Our project car that we lovingly call “Grandma” had a suspension that walked like a duck, and made noises that sounded like a duck. Not wanting to be “fowl” on the strip, we gave Grandma some help with a performance racing suspension from TRZ Motorsports and kicked in a premium shock package from QA1. To cap off our upgrade, we treated Grandma to a new set of brakes from Aerospace Brakes that wouldn’t lead to a quack-up when we tried to stop. Now that we’ve started our project build with components worthy of a 1,050 hp nitrous-breathing beast, Grandma is certainly not a sitting duck.

Turning this:

Into this:

Our 1978 Malibu “sleeper” project car is finally ready for its build-up. An extensive teardown has disrobed “Granny” to bare frame and body. While we shuddered to think of our “Granny” naked, we actually found a decent foundation to work from. There were a lot of areas where our project car needed some serious help, and we decided to go from the ground up. Our first step was to upgrade her suspension to handle an Edelbrock/Musi 555ci big-block crate engine. The stock suspension, although heavy enough, simply would not be up the challenge of the beefier drivetrain and performance that the monster motor is capable of putting out. We chose the TRZ Motorsports front suspension components because they were designed to replace the stock control arms without modification, and are strong enough to withstand the tortures of racing.

TRZ Upper and Lower Control Arms.
The TRZ Motorsports Package
TRZ Motorsports out of Kissimmee, Florida, builds high performance suspension components for serious street and drag race vehicles. They have been making parts for popular vehicles like late-model Mustangs (’79-04), Camaros (‘67-02), and Novas (’63-79) for years. What brought them to our attention was their support for less-often-seen vehicles like the G-body Malibu (’78-’88), Impala (’77-96), and S-10 pickups and Blazers (’83-02). Because our project car was a late 70’s Malibu, TRZ had ready-to-ship suspension components on hand. Manufactured out of chrome-moly tubing for weight and strength, and TIG welded for durability, the upper and lower control arms feature billet aluminum cross-shafts for corrosion resistance. We asked Todd Braasch at TRZ what we could expect in weight savings by replacing the stock front suspension with the TRZ Kit while strengthening up a suspension system that was designed for a weak-in-the-knees 3.8 liter six cylinder. Todd told us, “roughly 30 pounds.” We wanted to see for ourselves.

Each stock lower control arm weighed almost 14.5 pounds for a total of 29 pounds for both sides.

The TRZ lower control arms weighed 4 pounds, 12 ounces for a total of 9.5 pounds for both sides. All together, we saw just shy of 20 pounds lost in total for the lower control arm replacement.

The stock upper control arms weighed 6.5 pounds each, for a total of 13 pounds for both sides.
{ad:RMA}

TRZ’s high performance upper control arms (pictured on the right) weigh in at 2 pounds, 6 ounces each for a total of 4 pounds and 12 ounces. The total weight savings added up to 8.25 pounds.
Weight reduction and strength is crucial
Total weight reduction by replacing the weaker stock control arms with TRZ’s performance control arms was almost 28 pounds. Keeping in mind that we are replacing the smallish 6-cylinder small block powerplant with a larger 8-cylinder big-block beast, being able to control where the weight is on the car is critical. Our project car will be going to the chassis shop soon for a roll cage addition. As soon as the cage ties the chassis together, we will be mocking up the drivetrain so that we can upgrade the steering with the TRZ/Flaming River Steering package. We expect to see tremendous performance enhancement with another 40+ pounds of weight reduction from the stock steering system. Here’s the rub on putting your chassis on a diet: reducing weight is good only if you don’t sacrifice dependability and strength. Todd clued us in on the priority, saying, “safety is the biggest consideration when we build components. We only use chrome-moly; there is no mild steel in our entire shop.”
Good for more than just weight reduction…
In addition to allowing us some flexibility in weight placement, the TRZ suspension system is designed to handle better in a performance application. The upper control arms have 7 degrees of positive caster built into the design of the control arm for straight-line tracking and high-speed stability. Our sources at TRZ Motorsports indicated that 5-7 degrees of positive caster really affect the steering stability at 105 mph and above. TRZ’s upper control arms come with travel limiters to keep front-end rise under control, where many systems make the front shock absorber the suspension limiter. Relying on the shocks to limit the suspension travel makes it harder for the shocks to do the job they were designed to do. Todd Braasch at TRZ Motorsports emphasizes the safety factor built into the TRZ upgrades. Unlike the stock pressed steel components that deflect, bend and twist under loads, Todd explains that TRZ’s TIG welded 4130 chrome-moly tubular construction provides a greater level of stability and safety.
QA1 Pro-Coil Coilover Double Adjustable Shocks for Big-Block Vehicles.
To round out the TRZ Suspension package, we added QA1 Pro Coil coilover conversion double adjustable shocks designed for our big-block engine upgrade. The double adjustable shocks are completely rebuildable and revalvable, and according to Corey Flynn at QA1 Precision Products Inc., “These are the last shocks you’ll ever need to buy.”

Per QA1, their Pro Coil double-adjustable coilover conversions are “the last shocks you’ll ever need to buy.” Adjustment knobs on the shock body handle compression and rebound adjustments, and the shocks can be rebuild or have their valving changed if the need arises.
QA1 enjoys a great reputation for having a very consistent feel from the driver’s seat that gives the car a comfort level, which explains their popularity in every form of motorsports. Corey claims that a major advantage in QA1 shocks is that, “all components are built in-house, which guarantees consistency in construction, and every shock is checked on a shock dyno before packaging.” The threaded aluminum bodies allow easy adjustment between runs, while reducing weight compared to coilovers using a separate threaded sleeve. QA1 also takes pride in the consistency and repeatability of their external adjustments, taking the guesswork out of dialing in your suspension.
Spring-time Fresh
The coil springs supplied in the coilover kit vary depending on the application. For our big-block G-body conversion, we chose the DGMP1450-3 kit which includes powder-coated coil springs with a deflection rate of 450 lbs/in, that are 10 inches in length with 4.10 inch upper spring I.D. and 2.50 inch lower spring I.D. For small-block applications, the DGMP1350-3 with a 350 lbs/in spring is recommended. In addition to the improved performance value in the spring upgrade, we realized an additional weight reduction of almost 6 pounds.

The well-worn stock springs weighed over 8 pounds.

QA1’s 450-3 springs weighed in at 5 pounds and 4 ounces each.
Aerospace Brakes
Braking technology has changed tremendously since 1978, so it was a forgone conclusion that a brake upgrade was needed on our project car. We picked the Aerospace brake kit part #AC245, the heavy-duty race/street 4 piston caliper disc brake kit that is designed for cars weighing up to 3,000 pounds.

Aerospace heavy duty brake kit for G-body, S-10 and Grand National.
The Aerospace heavy-duty front brake kit included:
• Billet Aluminum 4 Piston Calipers
• Billet Aluminum Mounting Brackets
• Grade 8 Hardware
• Billet Aluminum Hubs with screw on dust caps
• Bearings and Seals
• Brake Pads
• 10-1/4” Diameter Drilled Rotors
• 1/2” Studs, 3” long
We also ordered the Rear Pro Street brake kit to complete our brake upgrade. Included in the rear kit:
• Billet Aluminum 4 Piston Calipers
• Billet Aluminum Mounting Brackets
• Grade 8 Hardware
• Billet Aluminum Hats with multiple bolt patterns
• Screw-on Dust Caps
• Brake Pads
• 11-3/4” Diameter .81” Thick Cast Vaned Rotors
Yet again we realized serious weight reduction by replacing the factory stock single piston cast calipers and brackets. The weight of the stock brake system measured 47 pounds where the Aerospace front brake upgrade weighed in at only 30 pounds. The billet aluminum Aerospace calipers added modern multi-piston stopping power and a high performance look to our suspension upgrade. In order to install the front brake kit onto the stock spindles, some modification of the spindles must be performed. This modification can easily be done by the home project builder using a cut-off wheel and grinder. We opted to make our lives a little easier by using our Cornwell plasma cutter and pneumatic die grinder.
Installation of the Front Suspension Components
Removal of the stock components and installing the new system is straightforward and easy. The vehicle will need to have a front end alignment after the components have been changed, but you can help yourself by recording baseline stock measurements before you disassemble the suspension components to have a place to start.

Taking baseline measurements will help get your front suspension alignment in the ballpark when installing the new components.

Support the car on jackstands and remove the front wheels.

Once the wheels are off, the front brake calipers and rotors can be easily removed, followed by disassembly of the shocks, lower control arm, coil springs, tie rod, spindle and upper control arm.

We found it easiest to install the lower control arms first. This allowed us a base to mount the shocks and coil springs to earlier in the installation process.

With the shocks and springs mounted to the lower control arms, we could then attach the upper end of the shock to the frame to hold the lower arm in place.

Attaching the top end of the shock to the frame.
{ad:RMA}

Attach and torque the upper control arms.

Install the spindle, hub and rotor, brake caliper and tie rod. The original rotor and caliper is shown installed here because we treated the brake installation as it’s own upgrade.
Finishing the Installation
The wheels can be re-installed and the vehicle lowered to the ground. Using your baseline measurement, adjust the coil over springs so that the ride height is close to the baseline measurement.
Front Brake Installation
As with the TRZ control arm installation, the car needs to be supported on jackstands and the front wheels removed to allow access to the brake system. The calipers can then be removed with a hex head socket or Allen wrench. The dust cover on the hub is then removed, revealing the hub retaining nut and outside wheel bearing. Once these are removed, the rotor hub is removed from the spindle with the inside wheel bearing.

Remove the three bolts that attach the dust shield to the spindle.

In order to mount the Aerospace calipers, some modification of the stock spindle is required. The modification can easily be done by a home mechanic using a cut-off wheel and grinder. We opted to use our Cornwell Plasma Cutter and pneumatic die grinder.

Once the spindle has been modified, the rotor hub can be installed. The wheel bearings need to be packed with grease and installed into the rotor hub.

The rotor hubs can then be installed on the spindle and secured with the retaining washer and retaining nut.

With the hub and rotor assembled and on the spindle, installing the caliper mount can begin.

Once the caliper mount is installed on the spindle, the calipers can be bolted onto the caliper mounts and the front tire can be re-installed on the vehicle.
Taking a lesson from the experts.
Once again we went to Todd Braasch for baseline adjustments for the track. Todd explained that the rule of thumb for these G-body cars is to, “start out tight and adjust your way into the track using the shocks and limiters.” He recommended starting with a good alignment job, making sure that you set the caster to the, “optimal 5-7 degrees positive”. As for the front end limiters, Todd again recommends to, “start tight, between 3/4 to 1 inch of travel, and adjust it to the track in 1/4 inch increments.” Todd tells us that they have a G-body with this exact setup running on 275/60 radials pulling 1.27 sixty-foot times and running 5.30 in the eighth-mile.
Wrapping it up
In an afternoon of work with common hand tools, you can improve the handling and front end durability of your G-body chassis with the added bonus of losing 51 pounds of unnecessary weight from the front suspension. For our purposes, taking out the underpowered V-6 and putting in a 555 cubic inch big-block on nitrous, beefing up the front end was a necessity. Dropping the fifty-plus pounds was just icing on the cake. Although we were shooting for the practical, the billet aluminum and chrome-moly performance components gave our chassis a real pro look. With quality looking components like these, we may not be able to pull off the “sleeper” look we were going for on this project build. Our front end is no longer an ugly duckling.

The finished front suspension. Our ugly duckling has been transformed into a beautiful swan, sort of.
{ad:HHP}
You might also like
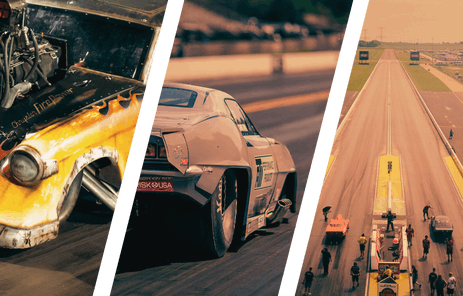
Travis Harvey Wins $125,000 At IHRA Pro Mod Mania In Milan
Travis Harvey scored a big win at the IHRA Pro Mod Mania event. Harvey brought home a cool $125,000 payday for his efforts at Milan.