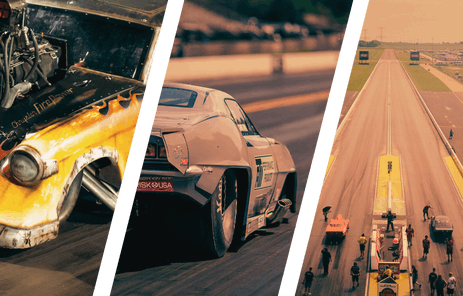
388 LSX Race Engine Build: Short Block Assembly

It has taken some time to get to part 2 of our LSX engine buildup for the Pacific Street Car Association’s Limited Street class, but it’s finally coming together. Part 1 covered the intricate machine work that Virginia Speed did to the GM Performance Parts LSX cast-iron block, and in this part, we stuff it with killer rotating and reciprocating parts from Lunati, GRP, JE, and Total Seal, following along with VA Speed’s Shawn Miller and picking his brain on the details.

Once again, Virginia Speed's Shawn Miller will be our guide.

Short Block Components:

  • Crankshaft – Lunati Pro Series 4340 Forged Steel with 3.622-inch stroke
  • Connecting Rods – GRP Pro Severe Duty Aluminum, 6.200-inch length, .927-inch wrist pin bore, 2.100-inch journal
  • Pistons – JE Forged Side Relief 4.125-inch bore, domed top with Calico thermal barrier and DLC coatings
  • Rings – Total Seal Gapless 1.5mm top, Napier 1.5mm second, and 3/16-inch oil rings
  • Bearings – Clevite TriMetal with Calico CT-1 dry film lubricating coating
  • Balancer – ATI Super Damper, SFI 18.1 spec, 7.074-inch diameter steel shell, 3-ring with dual keyways

There are a lot of different ways to build an engine, but each specific application has only a few right ways. For our engine, we broke out the PSCA rulebook and flipped to the Limited Street section, the class we intend to compete in. PSCA considers this more of an entry-level class, but with elapsed times in the mid- to low-8s, c’mon, you need a full-race motor to be competitive.

Removing a lot of the compromises required for street use and building it for the drag strip dictated the parts that Miller and VA Speed chose for the short-block, and also how they all went together. If you were to build a more street-oriented engine, or one for a road race or endurance application (like a Bonneville car), some things would be different than those used on our 388 CI drag-only engine, but Miller was able to point out many of the points where these paths diverge as he assembled our short block.

Crankshaft Considerations

Regardless of application, the block and crankshaft are the basic building blocks of the whole shebang, and are pretty universal across the board — get the strongest stuff you can. Our last installment told you everything you need to know about the GMPP LSX cast-iron block and how VA Speed prepped and machined it, so we’ll start this one with the crankshaft.

Lunati’s Pro Series 4340 cranks are their top-of-the-line units. They’re forged and machined in the United Damn States of America with roundness of each journal held to a tolerance of .0001-inch (one-ten-thousandth of an inch) and each rod journal is drilled with a lightening hole to reduce the inertia weight of the crank.

VA Speed chose a Lunati Pro Series 4340 forged-steel crank with a 3.622-inch stroke. Miller said, “That crank is as good as it gets when it comes to a forged steel crankshaft. It’s the best non-billet crank you can buy and is extremely good right out of the box.” Because we will be running a ProCharger supercharger, which is obviously driven off of the crank, VA Speed added an extra keyway (for two total) in the crank snout for the damper, which mounts the lower blower pulley, to better hold it all together under the extreme loads that the blower puts on the crank at peak boost. Other than the extra keyway and a touch of balancing with the rods and pistons, the crank was blown clean and installed in the block with Clevite bearings.

ATI provided the balancer, which is unique to our setup. Per Miller, “It’s a totally custom piece – the hub was made as short as possible to keep the supercharger pulley as close to the block as possible.” ATI catalogs an astonishing number of different variations in diameter and construction for their Super Damper line, but when something off the shelf isn’t quite right, they can easily step up and provide a custom solution. “I just asked them to get me the pulley as close to the block as possible and they did the rest,” Miller explains.


A second keyway machined into the crank snout helps distribute the load from the blower drive.

Connecting Rods

The rods are another of VS’s favorite choices: GRP aluminum pieces from their Pro Severe Duty line. A drag race engine likes aluminum rods for several reasons. For one, they’re lighter than comparable steel rods and significantly more affordable than titanium rods. And two, since a drag race motor never sees extreme operating temperatures (between fire-up, burnout, and a pass, it’s running for maybe one minute; not long enough to get hot) the rods don’t get a lot of time to expand under the heat, which aluminum has a tendency to do.

Aluminum rods can be used in street applications, and we’ve seen it done, but don’t expect 50,000-mile durability out of them. The GRP rods in our engine measure 6.200 inches from the centerlines of the pin and crank journals and use standard small-block Chevy .927-inch wristpins and 2.100-inch big ends. Aluminum rods require a dowel pin to hold the bearings in place, which these have, for the Clevite coated bearings.

Miller told us, “This is GRP’s best rod for forced induction small-block applications. We’ve used them 10 other times in 2,000 horsepower applications and never had a problem.”

By our calculations we’re limited to 18 pounds of boost. When we only have that much boost and we can use race gas, we can get a little carried away with compression and make up for it.

Pistons and Rings

For the pistons, VA Speed turned to JE and spec’d out a special set of slugs for our engine. These are, of course, high-quality forgings fit to a 4.125-inch bore, but instead of the traditional “full-round” design, these parts have reduced area around the pin bosses and essentially no skirts. They’re a forged side relief design, the strongest that JE makes. With less material, it’s a lot lighter piston than normal but the design doesn’t sacrifice a bit of strength, and in fact adds a bit by narrowing the pin which reduces flex.

Choosing the piston’s top shape (flattop, dished, or domed) required studying the supercharger and how much boost we could get out of it, then figuring out how much compression ratio we can get away with. In this application, a very slight dome was designed into the pistons to arrive at a final compression ratio of 11.5:1. “With the ProCharger F1, by our calculations we’re limited to 18 pounds of boost. When we only have that much boost and we can use race gas, we can get a little carried away with compression and make up for it. And we can also tailor camshaft timing to bleed off some cylinder pressure if we need to,” Miller said.

Miller said, “These pistons have reduced material around the pin bosses but they’re every bit as strong as the old-school full-round pistons.” The slugs are coated by Calico in North Carolina with an anti-friction coating on the skirts and a ceramic thermal barrier on the crowns. “That barrier coating really helps with detonation,” Miller told us. Calico also gave its Diamond Like Coating to the pins and pin bores in the pistons and rods to protect against galling.

Ring end gaps are very important and depend on several different factors. Miller explained, 'With gapless rings, on the top rings you have to run a lot of end gap on a forced induction application. We ran them (in this engine) at .035-inch. It sounds like a lot but with a gapless ring it’s not that big a deal. We can live with a little bit of blow-by as long as we’re sure that the ring’s not going to butt and rip the top off the piston.' The second rings were set at .025-inch, while the oil rings were set at .015. The oil ring is not as critical, 'but check it just to be sure.' Another thing to consider is the bore size—the bigger the bore the more ring gap you should run, and the smaller the bore, the less gap.

Coatings – Inexpensive Insurance

We utilized Calico Coatings on both the bearings and pistons as a way to insure against the unexpected. The engine bearings received the CT-1 dry film lubricant, while the piston skirts received CT-3, with CT-2 on the top, and the pins were treated to Calico’s Diamond Like Composite.

Calico’s David Adams explains, “CT-2 is a ceramic thermal barrier to help protect the piston from heat, while CT-3 is an anti-scuffing coating that basically extends the life of the piston and cylinder wall. It’s a dry film lubricant, but will hold a certain amount of oil as well.”The Calico DLC finish, applied to the piston wristpins, is one of the more exotic coatings. “It’s one of the hardest coatings there is, with a very low coefficient of friction, and a very hard nano-hardness, the micro-hardness of the surface itself,” Adams explains. “It’s so thin that you don’t need to change your clearances to install that pin in the rod.”
The Clevite bearings received Calico CT-1, which is also a dry film lubricating coating with oil retention properties. Per Adams, you will run less clearance as a result – “You’ll see a half-thou per journal, and you can run a coated bearing with tighter clearances than a non-coated bearing.”Why use coatings? “The whole idea is to reduce friction, reduce oil temperatures, and free up horsepower,” Adams explains.

More importantly though, it’s a way of protecting our investment. “It’s like an insurance policy. If you’ve never lost oil pressure, then it may not mean anything to you. But this little bit of insurance gives you a moment to get it shut down before you kill the entire engine”


The pistons were slid into the bores with clearance set at .007-inch for our engine. Miller said, “We run it rather loose. It’s always better loose than it is tight on a forced induction application, or any application for that matter, so the piston won’t seize up in the bore. With more boost, we’ll run more piston clearance, and less clearance with less boost.”

The piston rings in this engine were a new area for VA Speed. Miller’s connection at Total Seal convinced him to use their new gapless design rings, with 1.5mm top and second rings and a traditional 3/16-inch oil ring package. The gapless rings use a conventional style ring, but with an extra, thin ring in the same groove, set with the gaps 180-degrees apart. The top rings are stainless steel, and the second rings are a conventional Napier design.

Bearing Clearance

Everybody thinks you just pick up a book or go online and say, ‘Oh, I need this much clearance,’ but it doesn’t exactly work like that.

At this point, we need to discuss bearing clearances, which Miller feels is a very misunderstood area in engine building. He said, “Everybody thinks you just pick up a book or go online and say, ‘Oh, I need this much clearance,’ but it doesn’t exactly work like that. Main bearing clearance is the most important clearance to maintain in the engine. You have to look at what the application of the engine is, what the block material is, how much power you’re gonna make, and what type of crankshaft you have. There are a lot of variables and they all affect where your main bearing clearances should be. There is no hard and fast rule on where to run them.”

“The biggest thing is, what’s the usage? Is it a street car, is it a drag car, is it a road race or oval track car? All have different clearances,” Miller explains. “With street/road race engines, you’ll run clearances a lot tighter since the block gets hotter and the main bore expands and gets more and more bearing clearance as you go. When you set the clearances cold, you want them to be where it’s going to be at normal operating conditions and temperature. If you’re running 250 to 260 degree oil temps, you have to account for that when measuring cold bearing clearances. A drag race motor never sees those kind of temps so you run a much looser clearance in a drag race engine. They’re also usually making more horsepower, so you have to compensate for more crankshaft flex. You’re not going to hold that thing in place with the main bearing. You have to make room for that so they don’t beat the bearings out.”

On this cast-iron block, drag race engine, Miller set the main bearing clearances at .0027-.0029. When using an aluminum block, you can tighten them up because the aluminum expands much more than cast iron — Miller says to make those half-a-thousandth tighter. The crank’s thrust clearance, which is the fore-aft movement of the crank, was set at .005-inch. Miller said, “Any tighter and they’ll have a tendency to try and burn up the thrust bearing, especially in a car with a torque converter where you’re sitting on the trans brake for awhile and it gets hot and really pushes on the thrust bearing.”

Rod bearing clearance, according to Miller, is not nearly as critical as main bearing clearance. “They’re at the end of the oiling system, the last things to get oil, so they’re just not as important. You can screw up on rod bearings and get away with it.”

When it comes to the connecting rod bearing clearance, you should obviously still check it very closely, but it’s not quite as important as the mains. And surprisingly to us, Miller said they don’t vary the rod bearing clearance much between steel and aluminum rods on a drag race application. “The rods never really get hot enough to expand. We run them between .0027- and .003-inch on the rods. We’ve experimented with more clearance, but it just loses oil pressure. If you mess up rod bearings you’re really doing something wrong.”

Fasteners: Not A Place To Cut Corners

ARP bolts (and studs on the mains) were used throughout for their superior quality and also the consistency that they provide. “ARP studs give you a better torque, and a more uniform torque fastener-to-fastener,” Miller said. “Each one is exactly the same, with no difference in grain structure between bolts.”

Never scrimp on fasteners when building a race engine. ARP makes the best stuff money can buy, and their bolts and studs are cheap insurance when it comes to making a motor live.

GRP recommends using standard 30-weight motor oil to install the rod bolts, since it lubricates them and allows them to thread together equally bolt-to-bolt. ARP has its own specific lube as well.

Ideally, all the bolts in the engine should be stretched to length, not torqued with a traditional torque wrench. This is possible on the rod bolts, but impossible on the mains since they’re installed into blind holes and you need access to both ends of the fastener (obviously) to measure stretch. The reason measuring stretch instead of a torque value is described as follows by ARP:

It is important to note that in order for a fastener to function properly it must be ‘stretched’ a specific amount. The material’s ability to ‘rebound’ like a spring is what provides the clamping force. If you were to simply finger-tighten a bolt there would be no preload. However, when you apply torque or rotate a fastener a specific amount and stretch it, you will be applying clamping force.

The amount of force or preload you can achieve from any bolt or stud depends on the material being used and its ductility, the heat treat, and the diameter of the fastener. Of course, every fastener has a yield point. The yield point or yield strength of a fastener is the point at which the fastener has been over-tightened and stretched too much, and will not return to its original manufactured length. As a rule of thumb, if you measure a fastener and it is .0005-inch (or more) longer than its original length it has been compromised and must be replaced.

Ideally, rod bolts should not be tightened with a torque wrench, but rather stretched using a proper stretch gauge. “The bolts can torque differently every time you do them, and it’s very inaccurate so you should always use a stretch gauge on them. It’s very critical on rod bolts,” Miller said. It’s more time-consuming than using a conventional torque wrench, but not when you compare it to how much time it would take to fix an engine that’s kicked a few rods out the side of the block.

Virginia Speed likes to use ATI Super Dampers on their engines, and employed one on our Limited Street-bound bullet. It's a custom-made piece that integrates the drive pulley for the supercharger cog belt and is designed to tuck in as close as possible to the block to minimize crank flex. Miller was quick to point out that you should always use a proper damper installer. Don’t use a bolt threaded into the crank snout to pull the damper on. Plus, we’ve personally been guilty of beating a damper onto the crank with a 2x4 and a hammer, and that’s so the wrong way to do it. The thrust bearing will hate you for that.

And that’s the bulk of the short-block parts and assembly. Miller said this was the easiest part of building this engine. “It was pretty straightforward. We didn’t have a big stroke to we didn’t have to worry about the crank hitting the block, or cam-to-rod clearance. It all just fit in there nice.” Check back next time as we go in-depth on the cylinder heads and valvetrain, the most crucial areas when it comes to making power.

About the author

Rob Kinnan

Rob Kinnan requires very little introduction. Many would recognize Rob from his days as the Editor of Hot Rod Magazine. He is a dyed-in-the-wool hot rodder and muscle car enthusiast, a road racing aficionado behind the wheel of his Factory Five roadster, and a hardcore NASCAR fan.
Read My Articles

Drag Racing in your Inbox.

Build your own custom newsletter with the content you love from Dragzine, directly to your inbox, absolutely FREE!

Free WordPress Themes
Dragzine NEWSLETTER - SIGN UP FREE!

We will safeguard your e-mail and only send content you request.

Dragzine - Drag Racing Magazine

We'll send you the most interesting Dragzine articles, news, car features, and videos every week.

Dragzine - Drag Racing Magazine

Dragzine NEWSLETTER - SIGN UP FREE!

We will safeguard your e-mail and only send content you request.

Dragzine - Drag Racing Magazine

Thank you for your subscription.

Subscribe to more FREE Online Magazines!

We think you might like...


Street Muscle Magazine
Hot Rods & Muscle Cars
Diesel Army
Diesel Army
Engine Labs
Engine Tech

Dragzine - Drag Racing Magazine

Thank you for your subscription.

Subscribe to more FREE Online Magazines!

We think you might like...

  • Streetmuscle Hot Rods & Muscle Cars
  • Diesel Army Diesel Army
  • Engine Labs Engine Tech

Dragzine - Drag Racing Magazine

Dragzine

Thank you for your subscription.

Thank you for your subscription.

Dragzine - Drag Racing Magazine

Thank you for your subscription.

Thank you for your subscription.

Loading