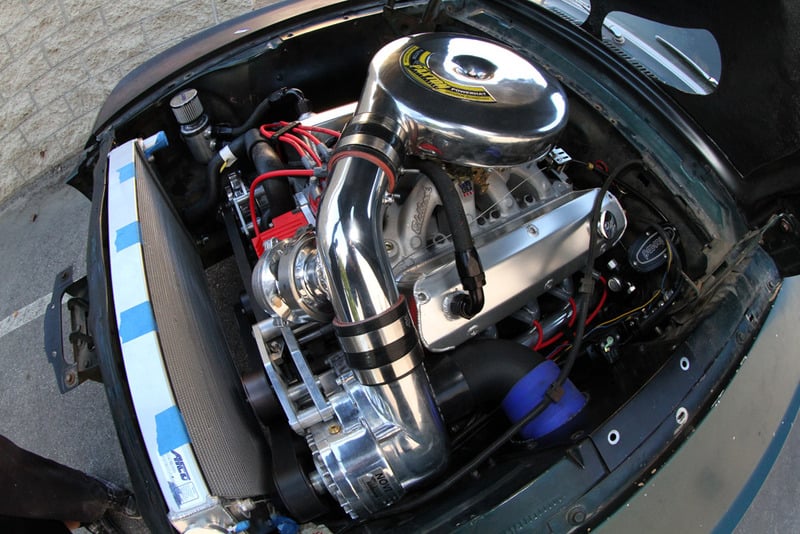
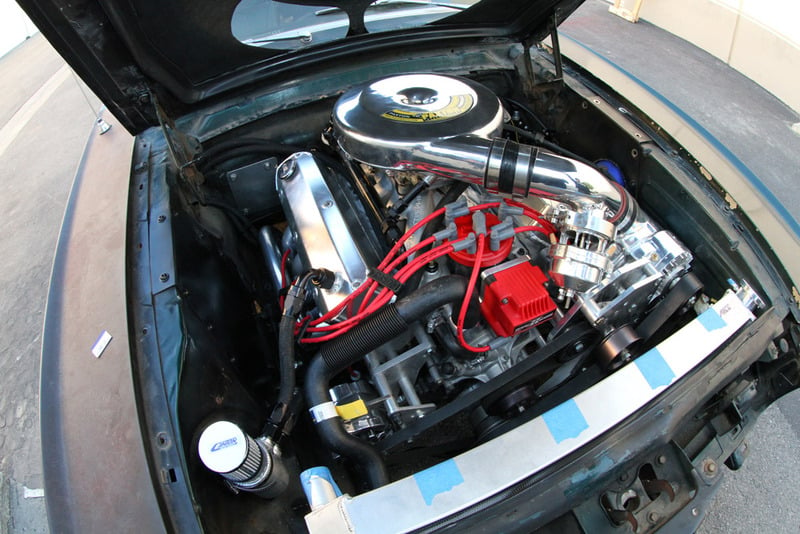
Our ’65 Mustang Project: “Biting the Bullitt [2]” has been under the knife in the powerTV shop for the last few months getting a brand new suspension along with fitting the engine and transmission, as we get closer to firing it up for the first time.
In our previous installation articles we installed a TCI Custom IFS front suspension [3], along with a complete rear suspension [4] from Strange and Calvert, plus capped off with a set of Wilwood brakes, Weld RT wheels, and Mickey Thompson tires.
We started with the TCI Custom IFS because we simply did not want to deal with working on a supercharged Windsor in a first gen Mustang’s overly tight engine bay. Also, it updates the front suspension to a more conventional upper/lower control arm combination.
For the rear suspension, we knew the stock 7.5-inch rear end and according suspension pieces weren’t going to keep up with the 1000hp+ we were going to be throwing down. A Strange 9-inch fit nicely in place, harnessing all the power we can throw at it. Keeping the power transmitted properly to the pavement, we turned to Calvert Racing and their complete line of rear suspension pieces. Lastly, wanting to fit a 15×9 and 275/60 drag radial comfortably in the wheel wells, we mini tubbed the Mustang with Autoworks’ Mustang-specific mini tub kit.
Overdrive and Durability In One with TCI’s 4L80E
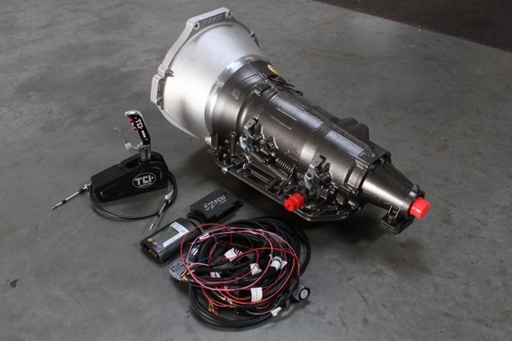
With the suspension completed we moved to test fitting the engine and transmission. For the transmission, we wanted something that would be easy to drive on the freeway and be able to handle the power. Unfortunately, a C4 is hard to build properly and we needed more gears than a Poweglide can offer. We decided to go with TCI’s [5] Super Streetfighter 4L80E 4-speed transmission. Yes we know, it’s a GM transmission in a Ford, but this transmission setup is really sweet.
 [6]
[6]TCI makes a modular 4L80E transmission that fits a wide range of applications, with the SFI approved bell housing on ours designed for a Ford engine. The EZ-TCU allows us to program shift points for full automatic shifting, or a manual mode can be triggered and the two buttons on the Outlaw shifter act as up and downshifts.
It all starts with TCI’s modular case that allows a Ford SFI approved bell housing to be adapted straight to it. That means no screwing around with spacer plates, everything bolts on and goes.
It is backed by a EZ-TCU and Outlaw shifter, which makes shifting a breeze because we simply don’t have to do anything! The EZ-TCU gives the Outlaw shifter the ability to be used in manual or automatic mode via the ratcheting shifter or the two push buttons on the shifter for up or down shifting. While in drive mode, the EZ-TCU can be programmed to shift at any RPM you want, increasing consistency and keeping us in the power band between shifts. There is even a switch that can be installed to regulate between soft (street) and firm (race) line pressures.
The 4L80E does depend on throttle position to work properly, so we opted for a TCI TPS sensor that drives straight from the carburetor’s throttle linkage and plugs directly into the EZ-TCU’s harness.
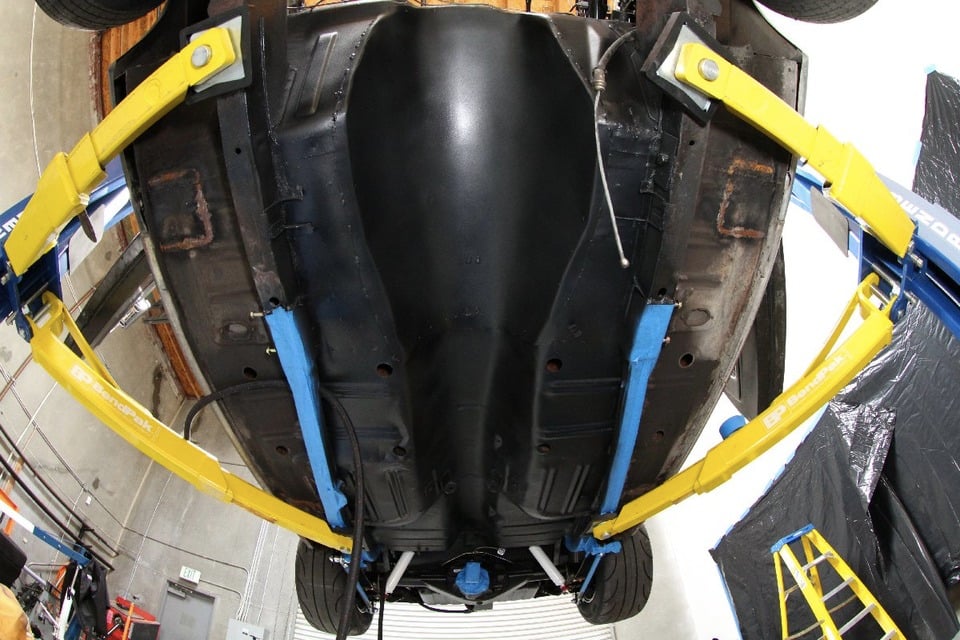
We knew it wasn’t going to be a direct fit for this much larger transmission, and rather then screw around with patch panels, we scalped the Mustang’s tunnel and installed a fresh sheet metal version that we formed in house that allows for complete functionality of the transmission linkage and cooler lines.
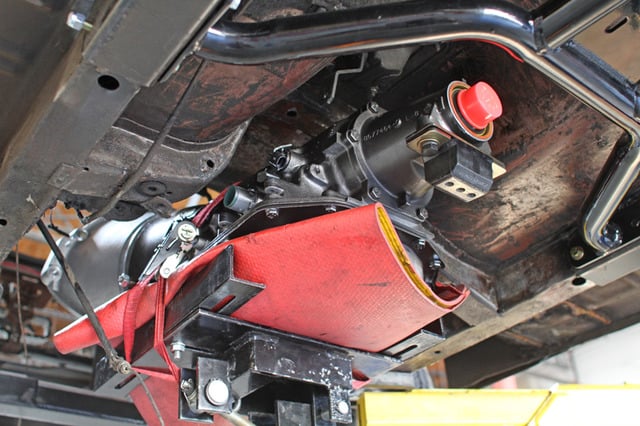
Since the TCI cross member already comes with engine mounts, there was no guesswork involved to get the small block in the car. For the transmission mount, we turned to Chris Alston Chassisworks’ [7] universal transmission mount kit. While they do offer the kit in different radiused bends, we opted for the straight tube and bent our own. The kit also includes two clevis ends with tabs and a transmission mount bracket. It was really easy to install, especially since we had our Chris Alston subframe brace in place to mount the tabs to.
The 4L80E is a big boy. We didn't mess around with hammering the tunnel to try to make it work, rather we scalped the tunnel and installed a fresh sheet metal piece that even offers a little wiggle room. Chris Alston's universal transmission mount worked perfectly and we secured it to their subframe brace. With the tunnel finished, we cleaned the entire bottom of the Mustang and undercoated it with canned 3M undercoating spray. This really helps the appearance and also reduces further rusting.
Cooling and Fueling with Snow Performance, Aeroquip, Fuelab, Derale and AFCO
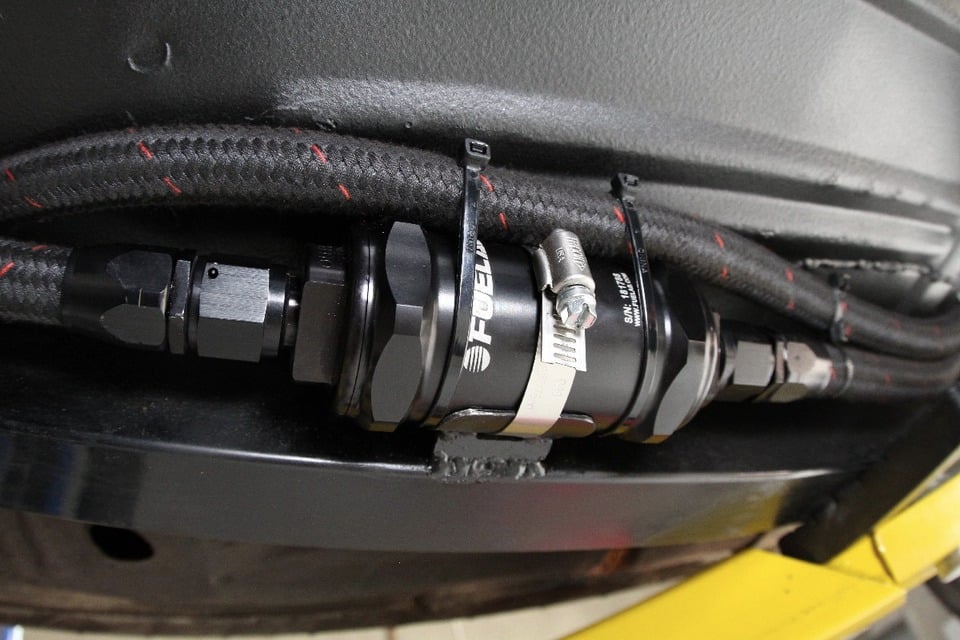
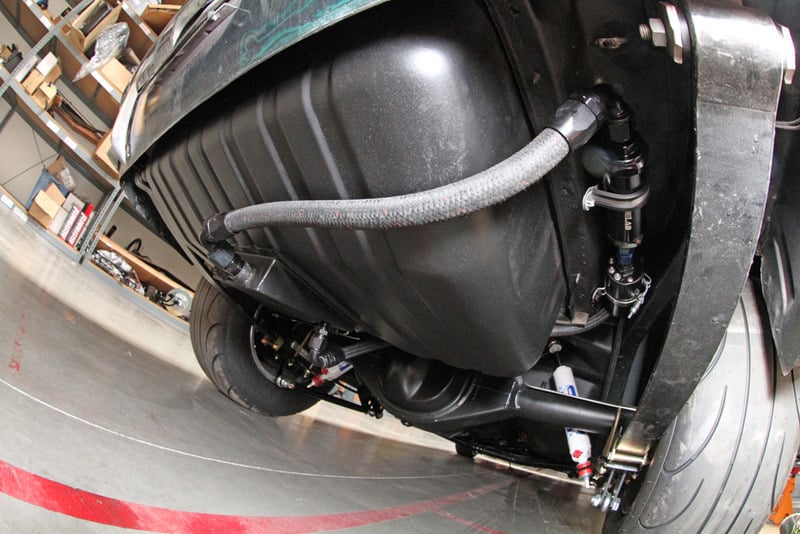
With the motor in place we moved to plumbing the fuel system with help from our friends from Fuelab [12] and Aeroquip [13]. Instead of going with a fuel cell, we were lucky enough to buy Tim Grillot’s [14] sumped stock tank he had built for his fastback. Fuelab then supplied us with their 1800 hp capable variable speed EFI fuel pump, 1:1 regulator, pre and post filters.
It is important to run a EFI fuel pump on blow-through carbureted applications, since we will see nearly 25 PSI of fuel pressure under full boost. The other great benefit of Fuelab’s fuel pump technology is that it can be run in low speed for street duty and switch to high speed when you need it. The pump can be wired for either a trigger or ground switch to activate. We will wire the pump to activate on the pump switch from the Snow Performance [15] water/meth kit mounted in the trunk, so when the Snow pump activates around 4 psi of boost, the Fuelab pump will run in high speed instantly.
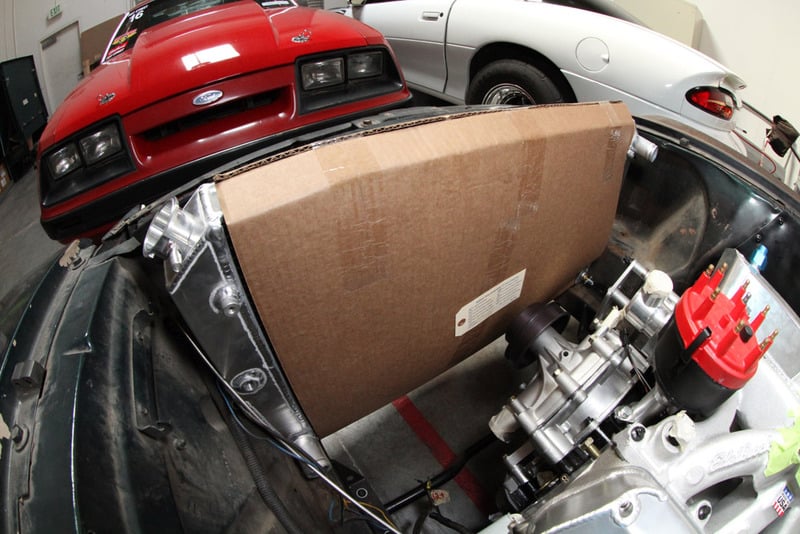
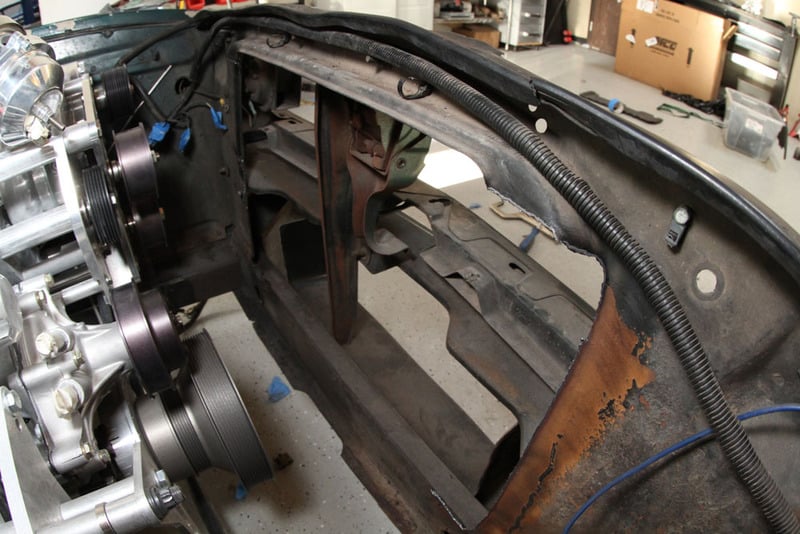
We needed to fit the largest possible radiator we could in our '65, so we turned to AFCO to build us a custom piece. The radiator secures into the frame rails at the bottom with dowels and threaded bungs on the front side that attach to the core support. The factory core support recess was cut out to gain much-needed clearance.
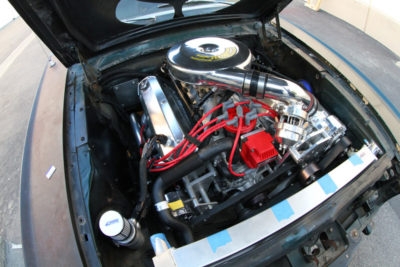
To feed the pump and motor we went with Aeroquip’s Starlite hoses and fittings. The Starlite racing hose is Aeroquip’s light weight racing hose, up to 45% lighter than steel braided. But don’t think this hose isn’t strong; it is covered with flame resistant Nomex and ultra durable Kevlar. For line sizes, we went with -12 AN from the pump to the pre-filter with a -10 AN outlet and return line. We also used the Starlite hoses and fittings to connect our custom Canton [18] oil separator to the valve cover’s welded bungs.
Since we knew we wanted to drive the Mustang around town without running into overheating issues, we turned to AFCO to build us a custom radiator to fill every bit of available space we had in the front of the Mustang. Fitting from frame rail to frame rail, this all-aluminum cross flow radiator locates into the frame rail with dowels and features threaded bungs on the front of the radiator so we can attach it directly to the core support. Before we could do that, we had to cut out the factory radiator’s mounting point and recess, gaining much-needed clearance to the motor.
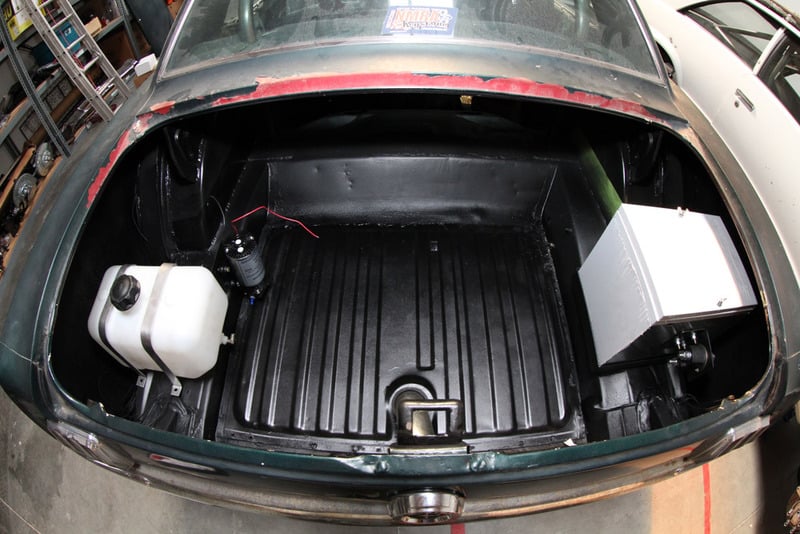
A sumped stock tank was a simple solution for our fuel system. Since the fuel pump is mounted above the sump, Fuelab recommends adding a check valve right after the pump's outlet. The post fuel filter is mounted about two feet forward of the outlet onto the Chassisworks' subframe connectors. The rest of our fuel system consists of a Snow Performance Stage 3 water/meth injection kit, which we mounted the 2.5 gallon tank and pump opposite of our battery box.
With the supercharger and radiator in place, it is a tight fit, with as little as 2-1/4 inches of clearance in some spots. We turned to Derale to build us a custom shroud that would place dual fans offset from each other in spots that would clear the supercharger drive system. To aid with the building, we made a template of our front drive, complete with spacing to all the bolts and belts.
The Odds and Ends
With the fueling wrapped up and the cooling system nearly complete, we moved onto buttoning up other projects and prepping for wiring.
We made an electronics panel that mounts in place of the factory heater blower, allowing us to easily service any of the engine’s electronics. Everything will be controlled by Racepak’s [23] new SmartWire that is a fully programmable, automated relay board that contains no fuses.
 [24]
[24]The Racepak UDX display fit perfectly into the blank Mustang dash insert we purchased. The UDX will display all our critical sensor inputs as well as displaying our basic car functions like turn signals and lights.
Speaking of Racepak, we also went with their UDX series gauge cluster. Outside of displaying all of our critical sensor outputs, it also serves duty like a traditional cluster with turn signal, fuel level, and high beam switch notification. We mounted the UDX into an ABS plastic panel that fits directly into our factory gauge cluster location.
Canton supplied us with this trick baffled oil catch can that vents to both valve covers. Canton has the ability to build custom catch tanks with any options you desire.
The trunk was a suitable place to mount our Snow Performance 2.5 gallon reservoir, along with a simple bracket to hold the pump in place. Opposite the tank is a Taylor battery box with an Optima [25] Red Top Battery and emergency shut off switch mounted to the box.
We really didn’t want to install a cowl hood on the Mustang and opted for a classic teardrop hood from Maier Racing. We did run into an issue with clearance to the intake pipe and opted to leave the pipe exposed from the outside…after a weekend polishing project, that is.
Biting the Bullitt is getting really close to running with a week’s worth of random tasks and a few days of wiring left before it is ready to run. With a mere 300 hours into the project we are getting excited about making that first trip to the track for some solid nine-second passes. Stay tuned to future updates and tech articles on our ’65 ‘Stang!
