Since Horsepower Wars: Pony Wars is all about determining whether the 2017 Camaro SS or Mustang GT reigns supreme when modified, baseline testing only served to set a starting point for our modifications. After establishing our baselines, Team Camaro and Team Mustang were given $5,000 to modify and optimize our vehicles to participate in the same testing: dyno, drag strip, road course, and 60-0 braking. Each event is worth a predetermined amount of points, with the dyno being worth two points, drag strip worth three, road course worth three, and 60-0 mph braking worth one point. The tests will be conducted for both the $5,000 and $15,000 portion of our competition with the winner being the car that collects the most points through both rounds of testing.
As you’ve already seen in our baseline testing, the 2017 Camaro SS — specifically in 2SS form compared to a base GT — is far superior to its crosstown rival, the Mustang. But before we dance on the grave of our competition, we’re willing to admit that the Mustang was far less well-optioned from the jump. Our SS, on the other hand, has just about every bell and whistle available from GM.
But is that really our fault? Even if the Mustang had the higher trim options, such as the Performance Package, it still couldn’t possibly have come with a suspension that is on par with the Camaro’s magnetic ride control. Team Mustang was even allowed to upgrade the braking system on its ‘Stang to the Brembo binders to make sure everything was even-Steven.
Plus, skimping on the options saved the Mustang a substantial amount of girth and brought its total weight to within 26 pounds of the Camaro — roughly 3,667 versus 3,693 respectively (we weighed them). If you’ve ever looked at anything comparing the two, they are typically closer to 200 pounds different with the edge going to the Camaro. So, all things considered, both cars were on roughly even ground to being with… well, at least theoretically.
Widening the Gap
While the two are fairly evenly matched at the brochure, the dyno and drag strip told us a different story. The Camaro belted out a frankly astonishing 408 rear-wheel horsepower while the Mustang struggled to put down 357, with the delta on torque being even wider — though this is to be expected with the substantial displacement difference. At the track, the Camaro showed that it was a torque monster besting the Mustang by almost a full second at the drag strip and road course.
Here, the baseline of the Mustang GT (left) and Camaro SS (right) show a vast delta in power production.
With the baseline numbers in, we turned to some of the best in the business to give us insight into what our next mods should be for the Camaro. Brandon Weber of Accelerated Racing Solutions (ARS), out of Rancho Cucamonga, California suggested we focus on making more power and let the already capable suspension and brakes do their thing with a little more power in tow. “Honestly, your first mod should be E85,” Weber suggested. “But, since the rules don’t allow that, the next is going to be full bolt-ons. The car can pick up some decent power but the fuel is going to be a pretty big limiting factor since the LT1 is already pretty optimized due to the direct-injection setup.”
Turning our thoughts to the suspension, we asked the guys at BMR where they thought our money would be best spent. And though they recommended quite a few components, we felt that our budget would be best spent on some minor things with more suspension mods coming the Camaro’s way for the $15K budget. Our thinking here is that the magnetic suspension on the Camaro is already pretty capable from the factory, and while it can definitely be improved, the budget necessary to make substantial gains would have to wait for our larger budget.
Our strategy here is to win. To us, it made more sense to get power into the car, win the dyno and likely the drag strip, and then take our chances at the road course. Even if we gambled and lost at the road course, and perhaps the 60-0 braking test, we would still walk away the victors of the $5K portion of testing with five points to the Mustang’s four. From there, all we would have to do is repeat the same formula for the $15,000 portion of our testing and we would be crowned the overall champions, walking away with 10 points compared to the Mustang’s eight.
The Mods
With that in mind, we started our quest for more horsepower by getting more air into the engine. This meant ditching the factory air intake for something a little more performance oriented. For that, we turned to the guys over at Holley for one of their new iNTECH cold air intakes (PN 223-01).
The intake is a complete bolt-in replacement for our stock intake but uses a four-layer dry air filter that not only eliminates the use of oil, which could ultimately dirty our MAF and thus decrease horsepower, but it’s also a free-flowing element that helps improve airflow. It installs in the factory location and uses a Slip-Seal housing that eliminates the need for almost all hose clamps and adapters. Holley claims that the intake is worth up to 18 horsepower and 21 lb-ft of torque.
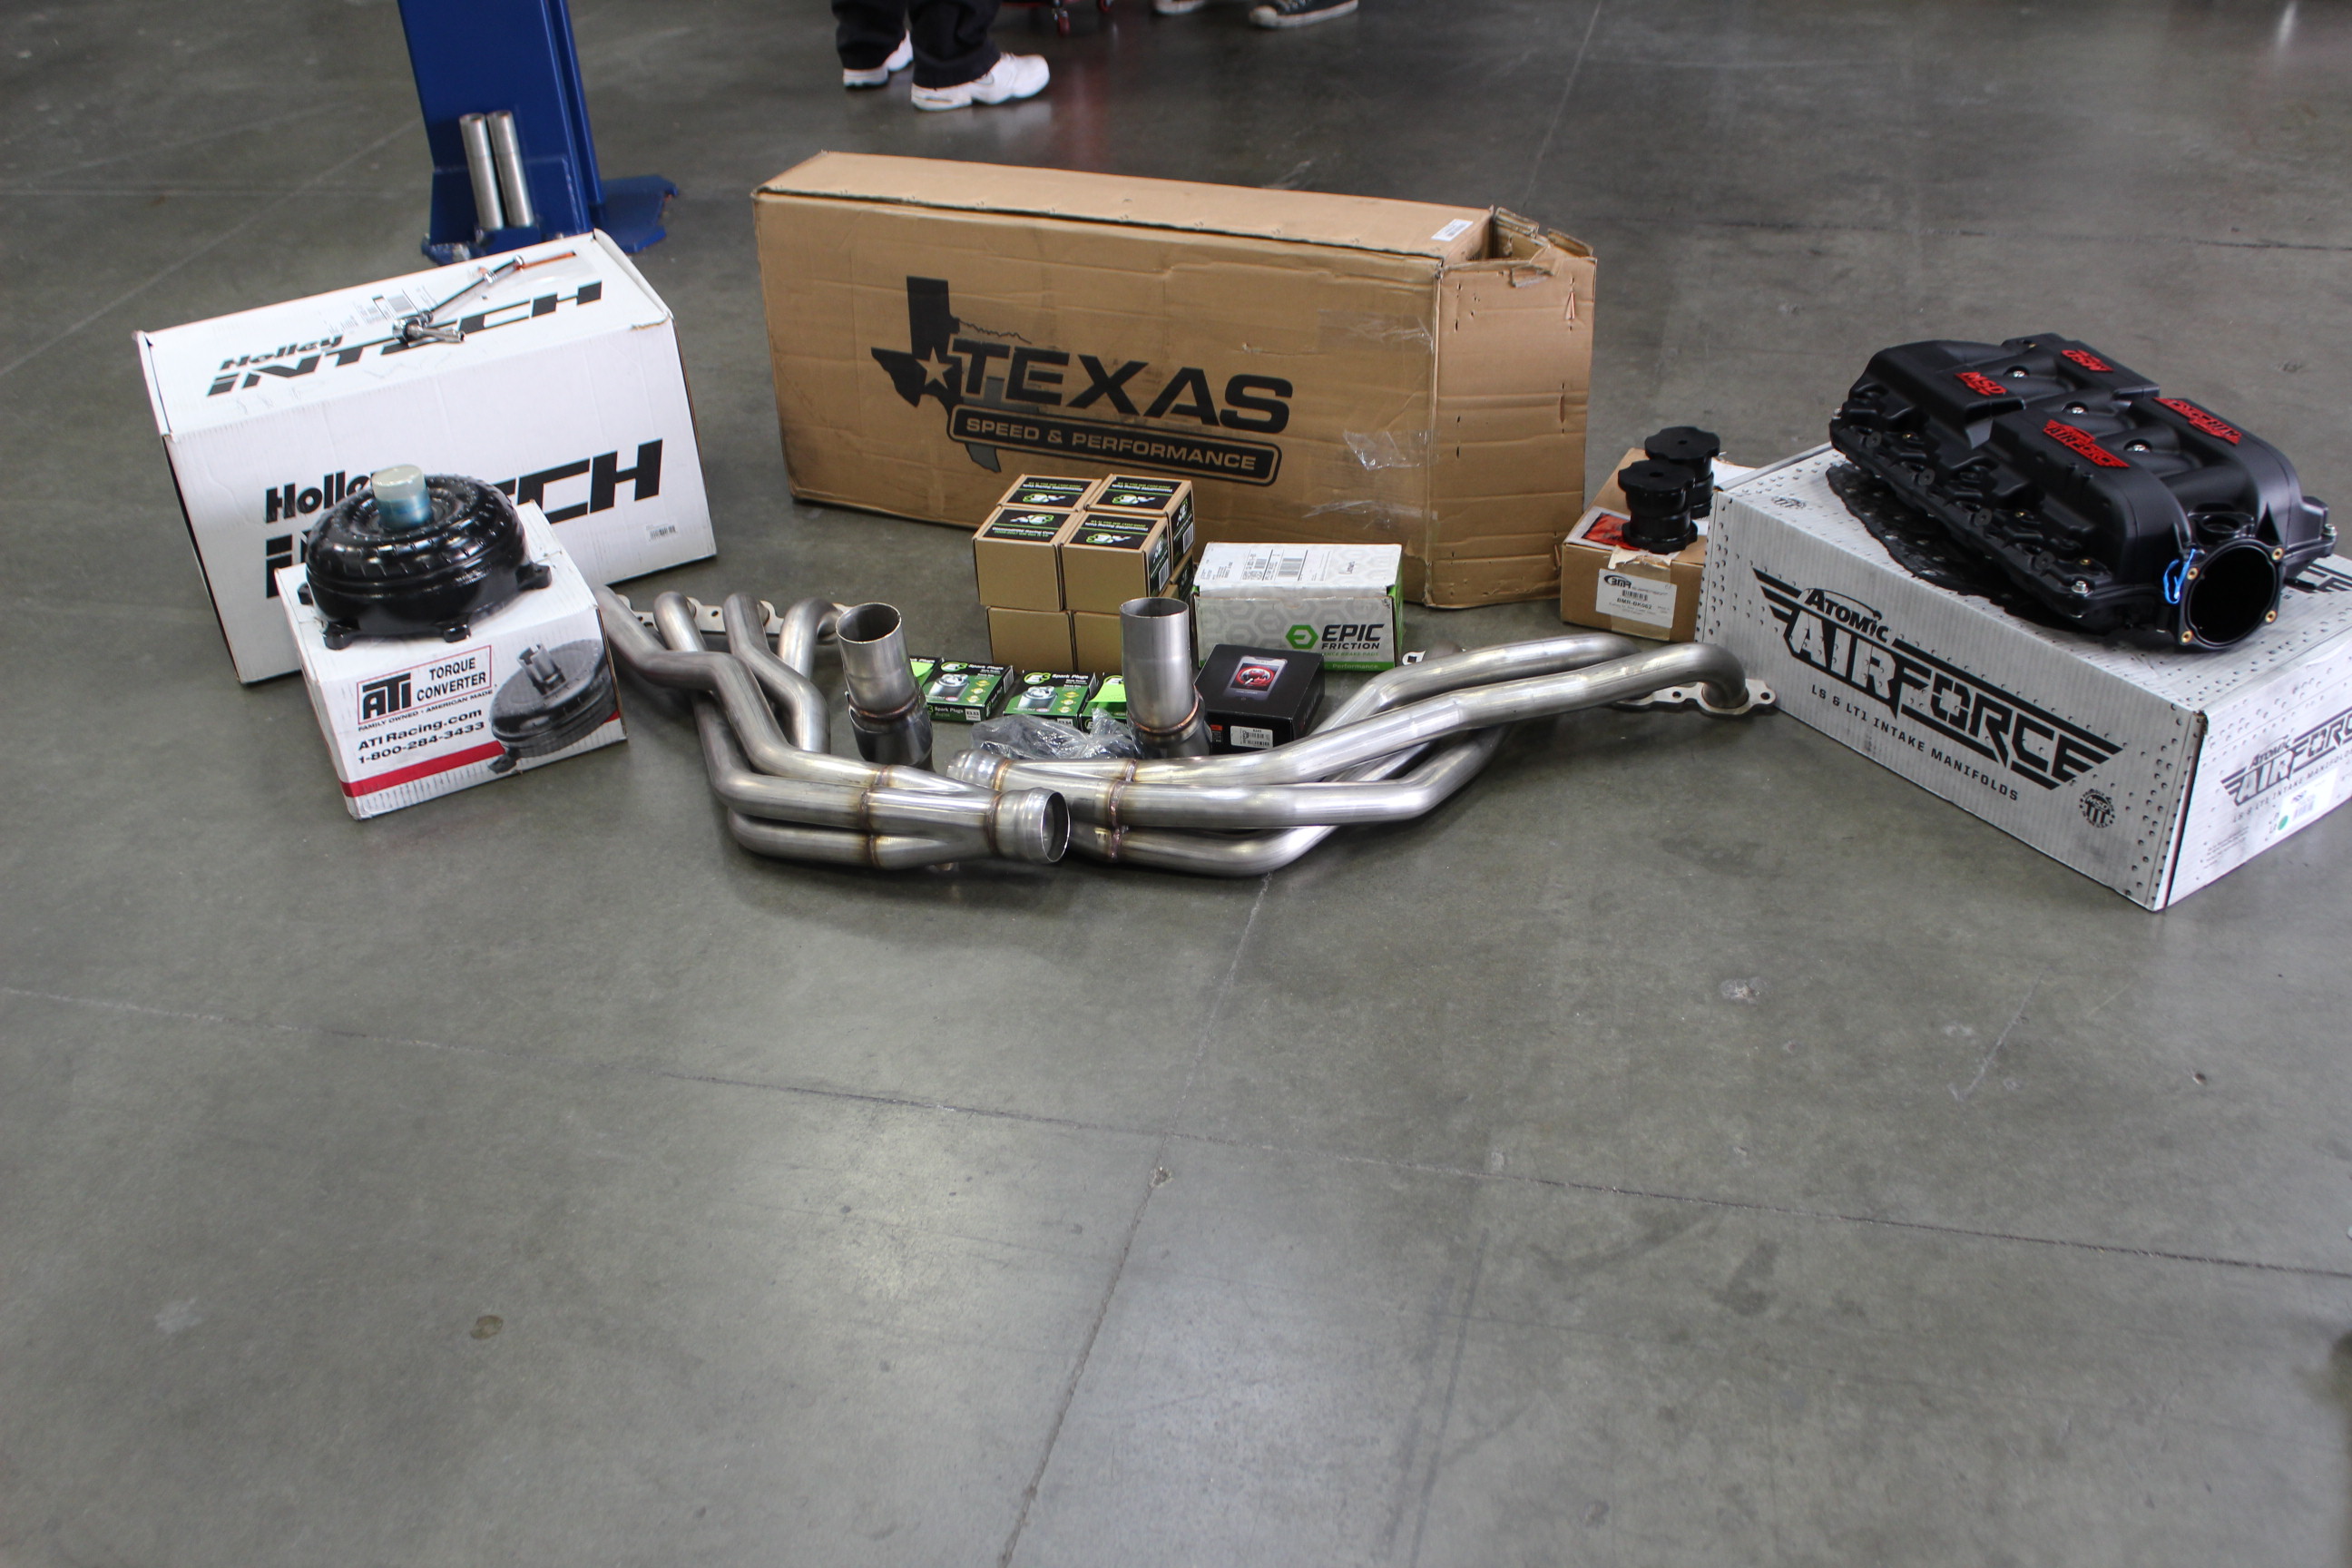
Moving down the intake path, we decided to continue our improvements to the Camaro’s intake tract. This meant ditching the factory LT1 intake manifold in favor of an MSD Atomic Airforce piece (PN 2700). The larger 103 mm opening not only allows us to use larger aftermarket throttle bodies, its bell-mouthed opening smooths airflow and minimizes shrouding. It also enhances plenum volume, allowing our beefed up LT1 to really breath.

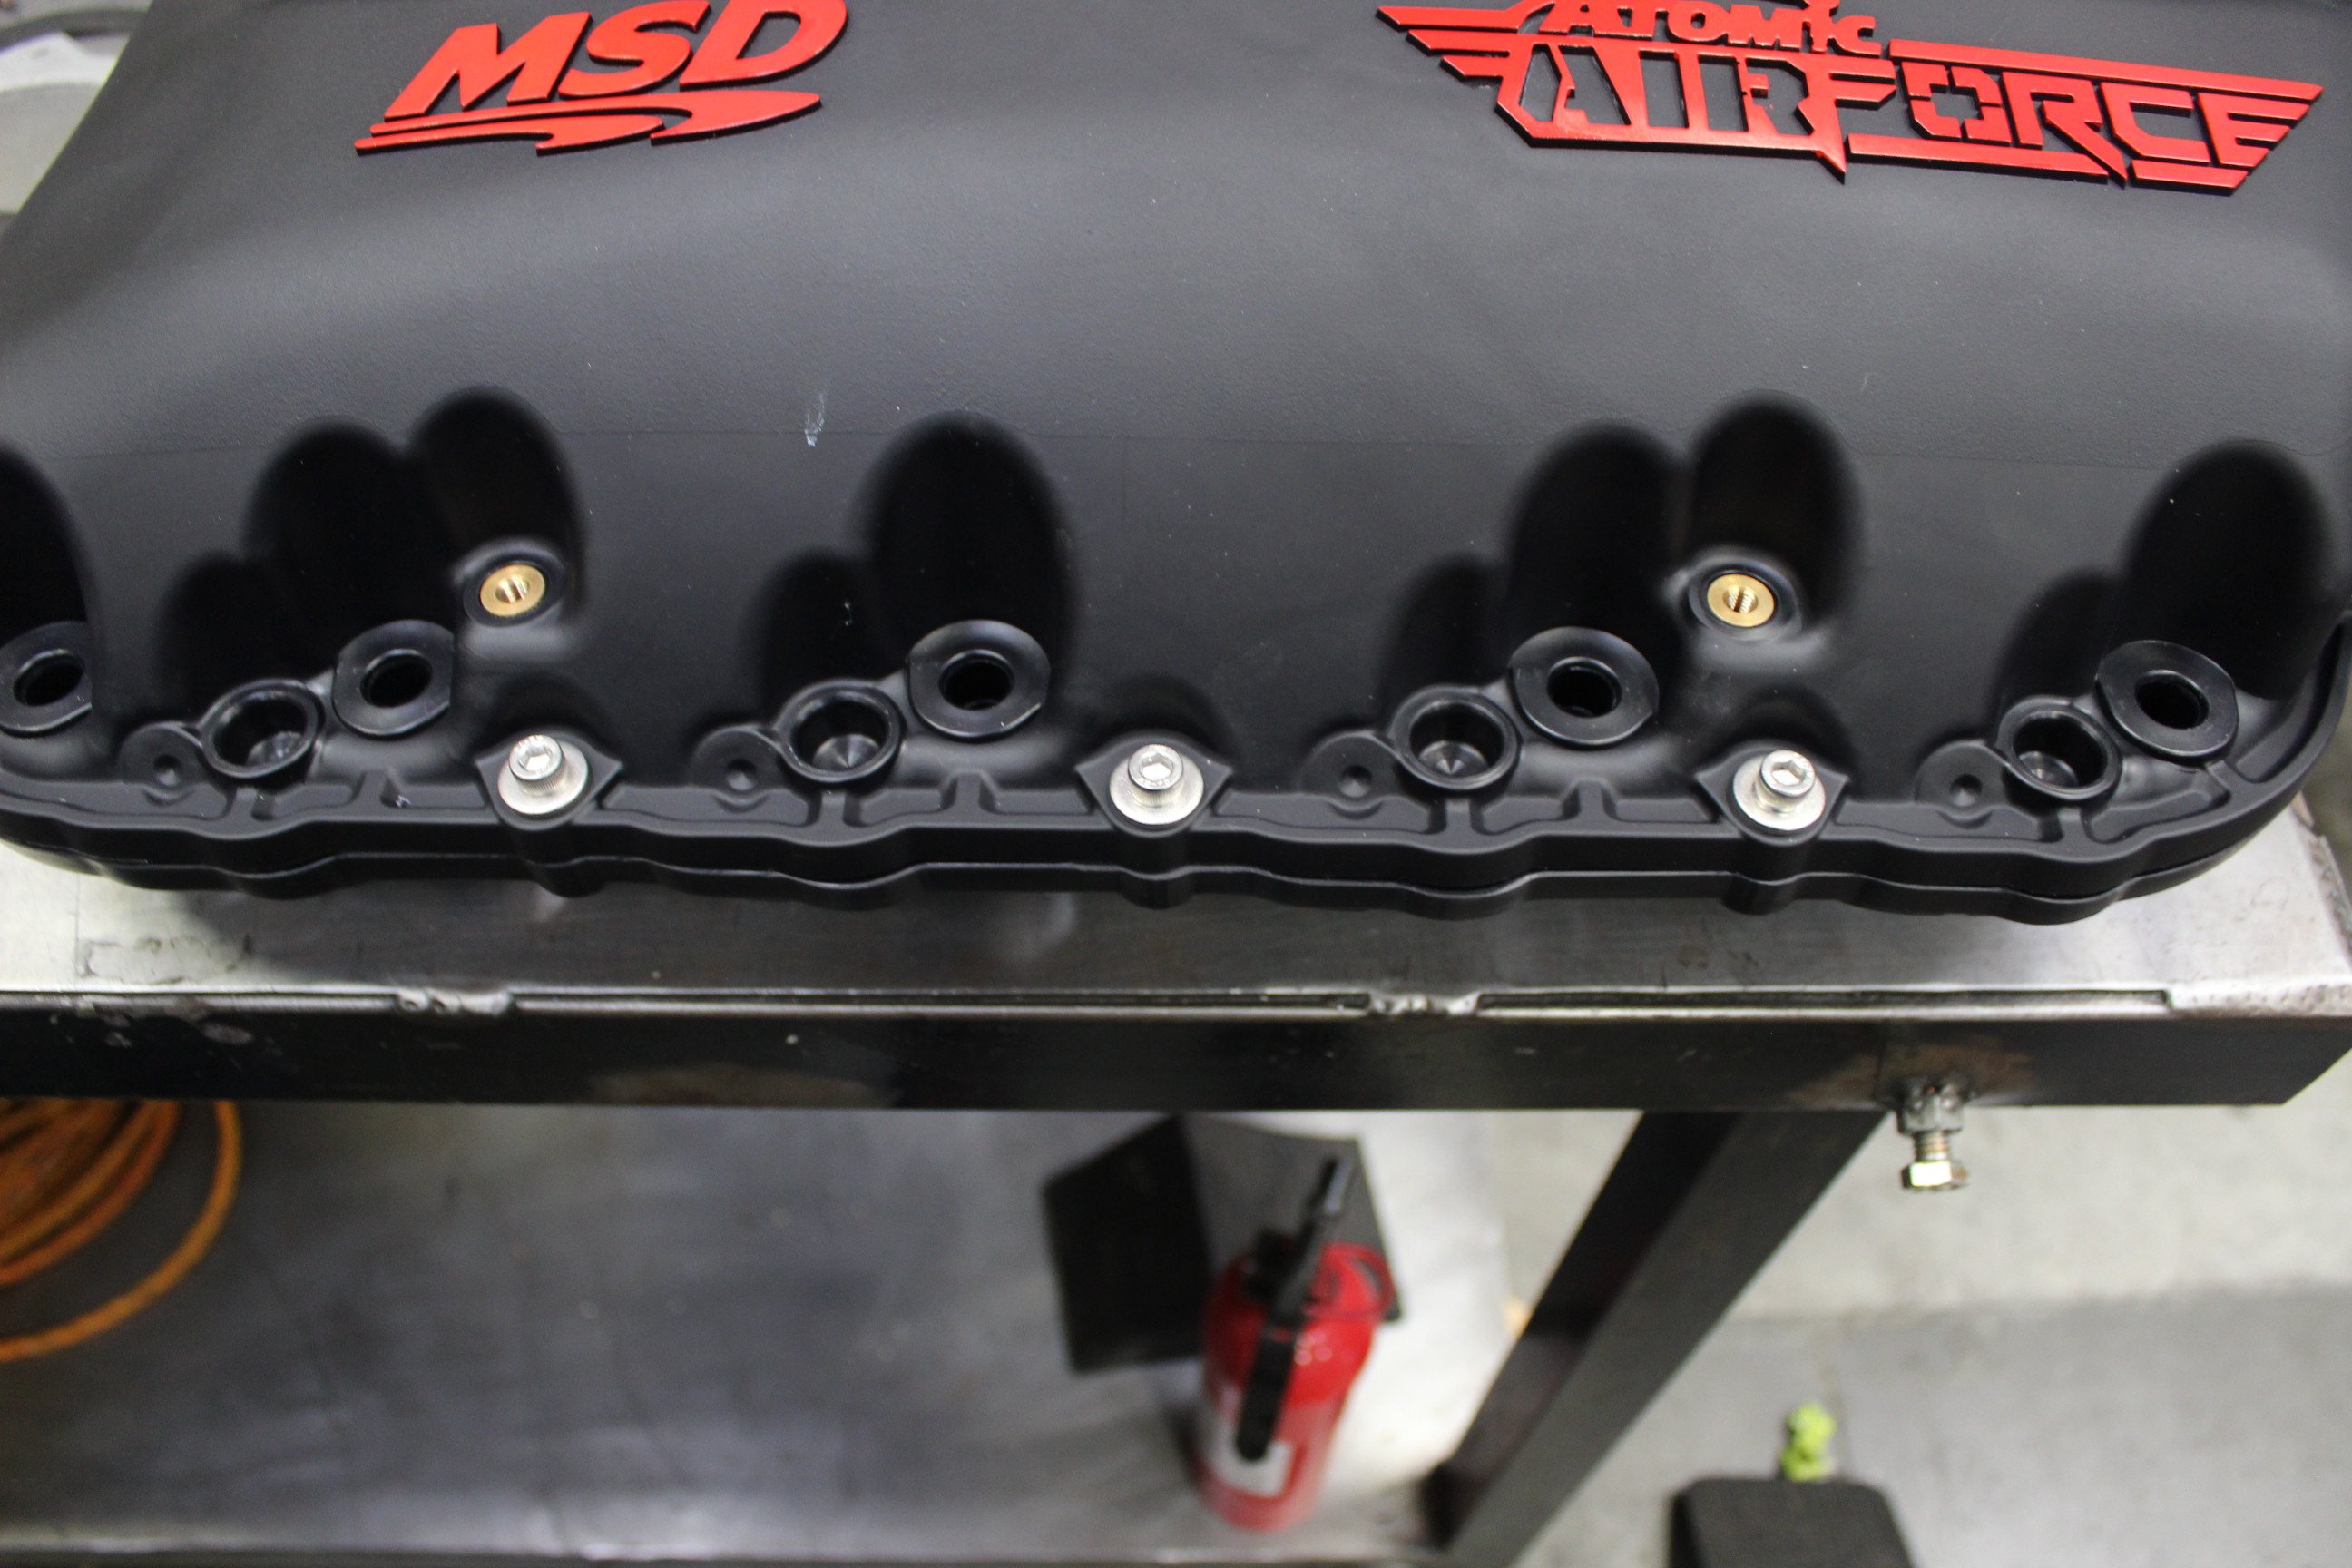
In addition to these features, it will handle boost substantially better than our stock manifold, which will be important for our next phase. It’s also a two-piece design that will allow us to port it if we so choose further down the line. The manifold also comes with drillable “blanks,” and matching threads, that would allow us to add auxiliary fueling to the direct-injected Gen V mill if we need it later down the line. For now, we will install the intake as is.
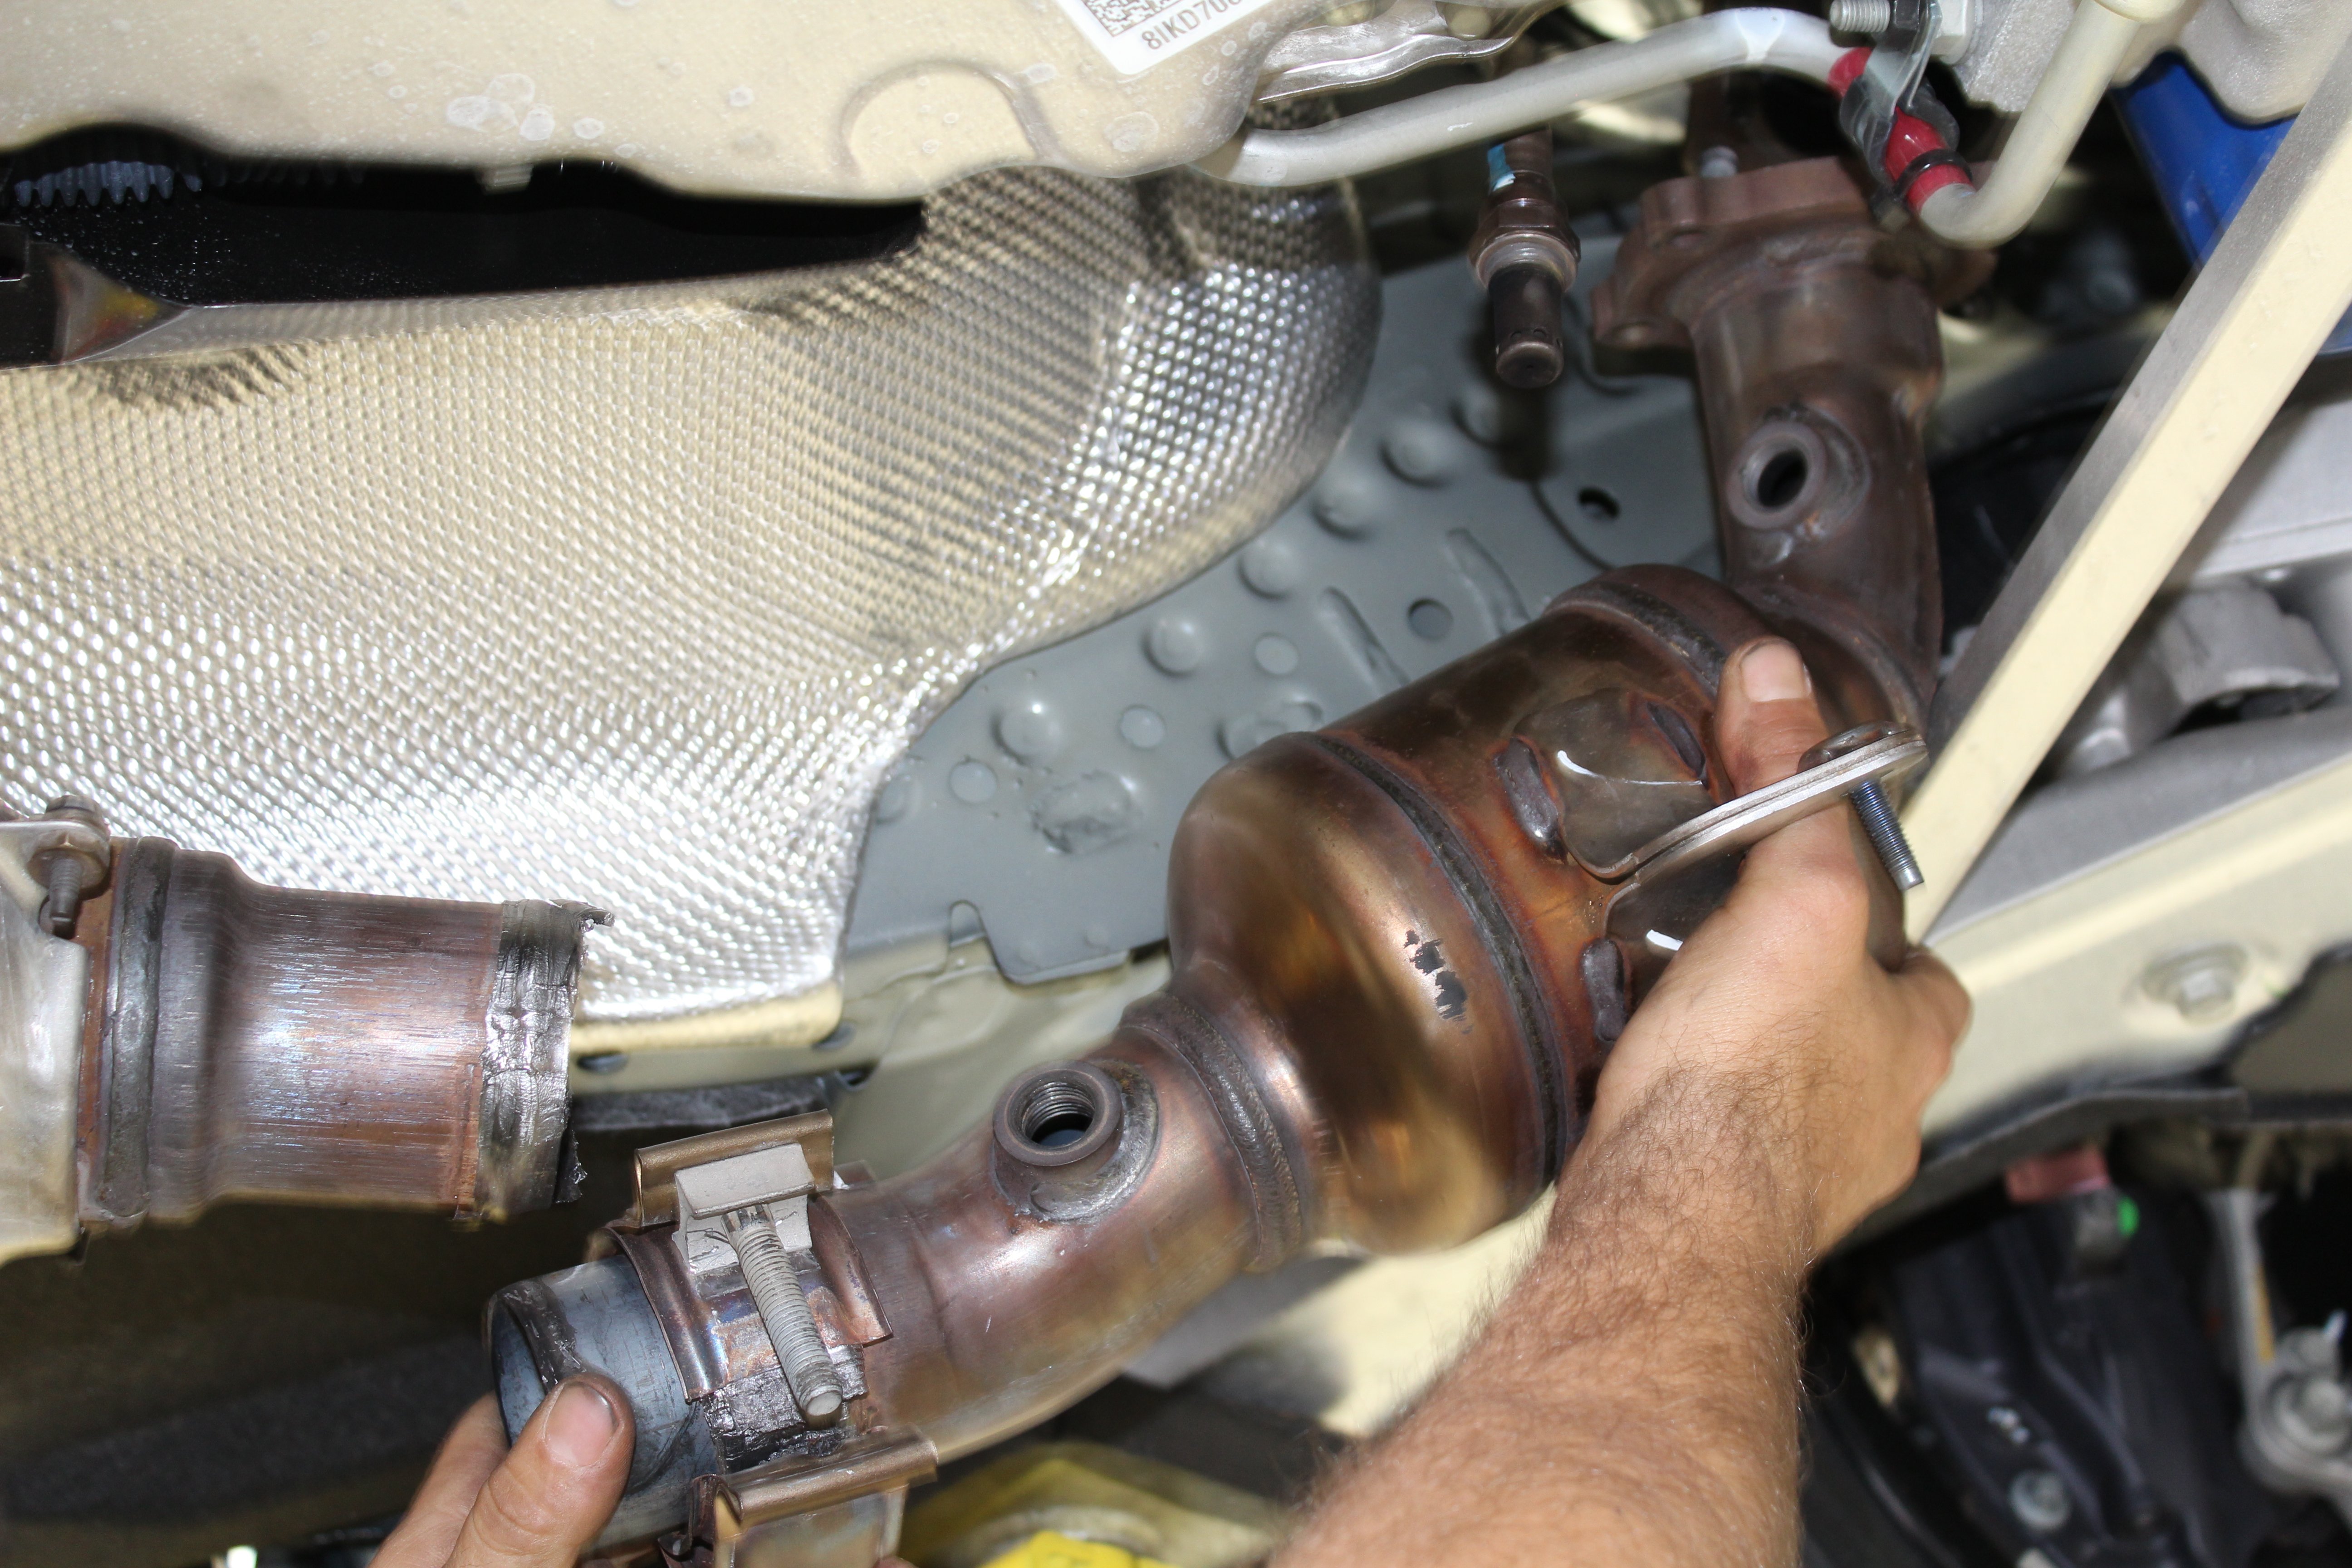
Since we are going to be getting a lot more air into the cylinders of our LT1, we have to evacuate them efficiently as well. To do that, we had Texas-Speed send us a set of stainless steel, 1 7/8-inch primary headers (PN 25-TSPG6304HCAT-178) to ensure we were squeezing every ounce of power we could out of the car.
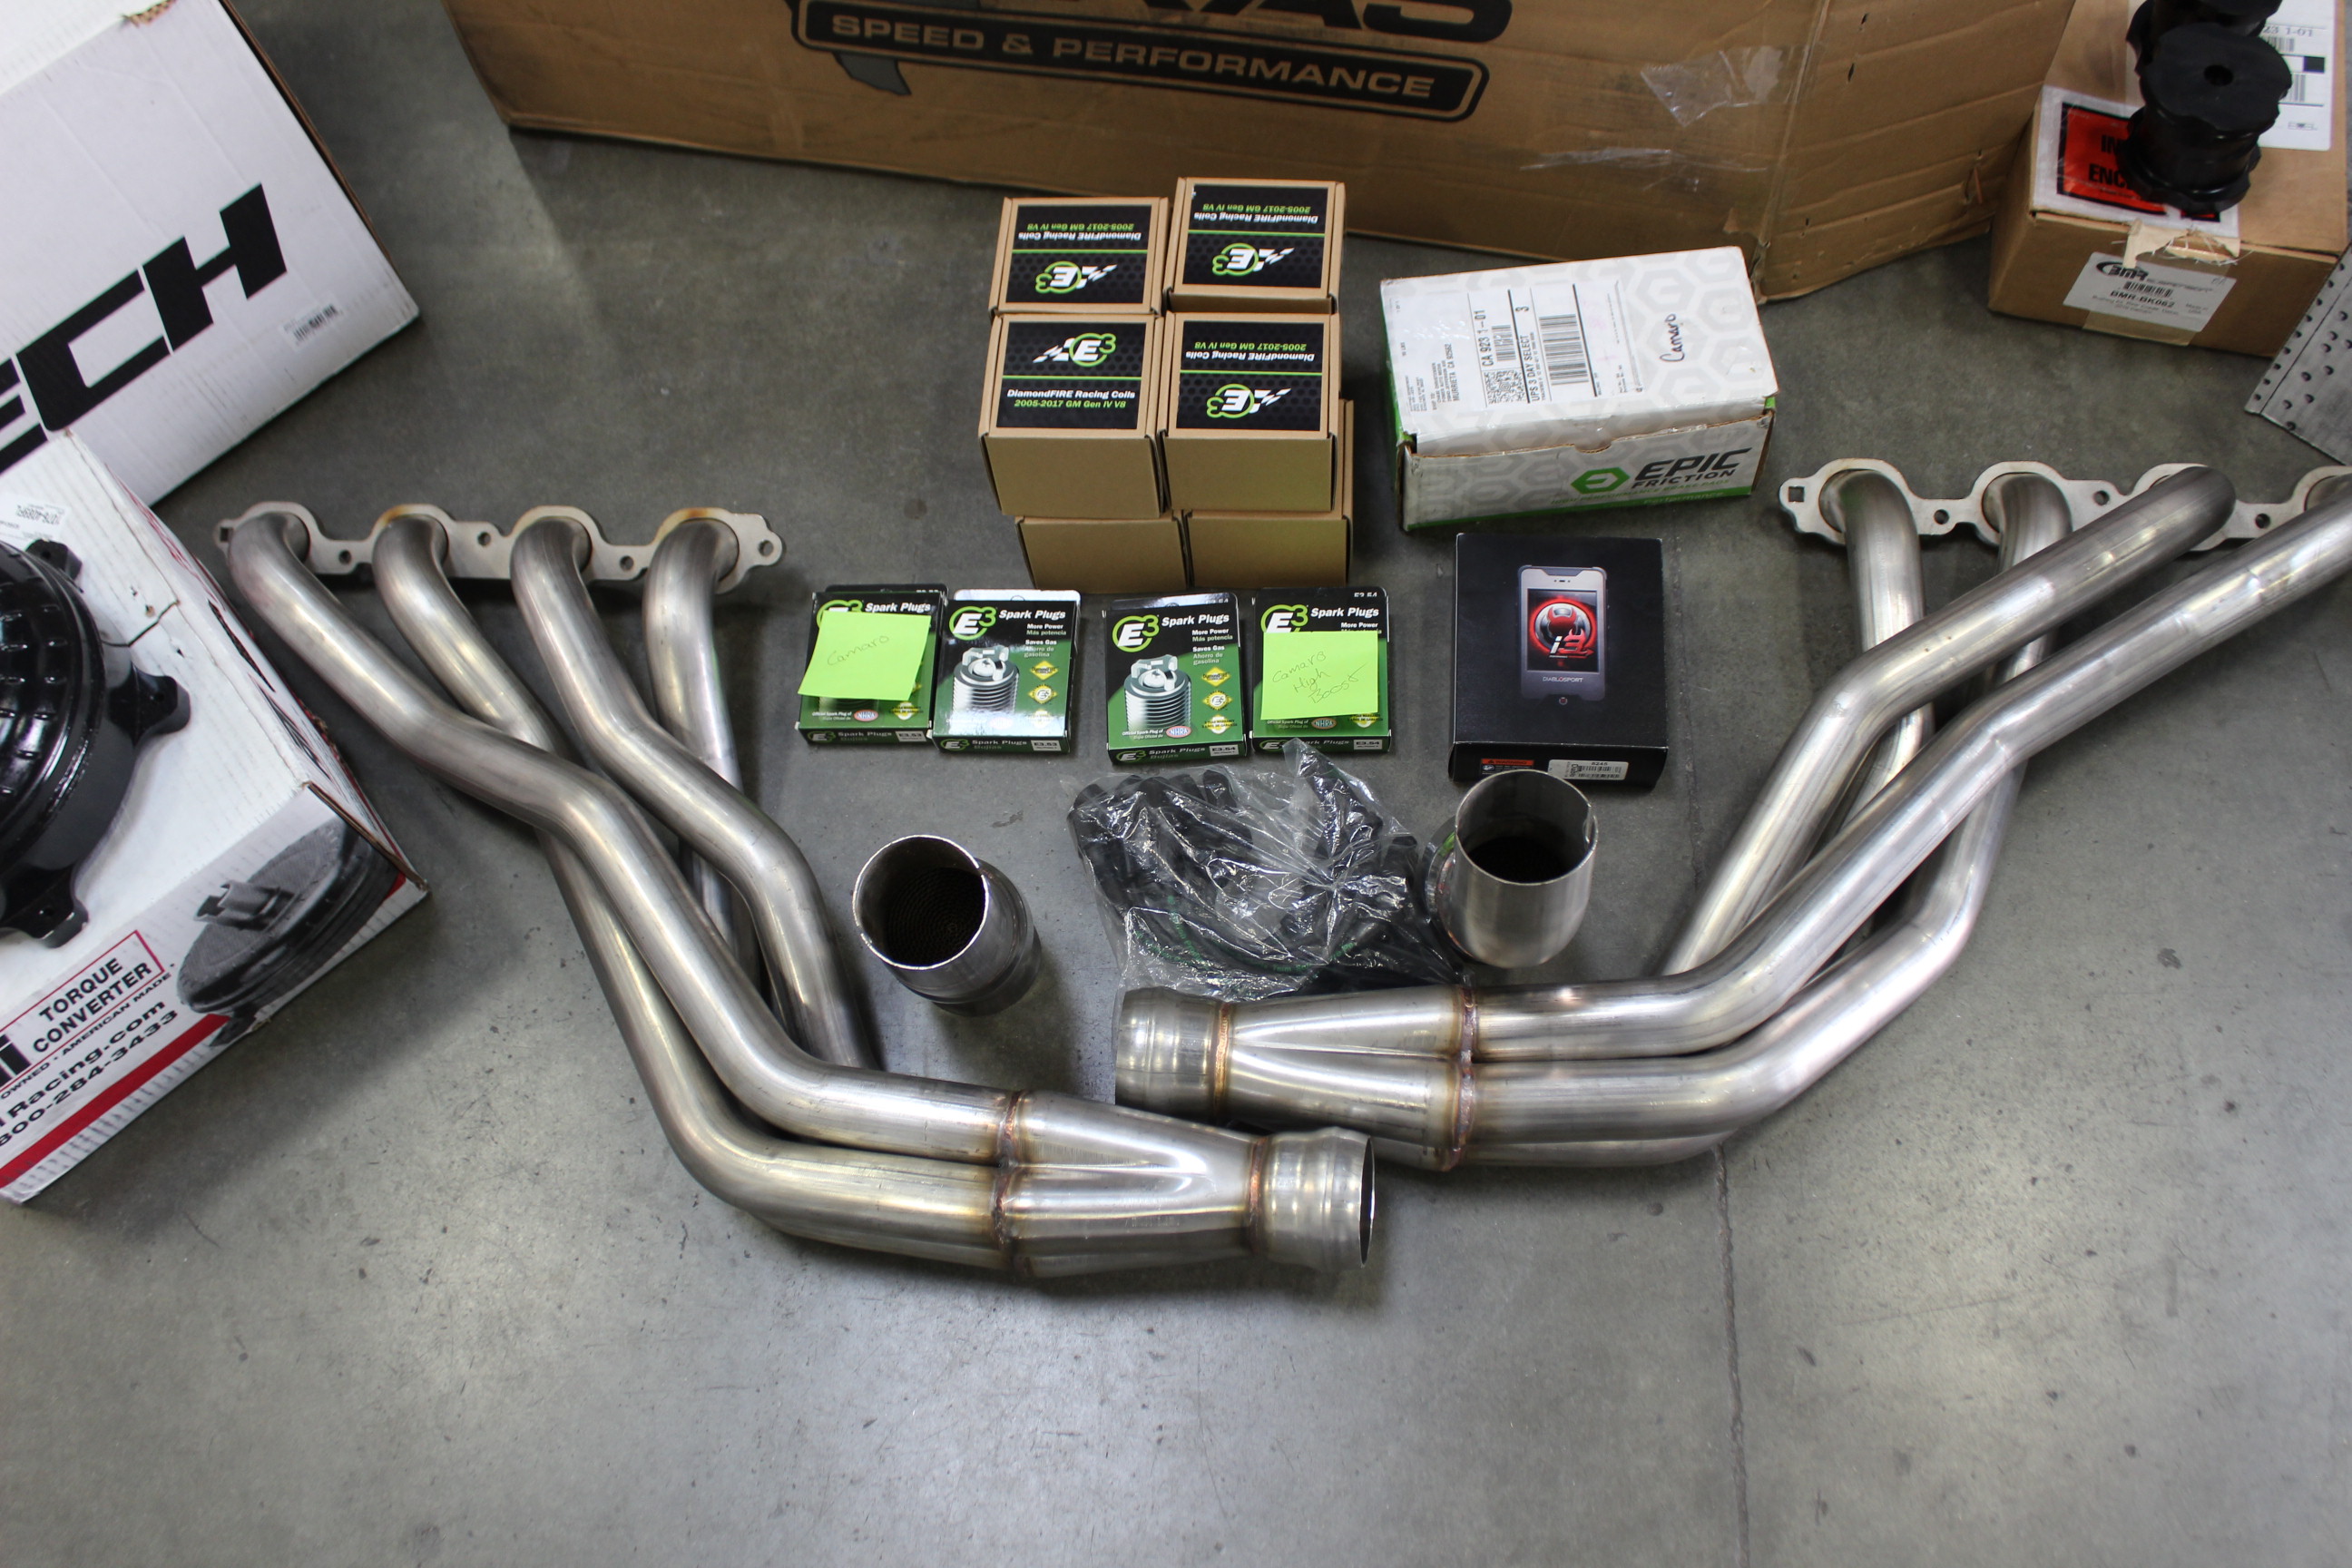
Made from 304 stainless steel, they’ll look great no matter what abuse we put them through and with mandrel-bent tubing, they’ll not only look fantastic, they’ll flow as good as they look. And perhaps more importantly, they’ll fit great as well. Texas-Speed tells us that the material used to make the headers is up to 2mm thick, making them much more durable than many headers on the market. As per the rules, we spec’d our headers out with a matching set of high-flow cats.
Since our Camaro already comes equipped with the NPP dual-mode exhaust system, we didn’t see the need to change it. Since the dual-mode system essentially bypasses the muffler, we weren’t too worried about back pressure and once the headers are installed, it should give our Camaro a nasty snarl to boot.
With our air pump (read: motor) optimized, we needed to be sure that all that extra air and fuel would be utilized in the most efficient manner possible, which is why E3 sent over a set of ignition coils, spark plug wires, and spark plugs. These will help out for sure when boost is introduced as well.

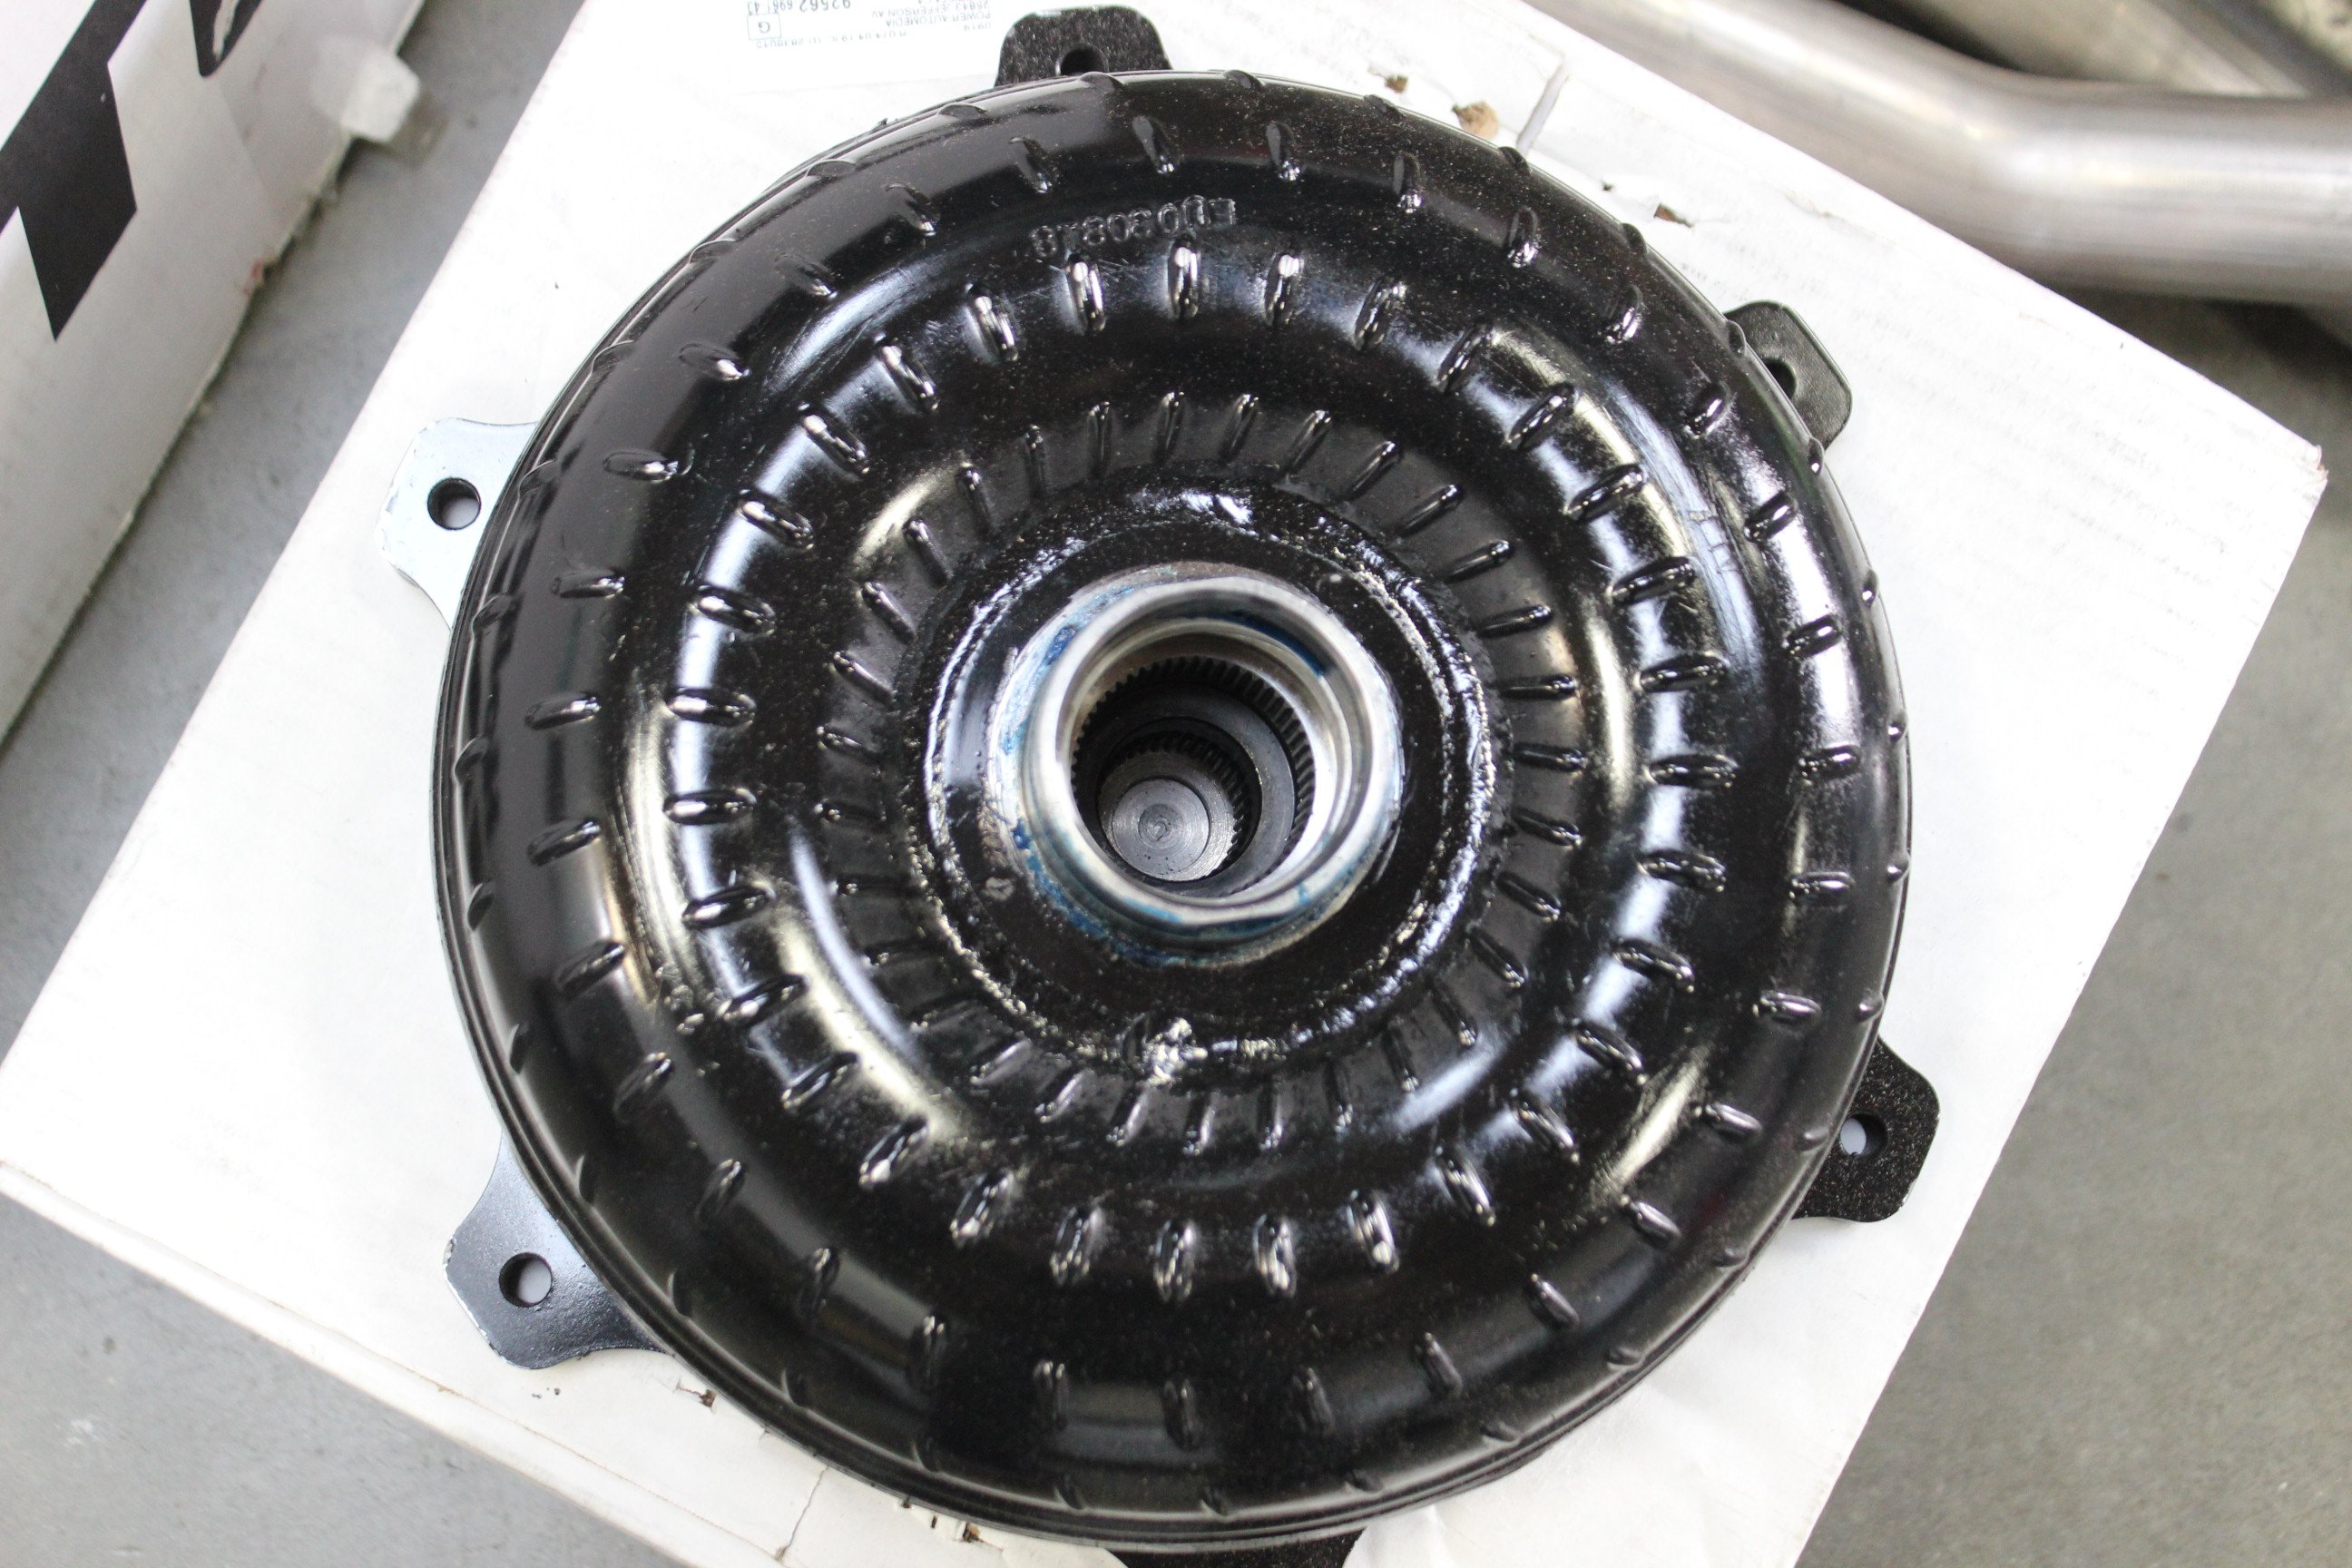

With the engine parts picked out, we turned our sights on the rest of the drivetrain and the suspension. Even though the Camaro already cut a blindingly quick (for stock) 1.78 60-foot time, we all know that there’s no such thing as “quick enough.” So, to get us off the line a little quicker, we hit up the guys at ATI for a looser converter for our 8L90.
ATI just so happens to be one of the only manufacturers that currently offer a torque converter for our 2017 Camaro SS making it an easy choice. We chose to go with ATI’s Streetmaster converter (PN 708350) to give us an extra 800-1,000 rpm of additional stall speed. On top of that, ATI uses a billet cover as well stator cap to reinforce the converter and make it much more friendly for the kind of power that we would be throwing at it down the line. In addition to the billet goodies, the torque converter uses fully furnace brazed fins, a 4140 turbine hub and Torrington roller thrust bearings.
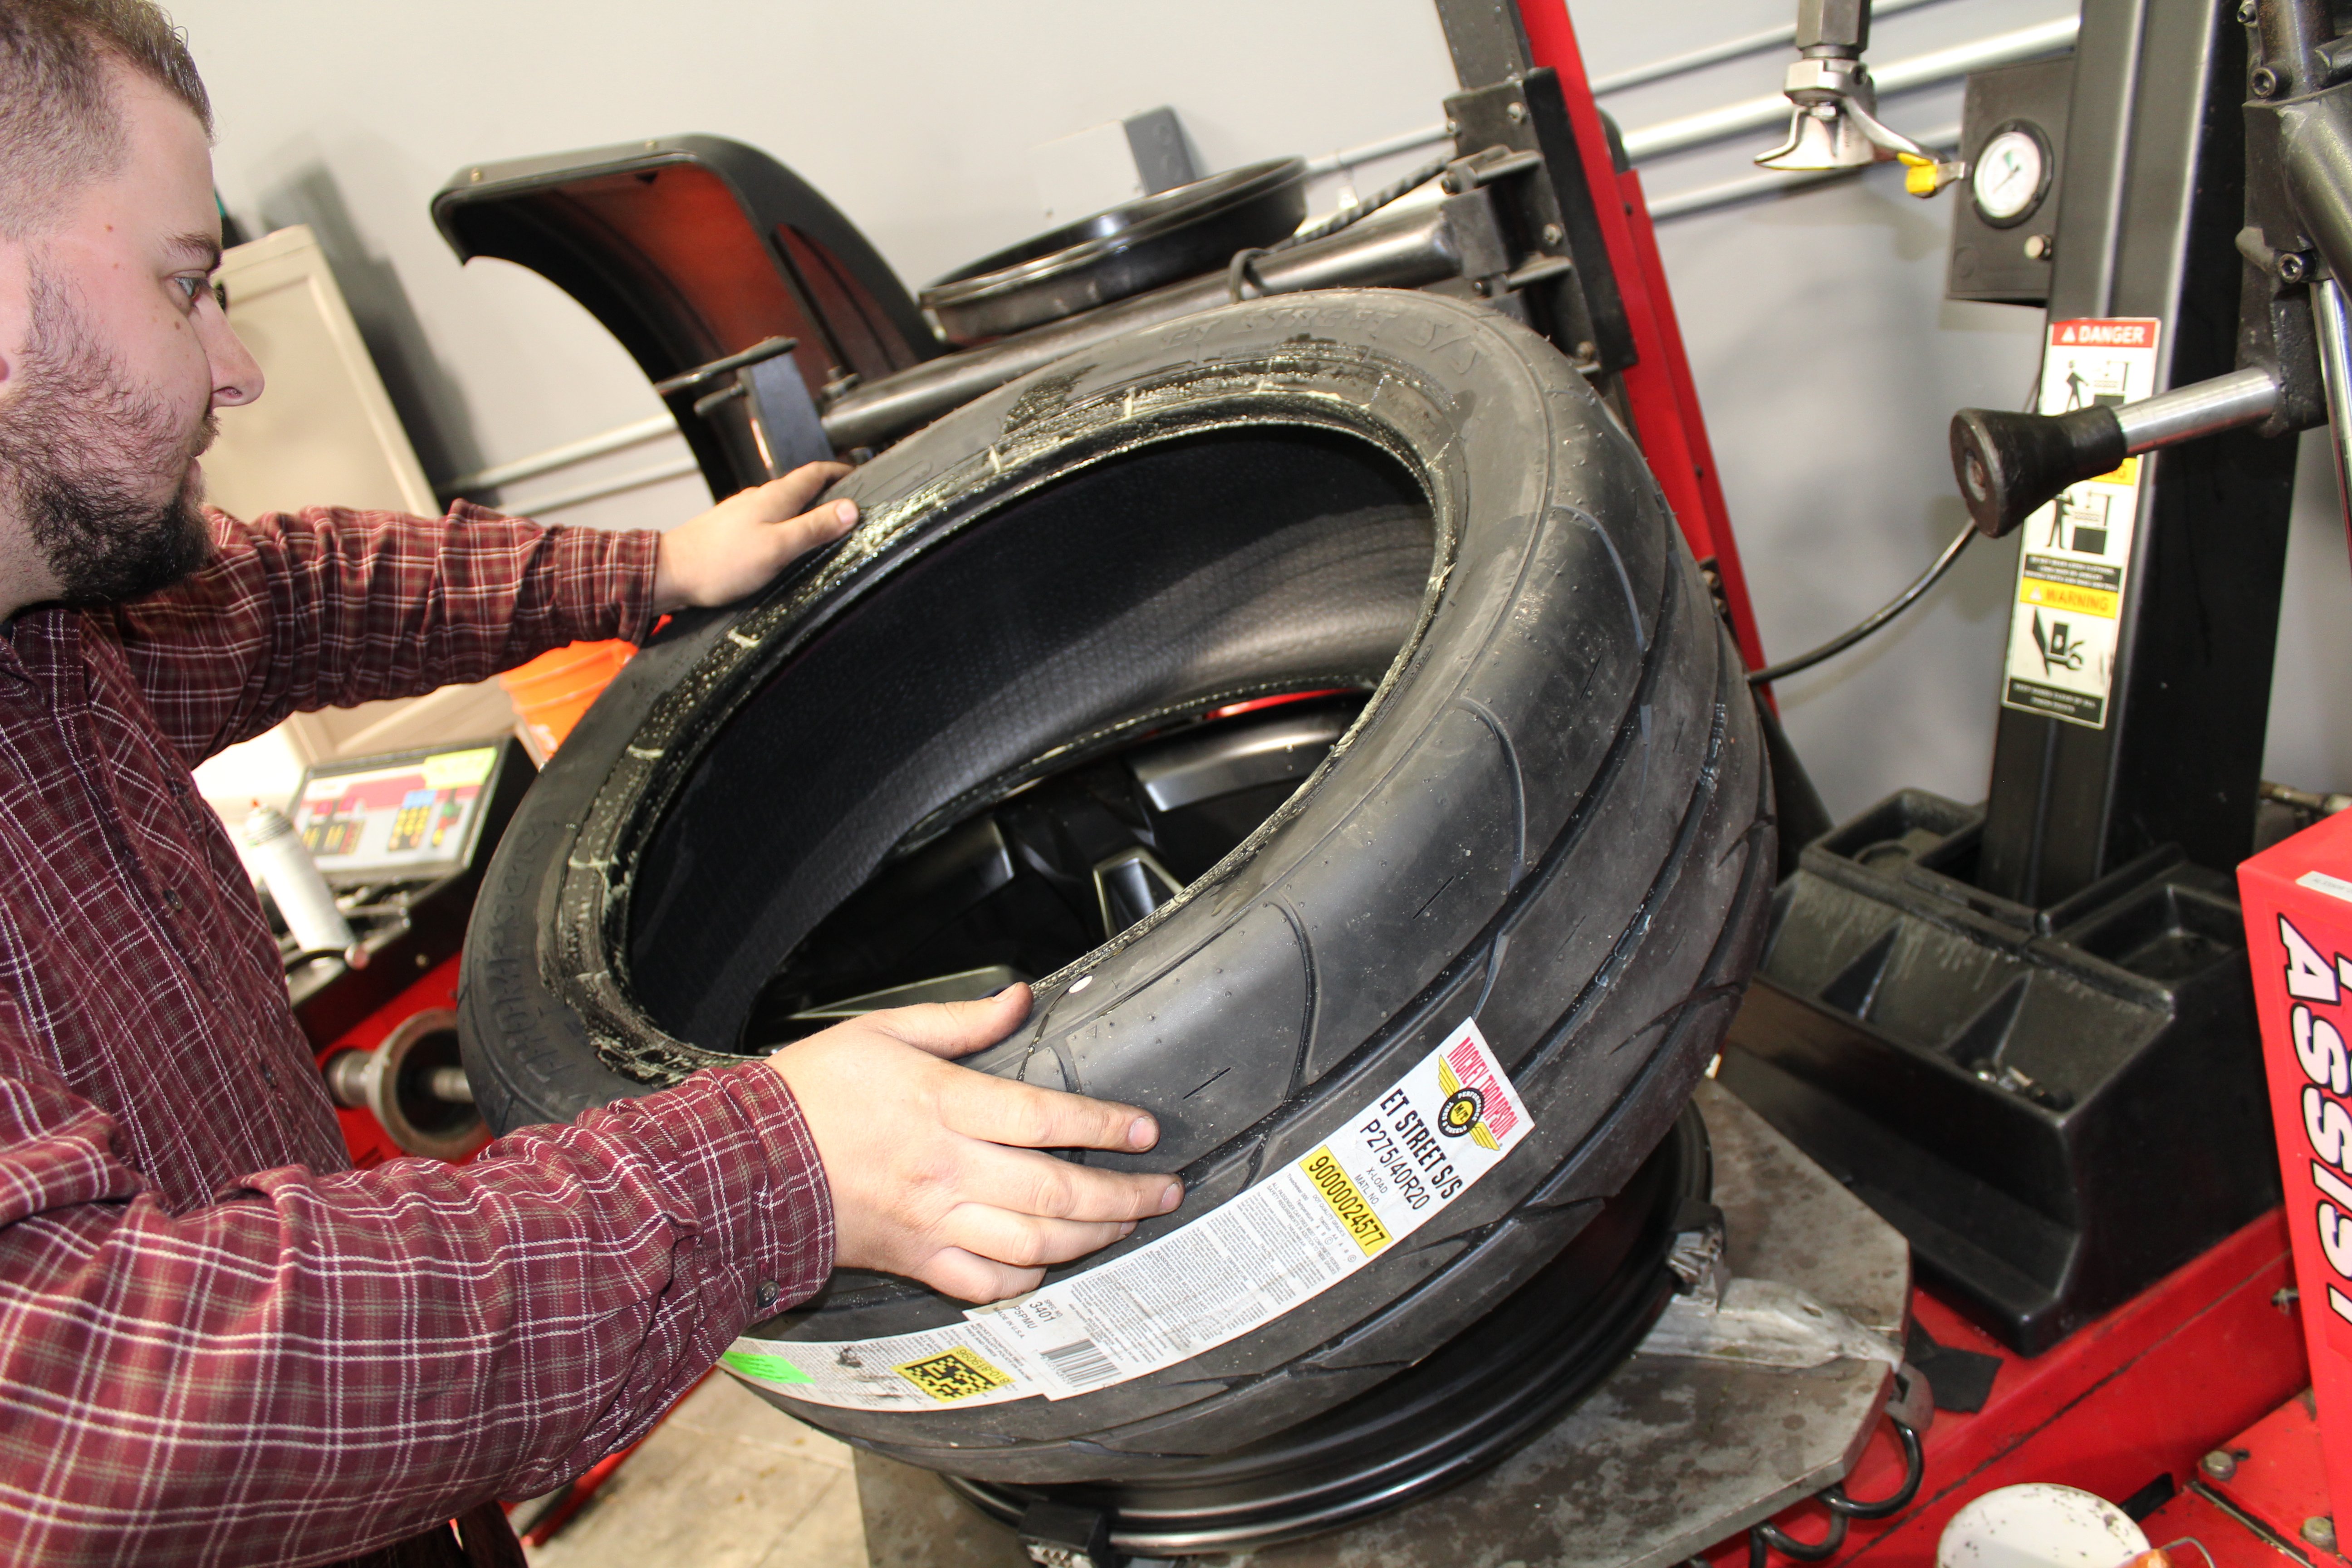
With all of that extra grunt making its way toward the rear wheels, we decided that some suspension mods might be in order to help us plant all of our new-found power. To keep our rear Mickey Thompson Street S/Ss from hopping, the guys at BMR sent us one of their rear cradle bushing kits in Delrin to keep everything in line (PN BK063).
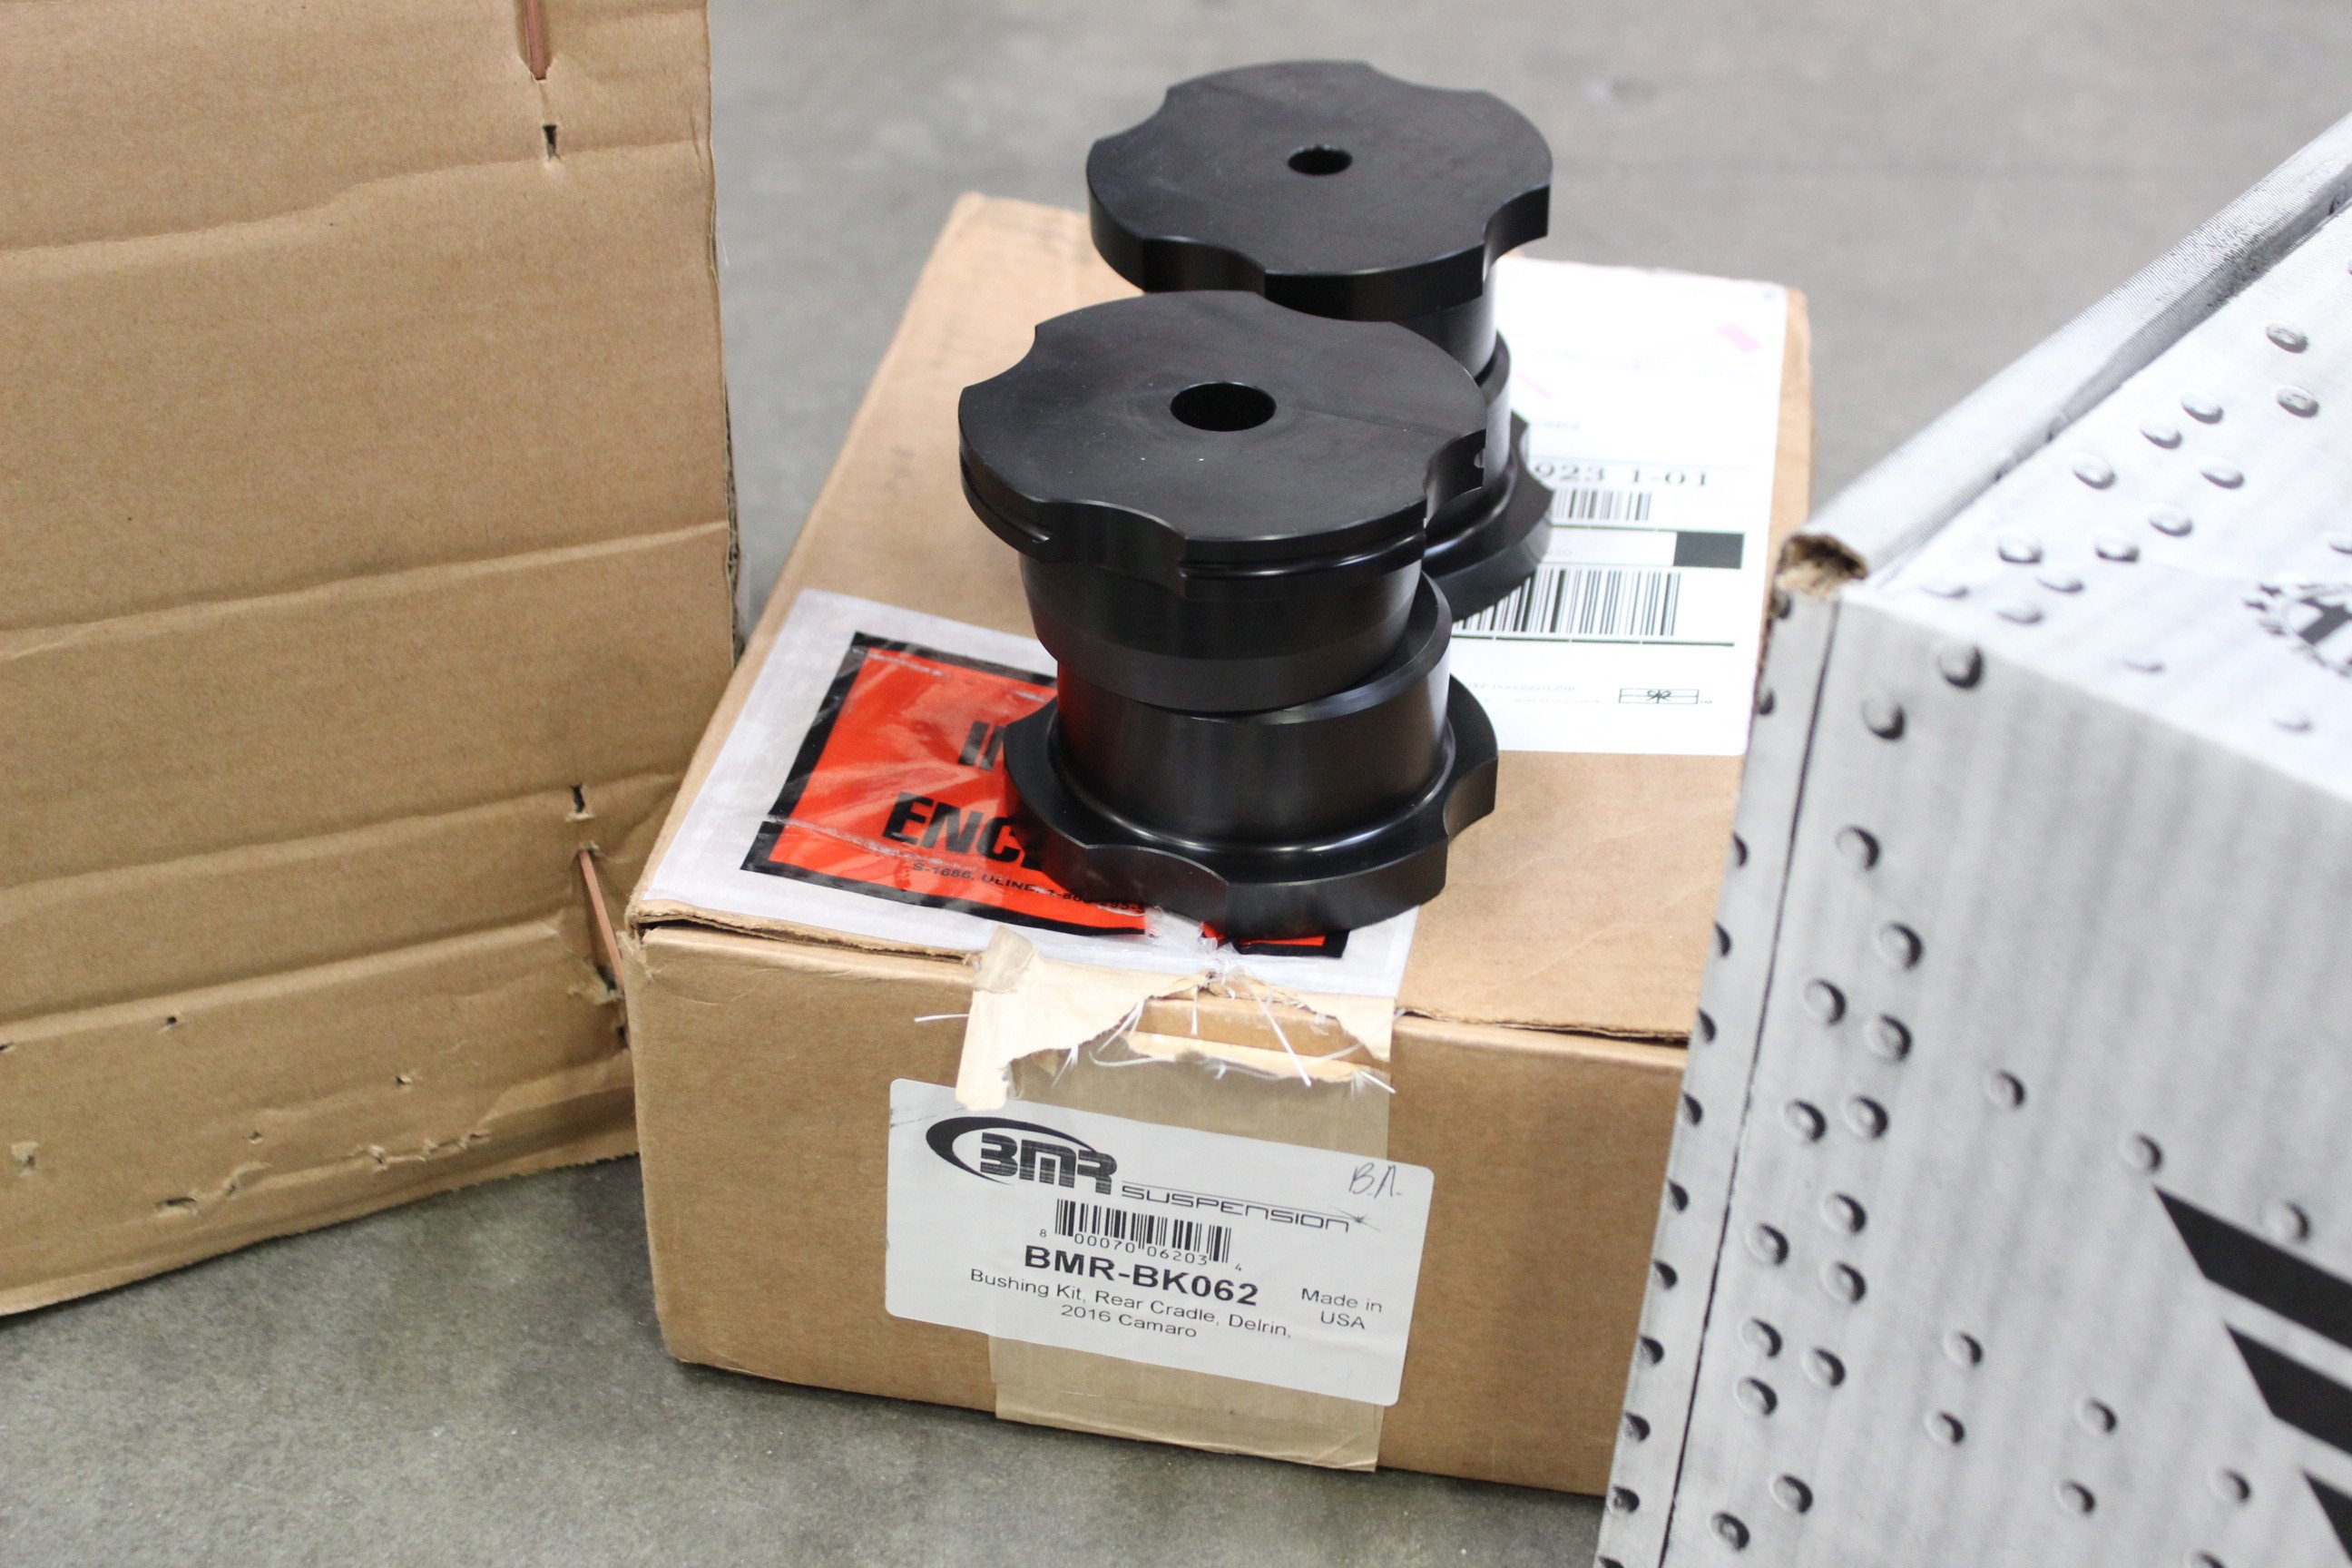
We selected Delrin because it will eliminate virtually all movement of the rear cradle but will retain some street manners when it comes to NVH (noise, vibration, harmonics). While they are nearly as good as solid bushings at keeping movement out of the rear cradle, they will also prevent us from wanting to cut our own ears off while cruising around on the street, if we so choose to do so.
For tuning purposes, the guys at Diablosport stepped in and provided us with one of their iNTUNE i3 Platinum handheld tuners (PN 8245) that will allow us to not only upload a canned tune, but custom tune our cars as well (which we intend to do) via a remote tuner at one of hundreds of tuning shops across the nation. This will allow us to milk every pony out of our Camaro and this particular combination.
And speaking of milking the combo for everything it is worth, we selected Royal Purple for all of our lubrication needs. Its synthetic oils will not only keep excessive heat at bay but ensure that every pony possible is making it to the pavement or rollers. In a contest like this, every horsepower counts and using Royal Purple synthetics is an easy way to ensure our combination is making the most steam possible. For the engine, we went with Royal Purple HPS in a 5W-30 (PN 36530) and an Extended Life oil filter (PN 10-48), while out back, in the differential, we went with its MaxGear gear oil in a 75W-90 (PN 01301).
And since our stock pads were shot from putting them through their paces, we had EPIC Friction send us a new set of its pads for our Brembo binders. The compound they recommended is a good mix of stock-like performance and operation while being capable of standing up to more rigorous driving.
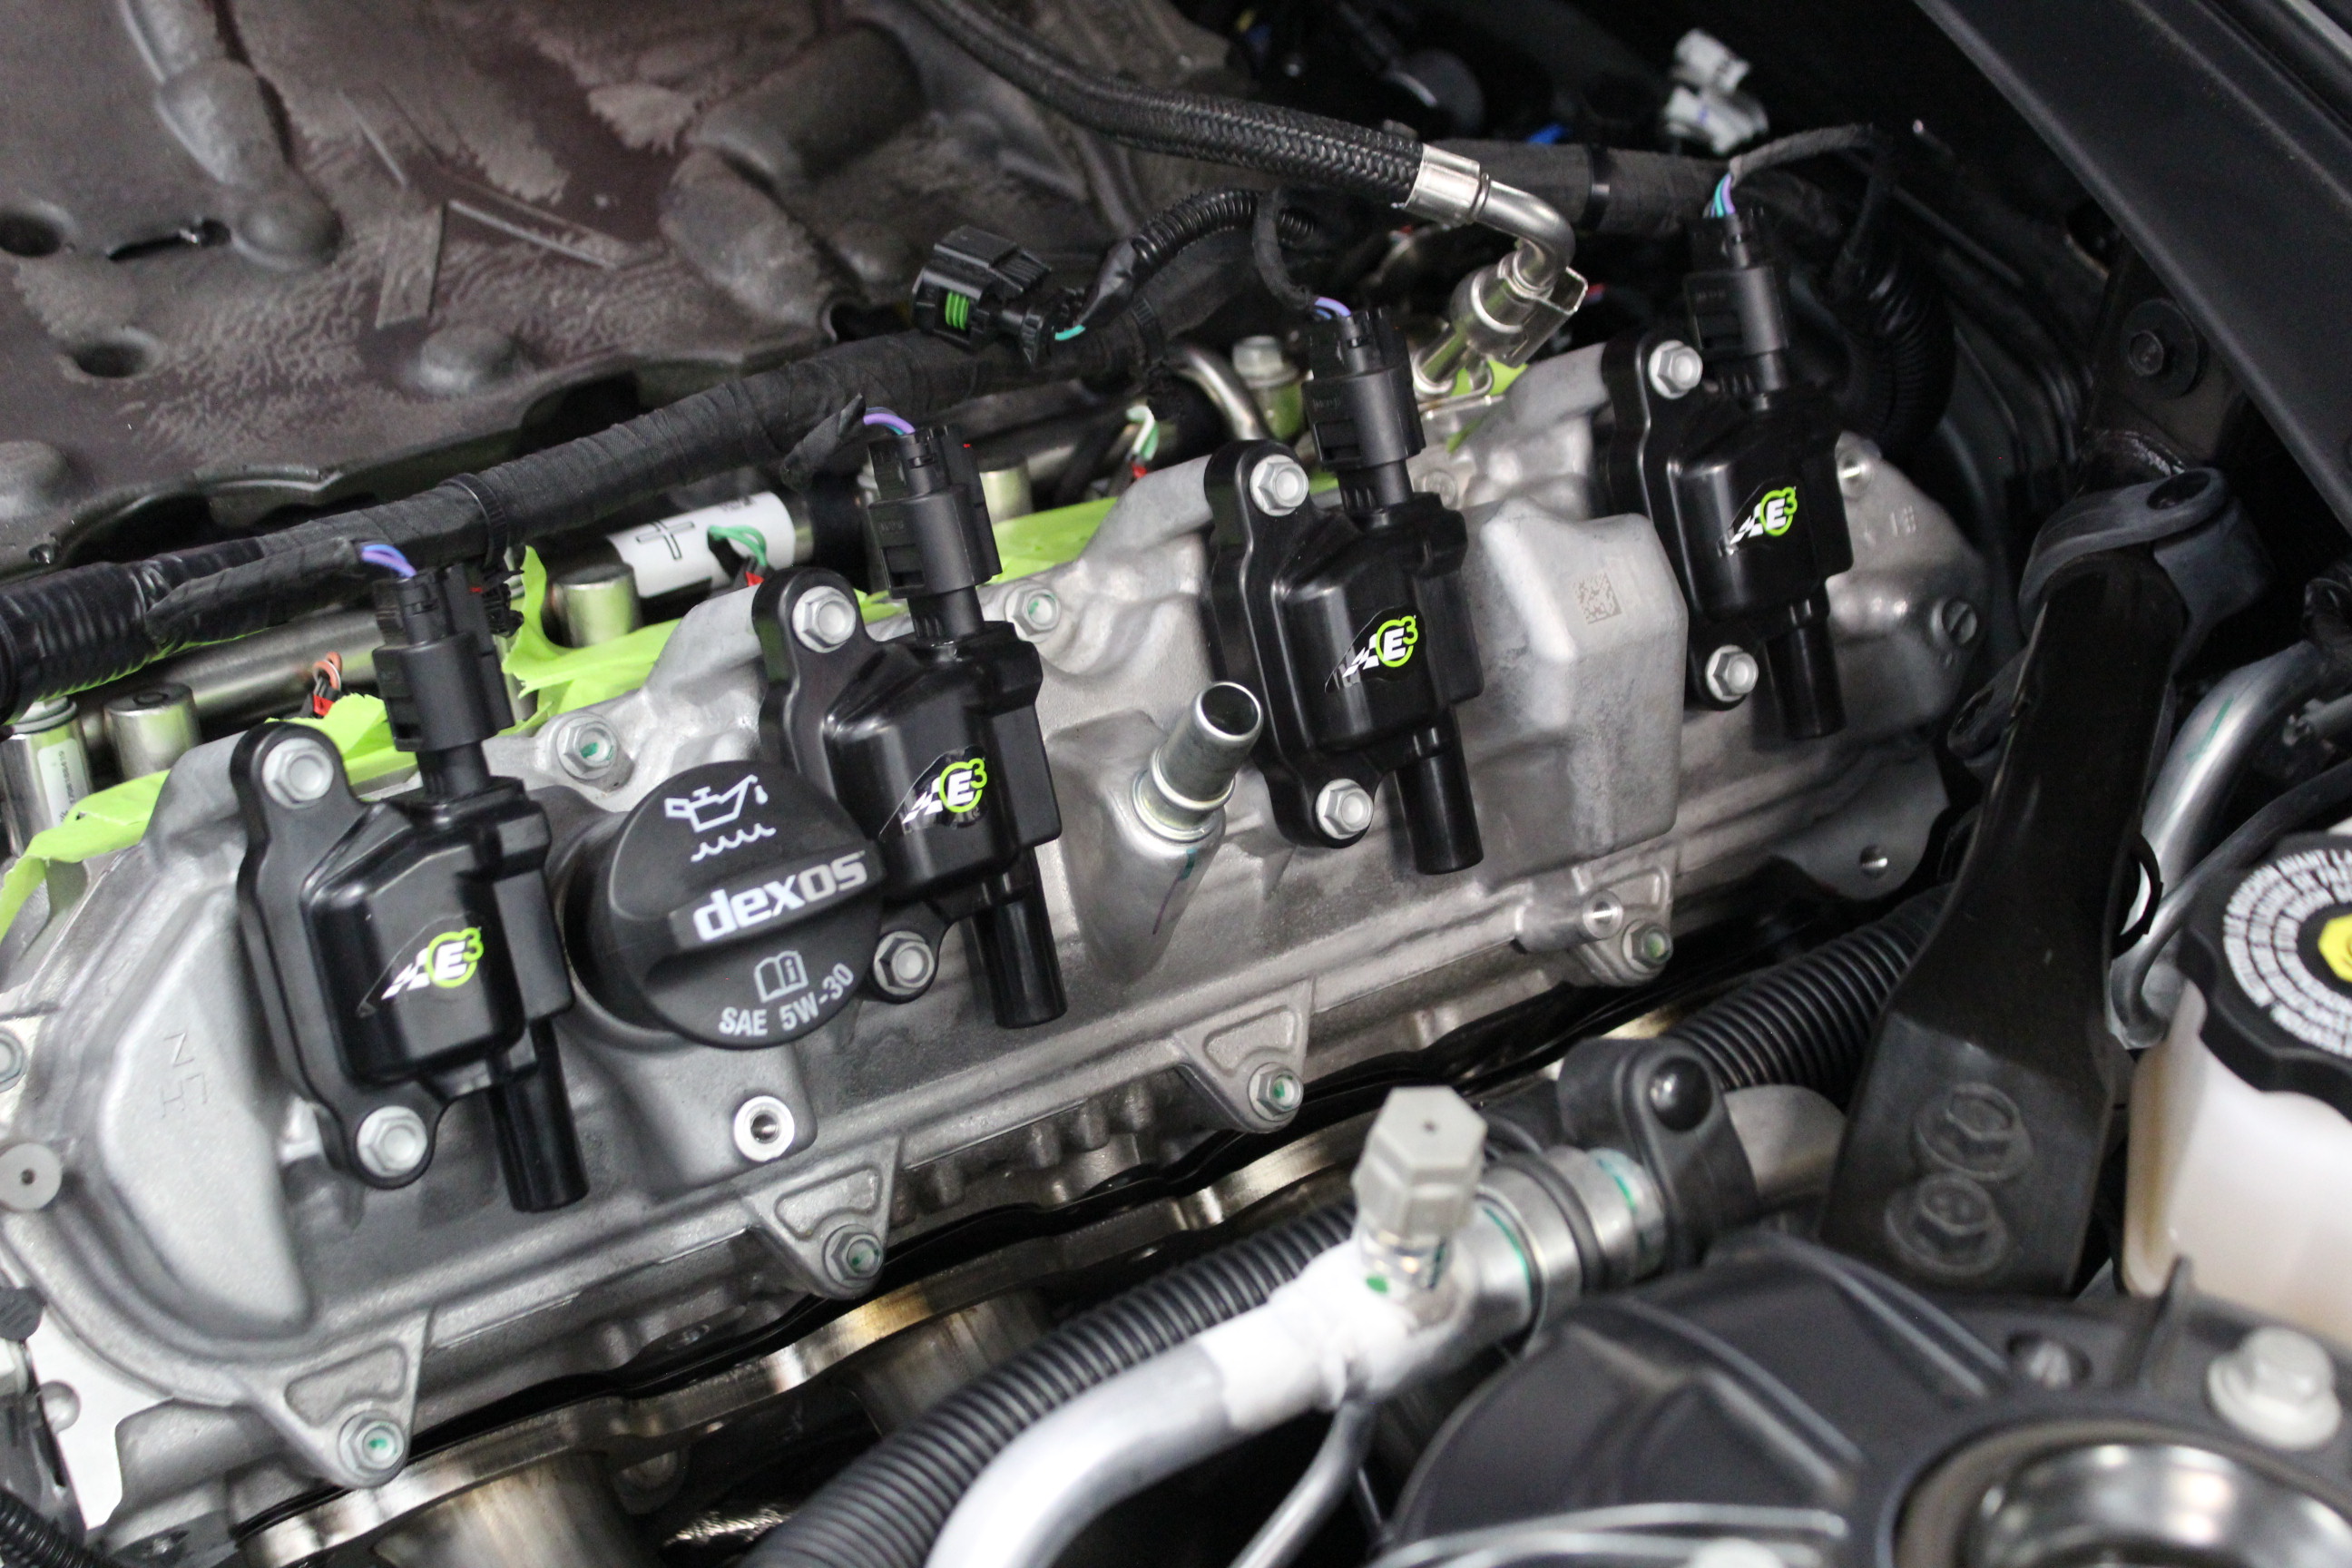
Our new E3 coils in place and waiting for the E3 spark plugs and wires.
All of our parts add up to a grand total of $4,318.75 based on Summit Racing Equipment pricing where available. You may be wondering why we didn’t use the full $5,000 and the answer is simple. We were going to use a larger aftermarket throttle body but it is currently on national backorder. Since we couldn’t get our hands on it, we decided to roll that portion of our budget over to our $15,000 efforts and thus came in well under budget.
For remote tuning, we chose Matt Kesatie of Kesatie Motorsports out of Sarsota, Florida to issue the marching orders for both our Camaro and our competition, the Mustang. With one tuner, we know that both cars will be in excellent shape after they leave the rollers. So, with everything picked out, we got down to bolting on some parts.
It’s Go Time
Bolting on all of our parts was a relatively straightforward process apart from the torque converter and perhaps the headers, though all things considered, they weren’t all that difficult and could definitely be done by most gearheads in their own driveways. We started things off simply by removing the stock intake.
After removing a few hose clamps and bolts that held the stock intake in place, and removing the MAF to be installed in the new intake, we were ready to move on to our intake manifold. The intake manifold didn’t take much effort either. Since there aren’t any fuel rails or injectors to get in the way, or require being unplugged or unbolted, it was simply the bolts that held the intake to the heads. However, we did have to disconnect some of the vacuum connections that held the intake in place, though even with this, it took maybe roughly 45 minutes to remove the intake and intake manifold.
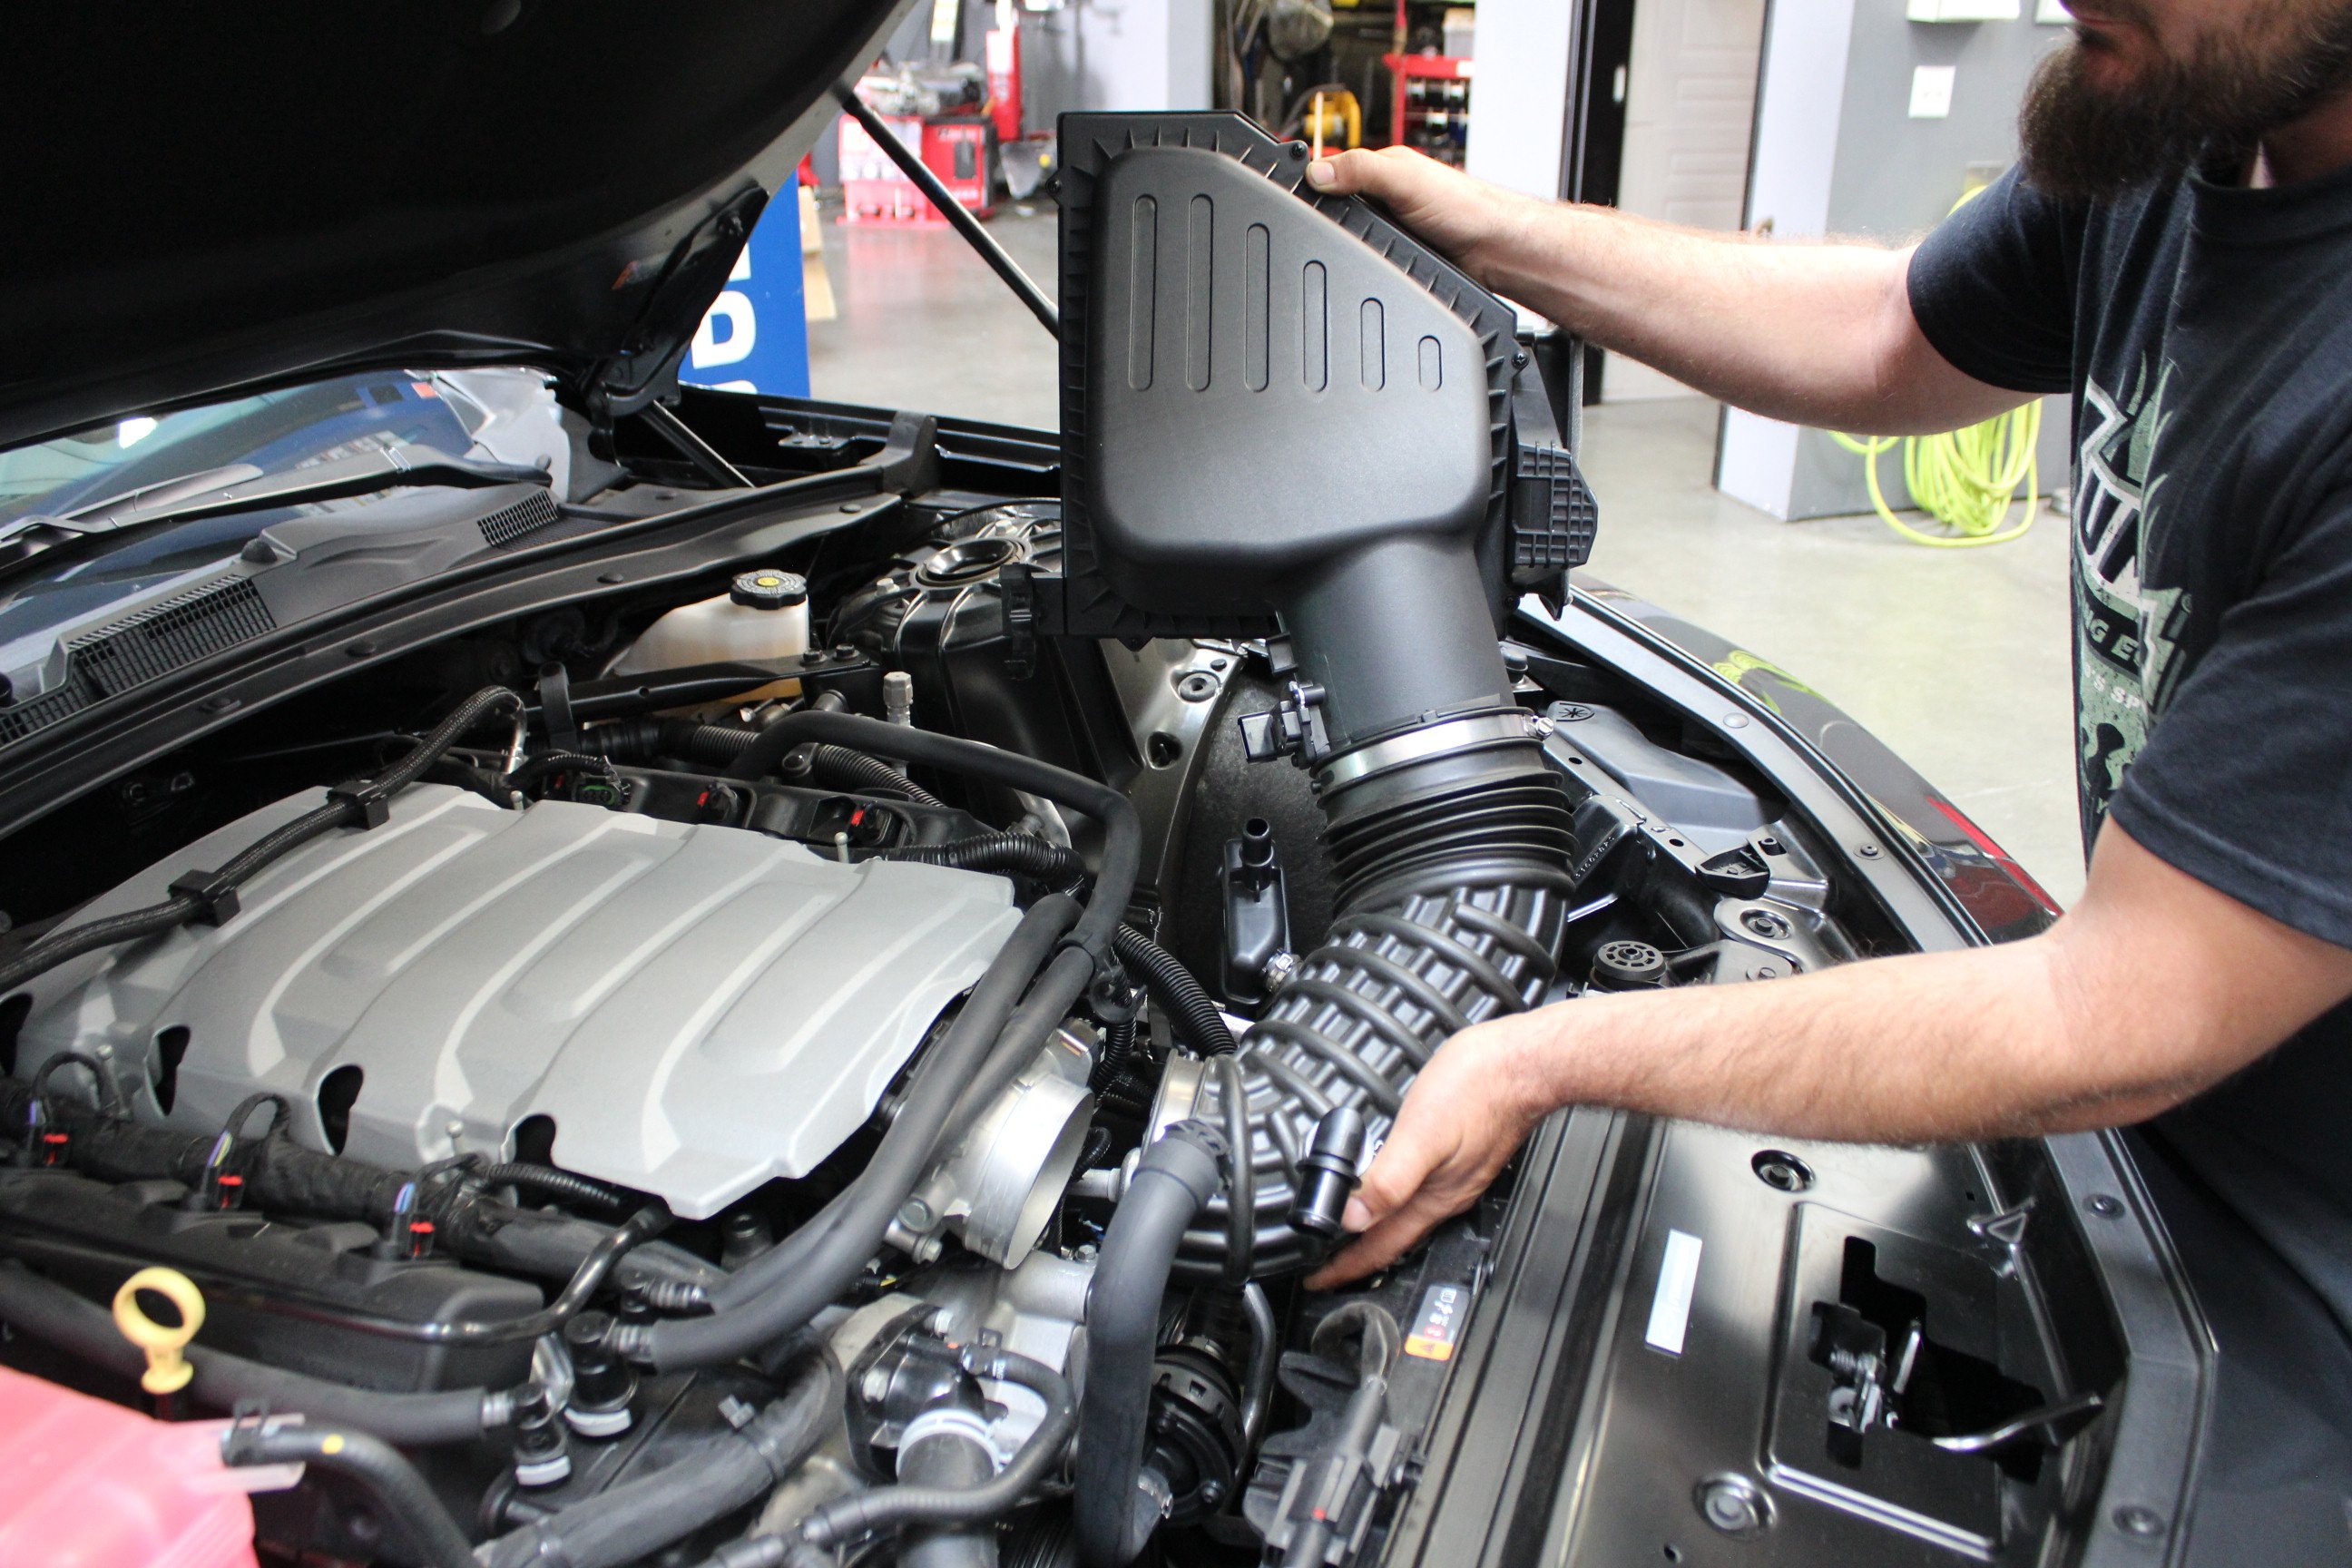


The intake and manifold are fairly easy to remove on a sixth-gen and the stock pieces were removed in under an hour.
The manifold and intake simply installed in the reverse order, and in the case of the intake, it actually required less effort as many of the connections are slip fit as we mentioned earlier. With the intake tract of our Camaro sorted, we turned our attention to the headers.
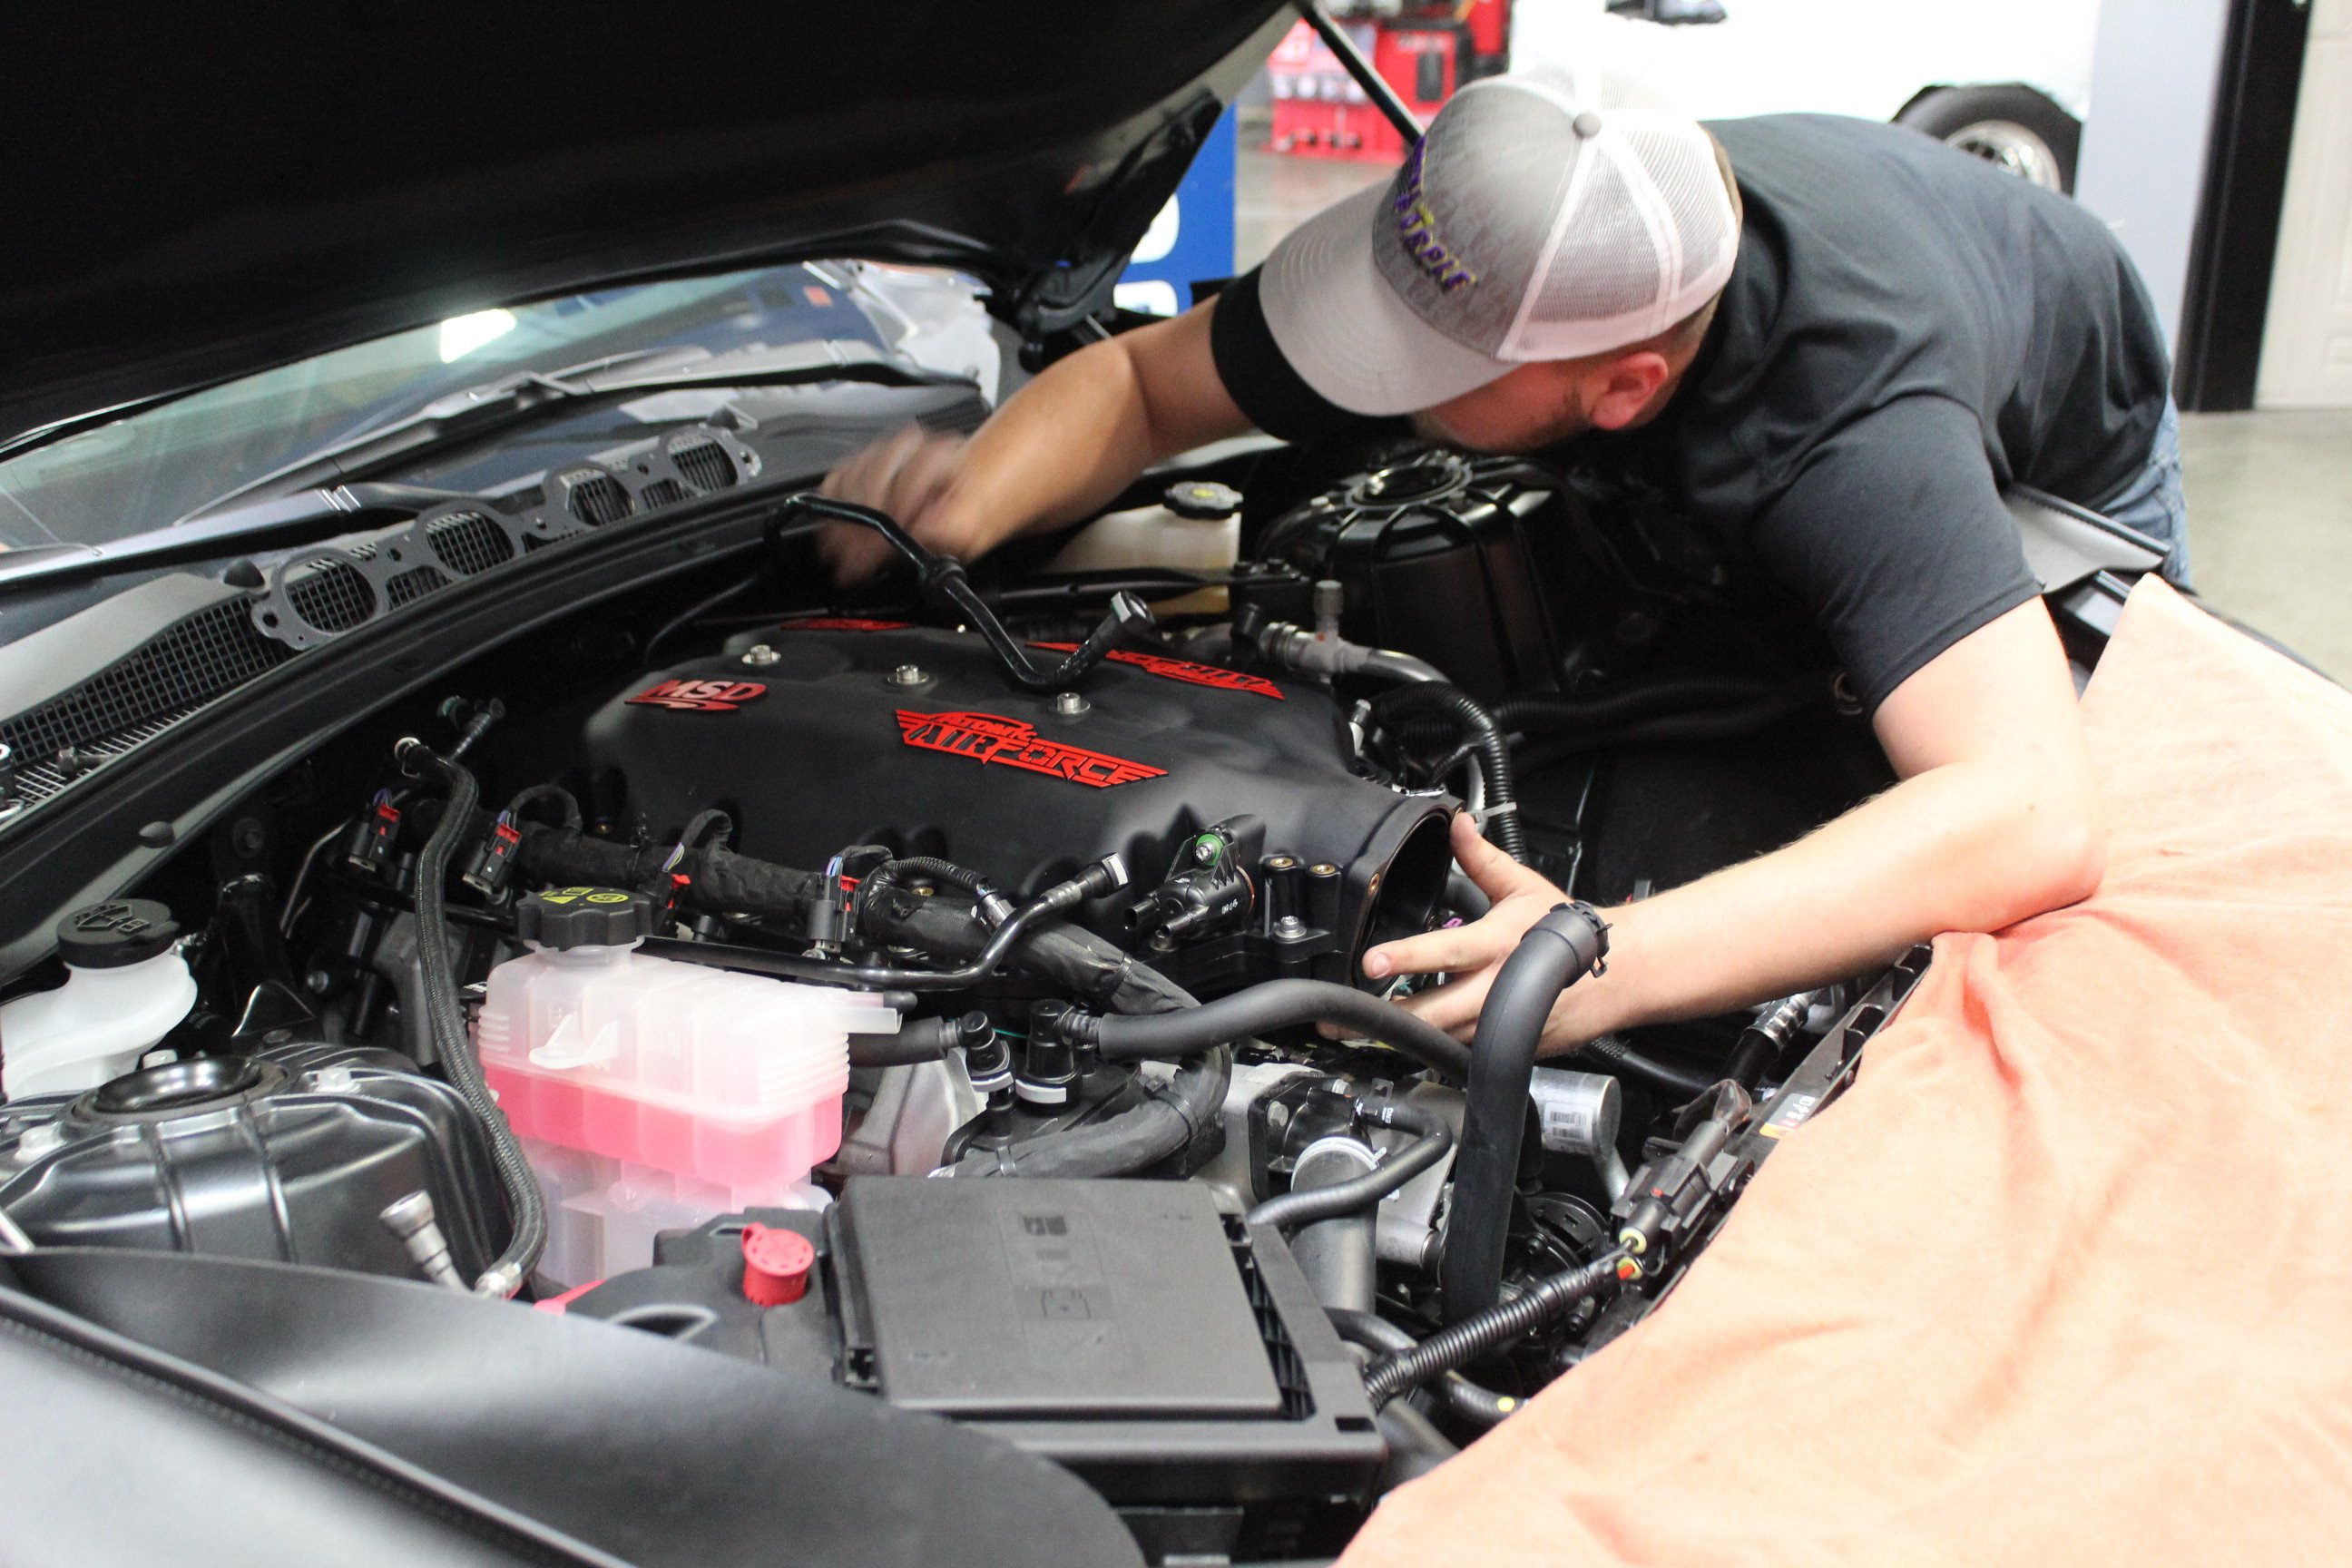


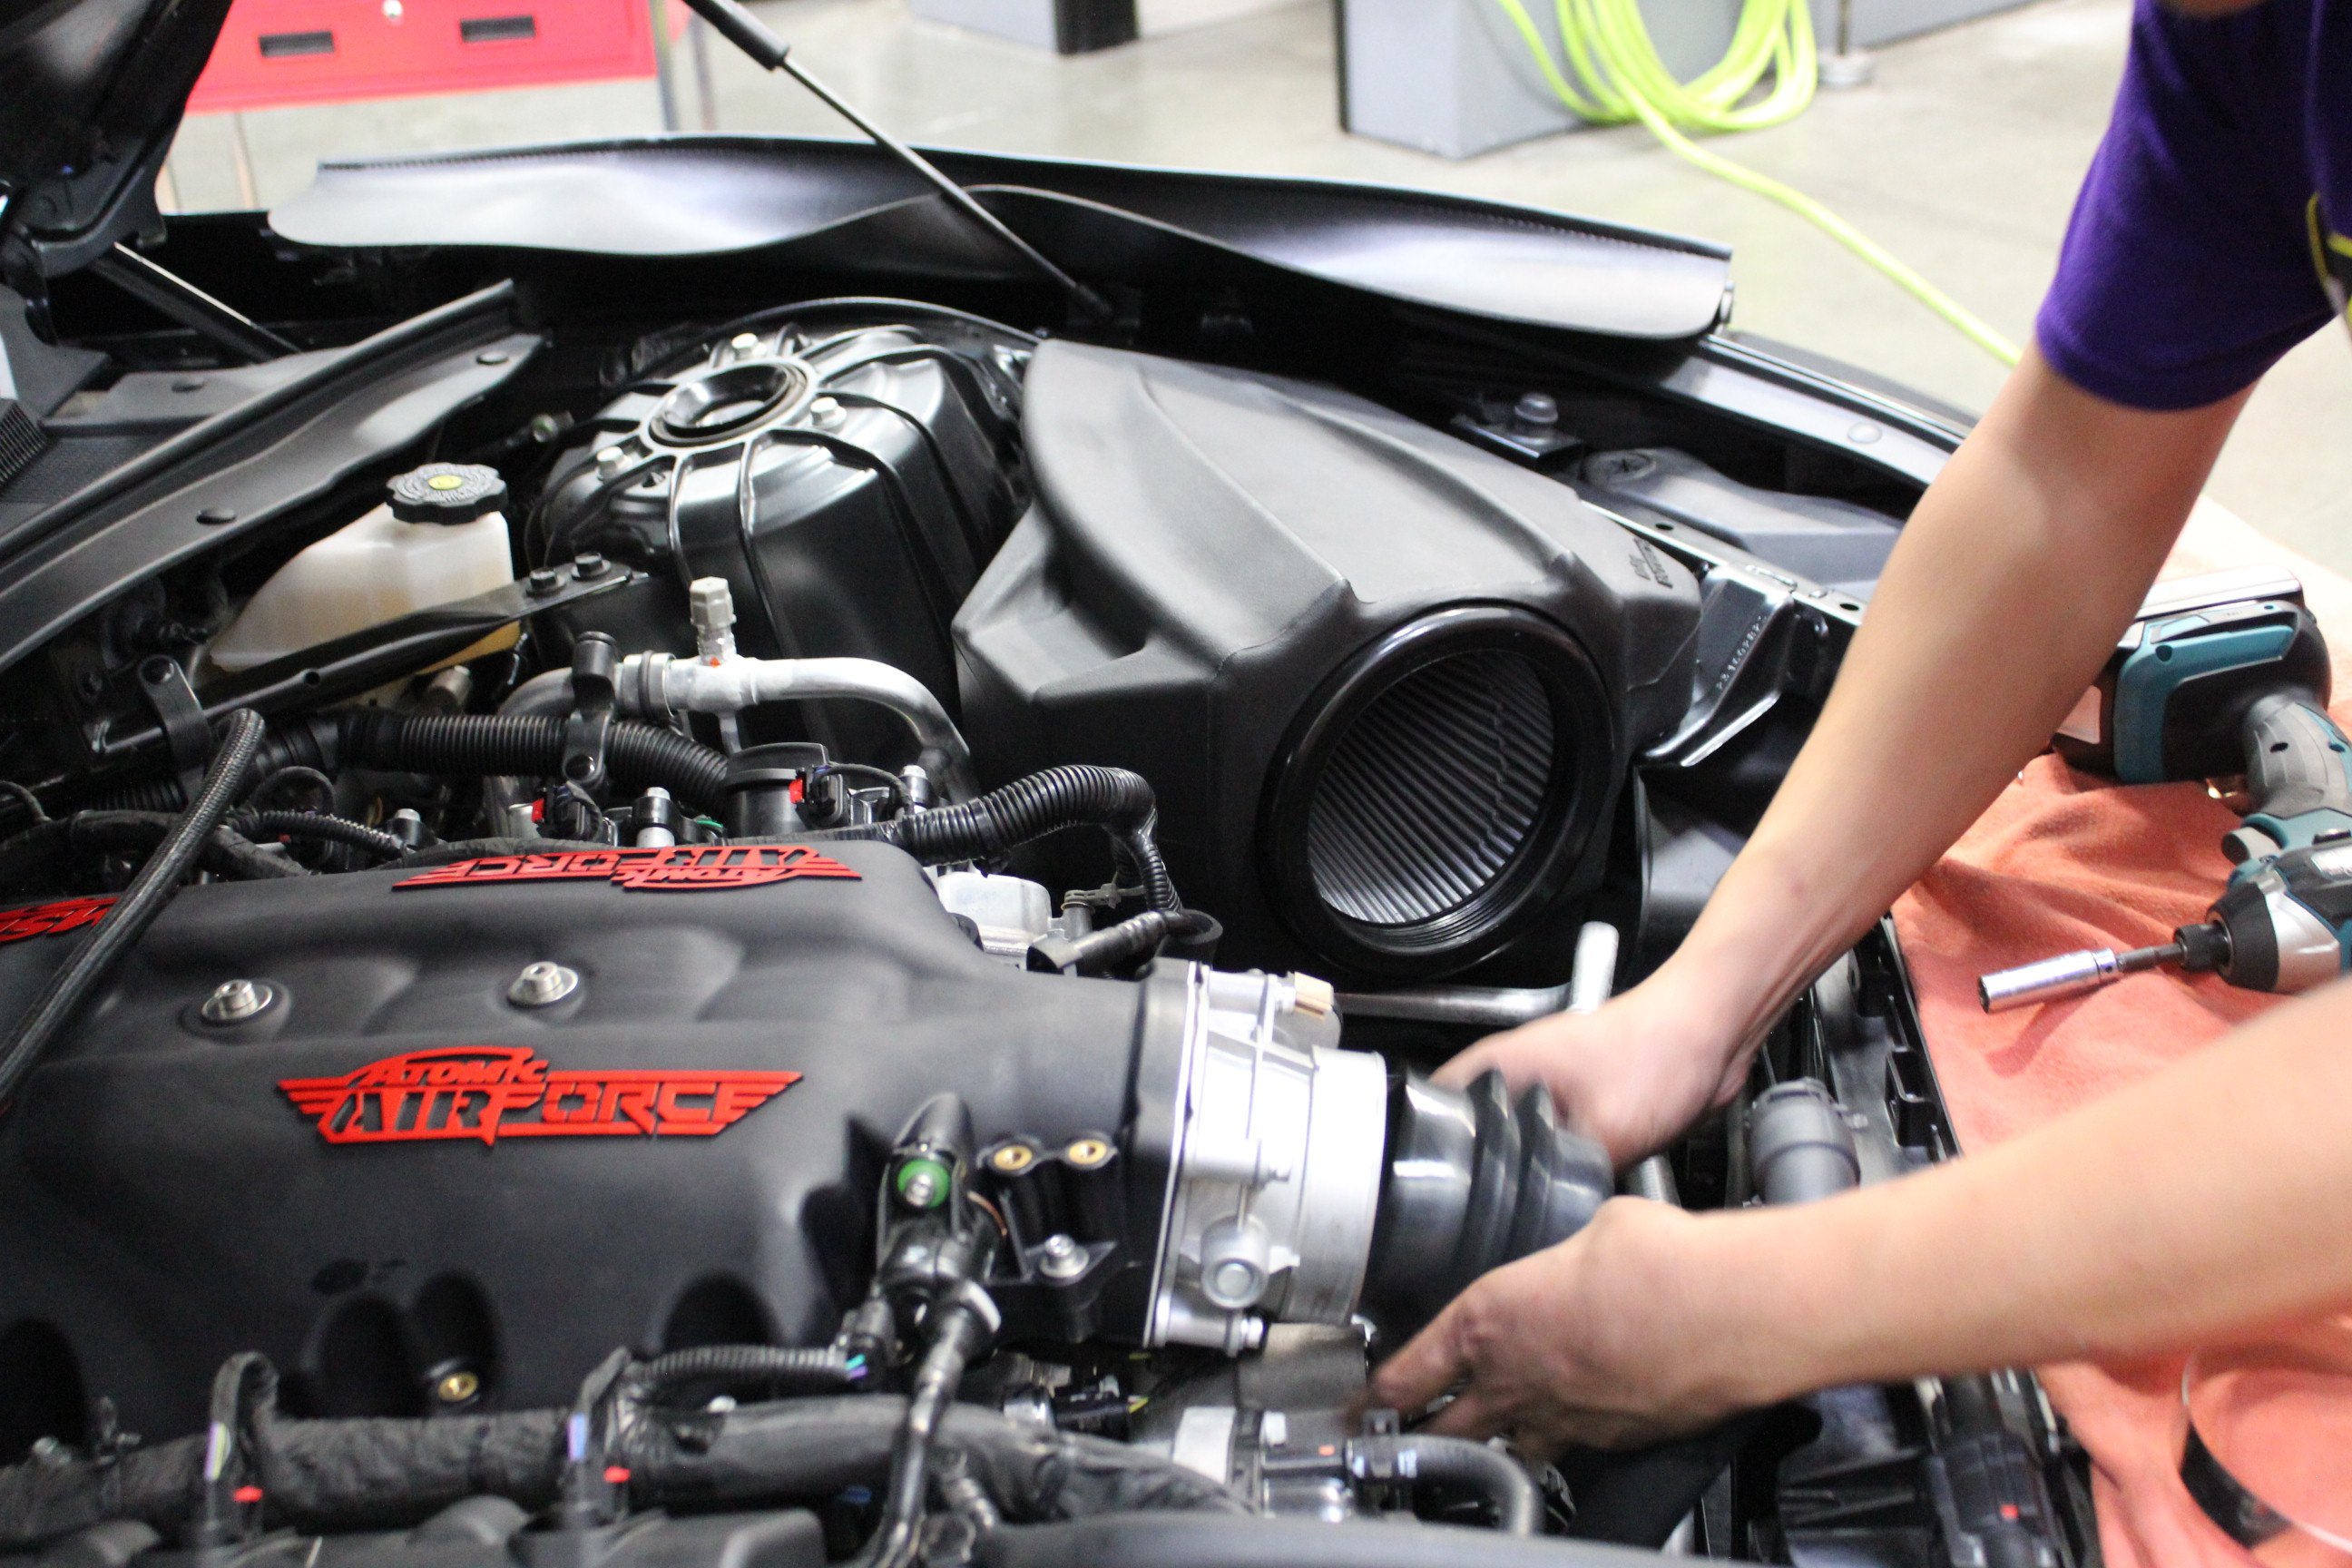
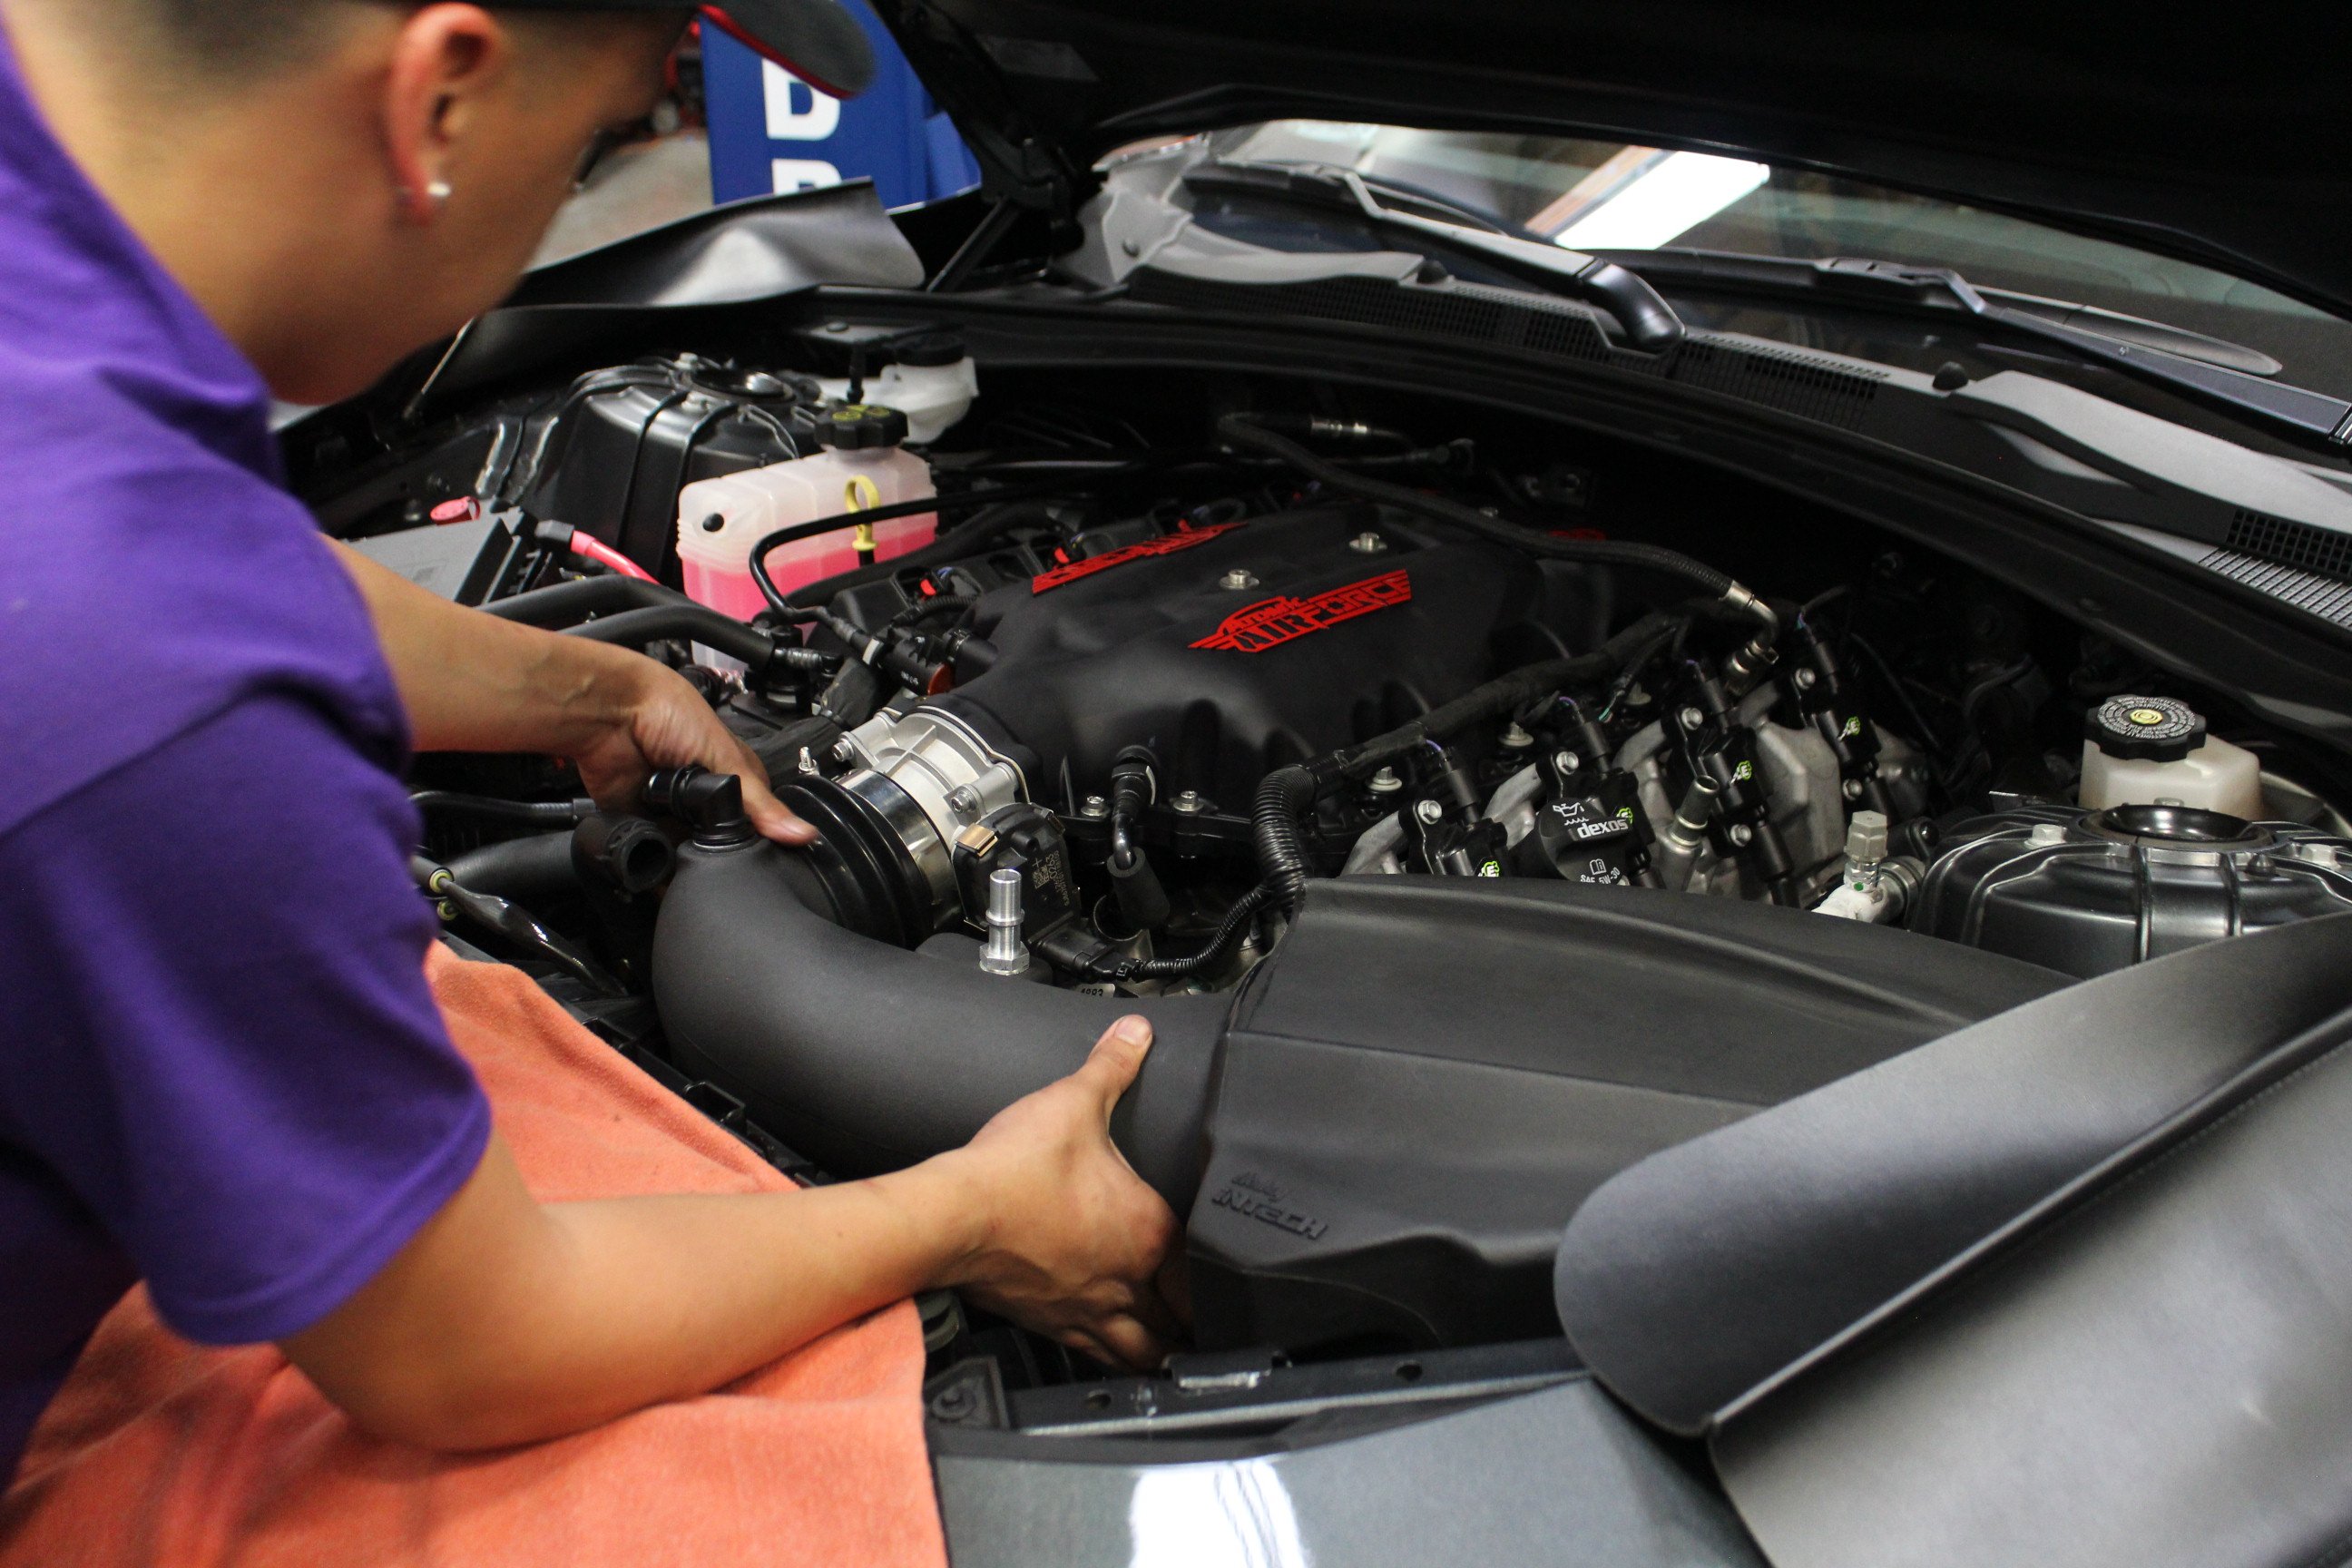
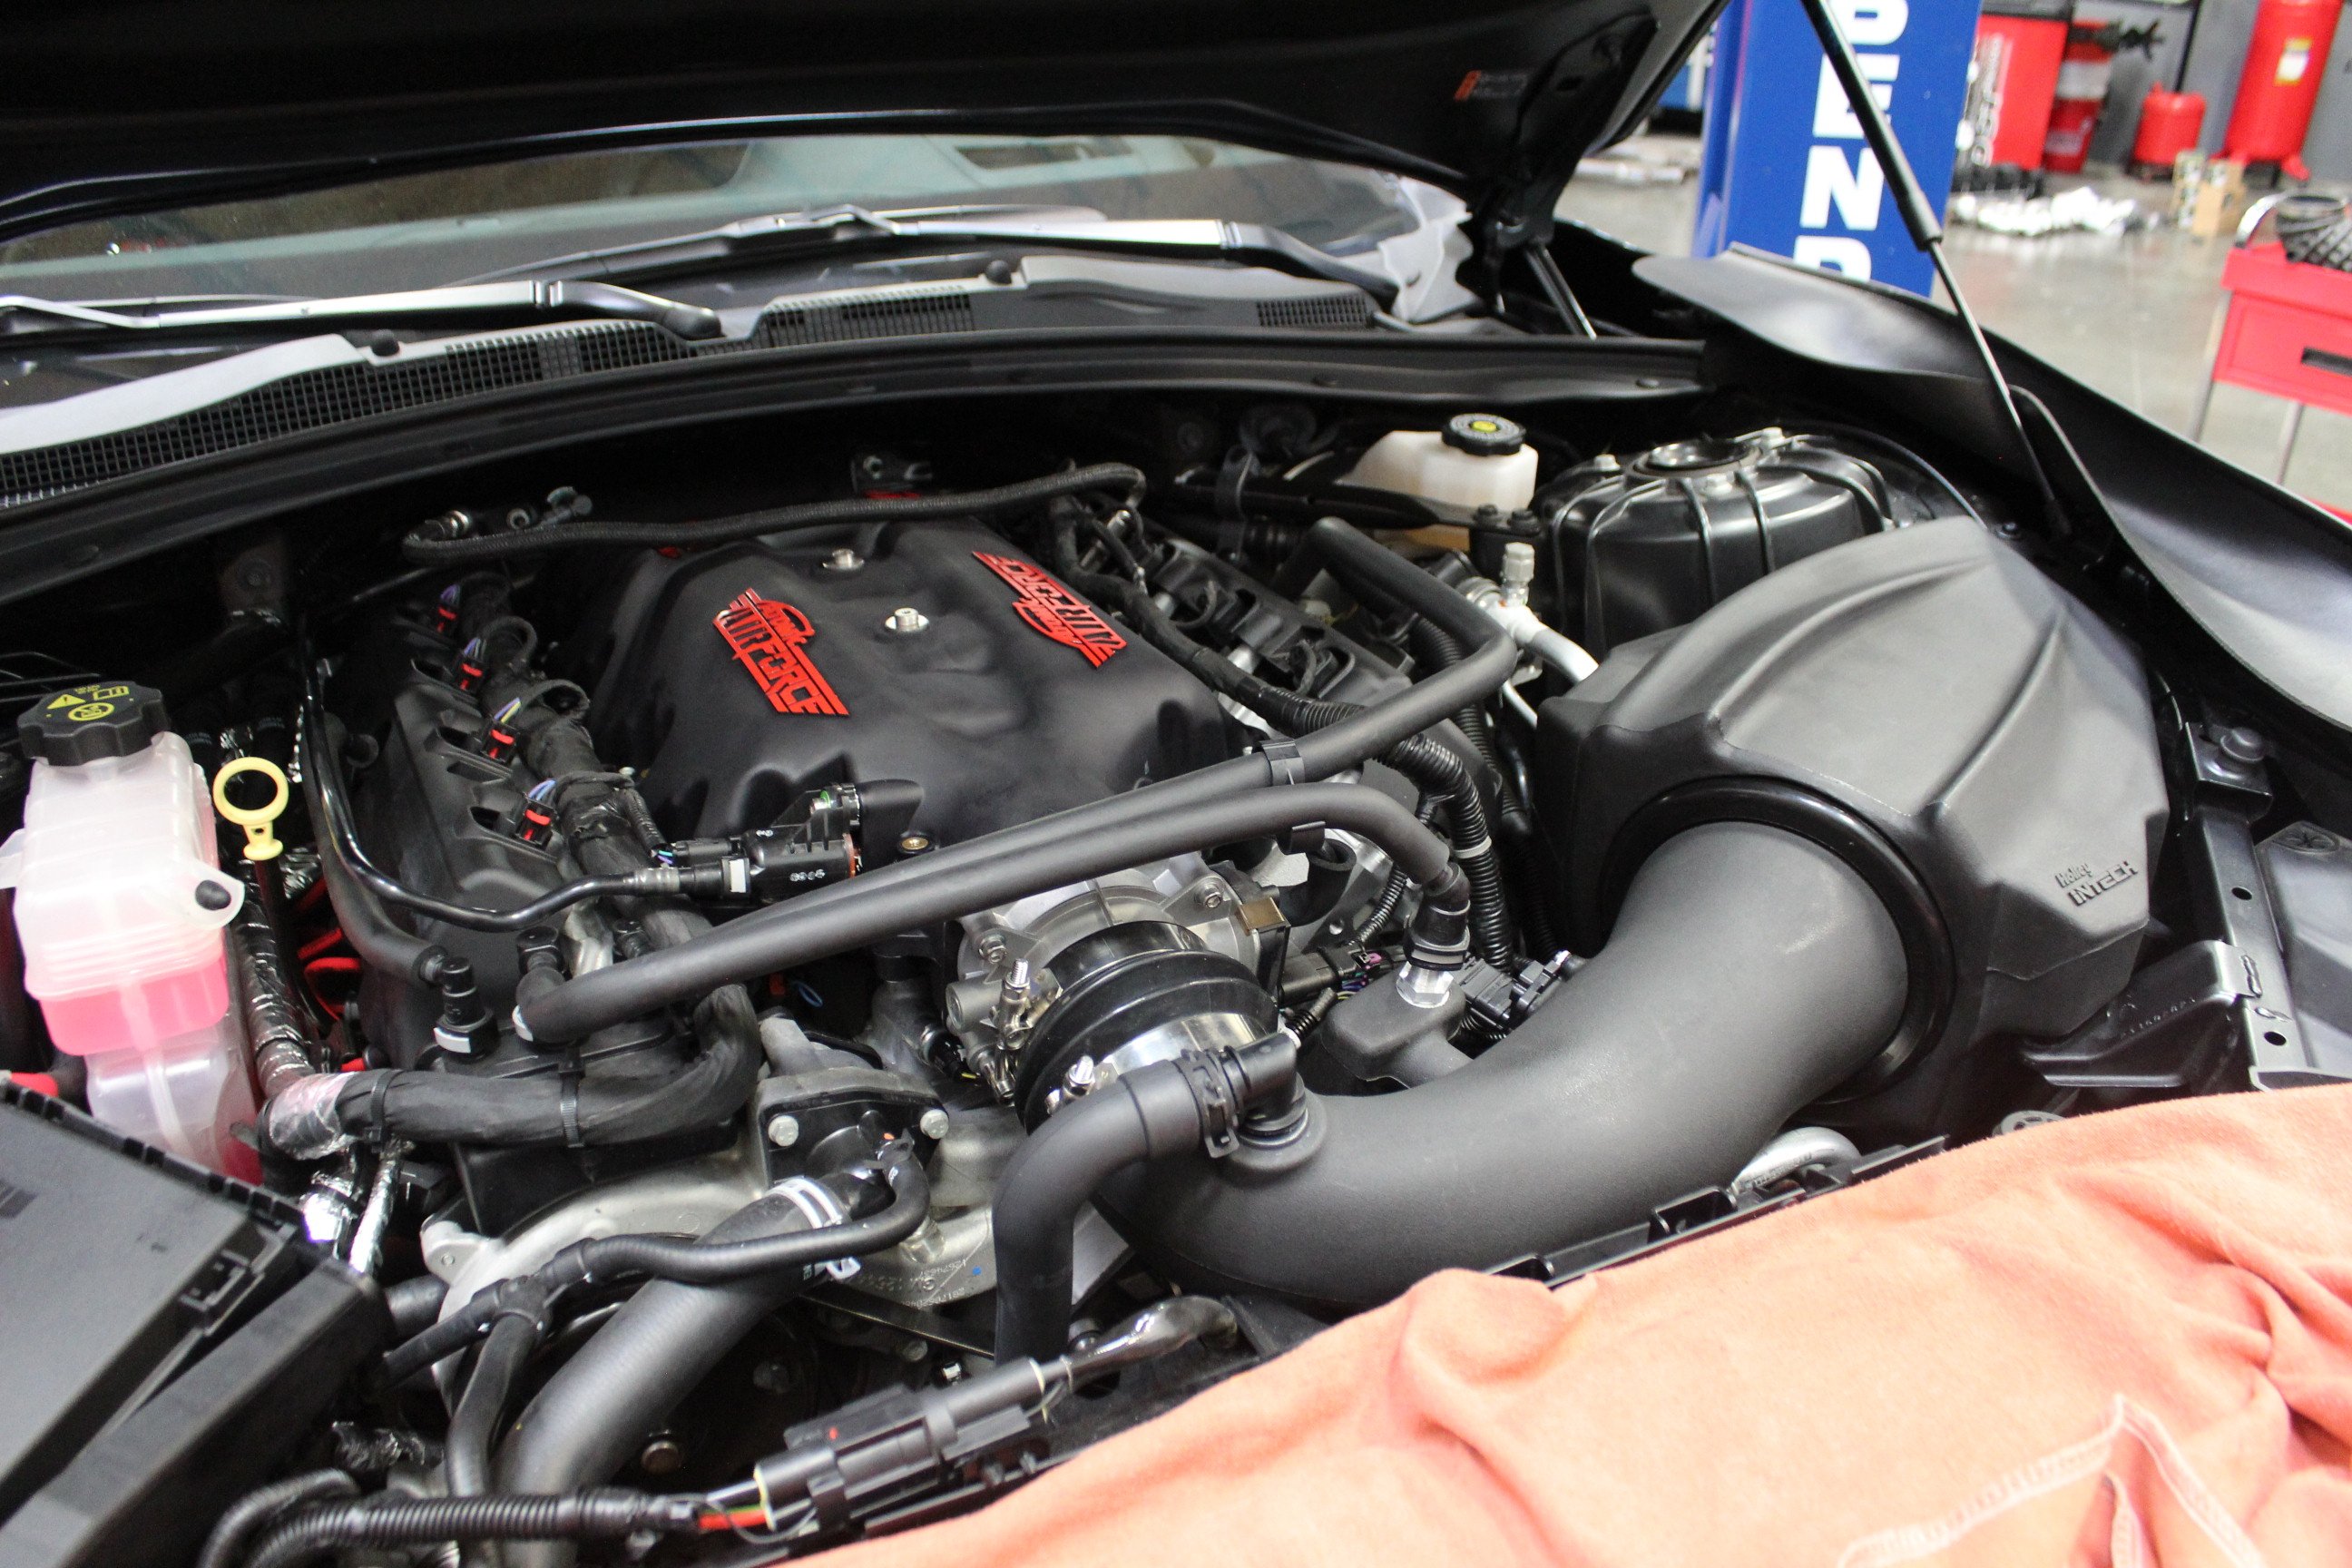
The intake on the Holley iNTECH simply slides together for the most part and only requires a single clamp to install. The stock throttle body mounts to our new MSD Atomic Airforce manifold and combined with the iNTECH intake is the perfect combo for getting our LT1 breathing a bit better.
Before we dive into this one, let’s just say that we’ve done our fair share of header installs and by comparison, this one is a breeze. There are a few special things to note, but if you follow along, it should be a relatively easy install. We first started by disconnecting all of our spark plugs from their corresponding leads. Next, it was simply a matter of loosening all of the exhaust manifold bolts and freeing the rest of the exhaust system.
This is relatively straightforward and can be accomplished with a few extensions and perhaps a universal. On the driver’s side, you’ll need to disconnect the steering linkage to remove the exhaust manifold. Also of note, the oil dipstick bolt needs to be removed to allow the manifolds to come out.
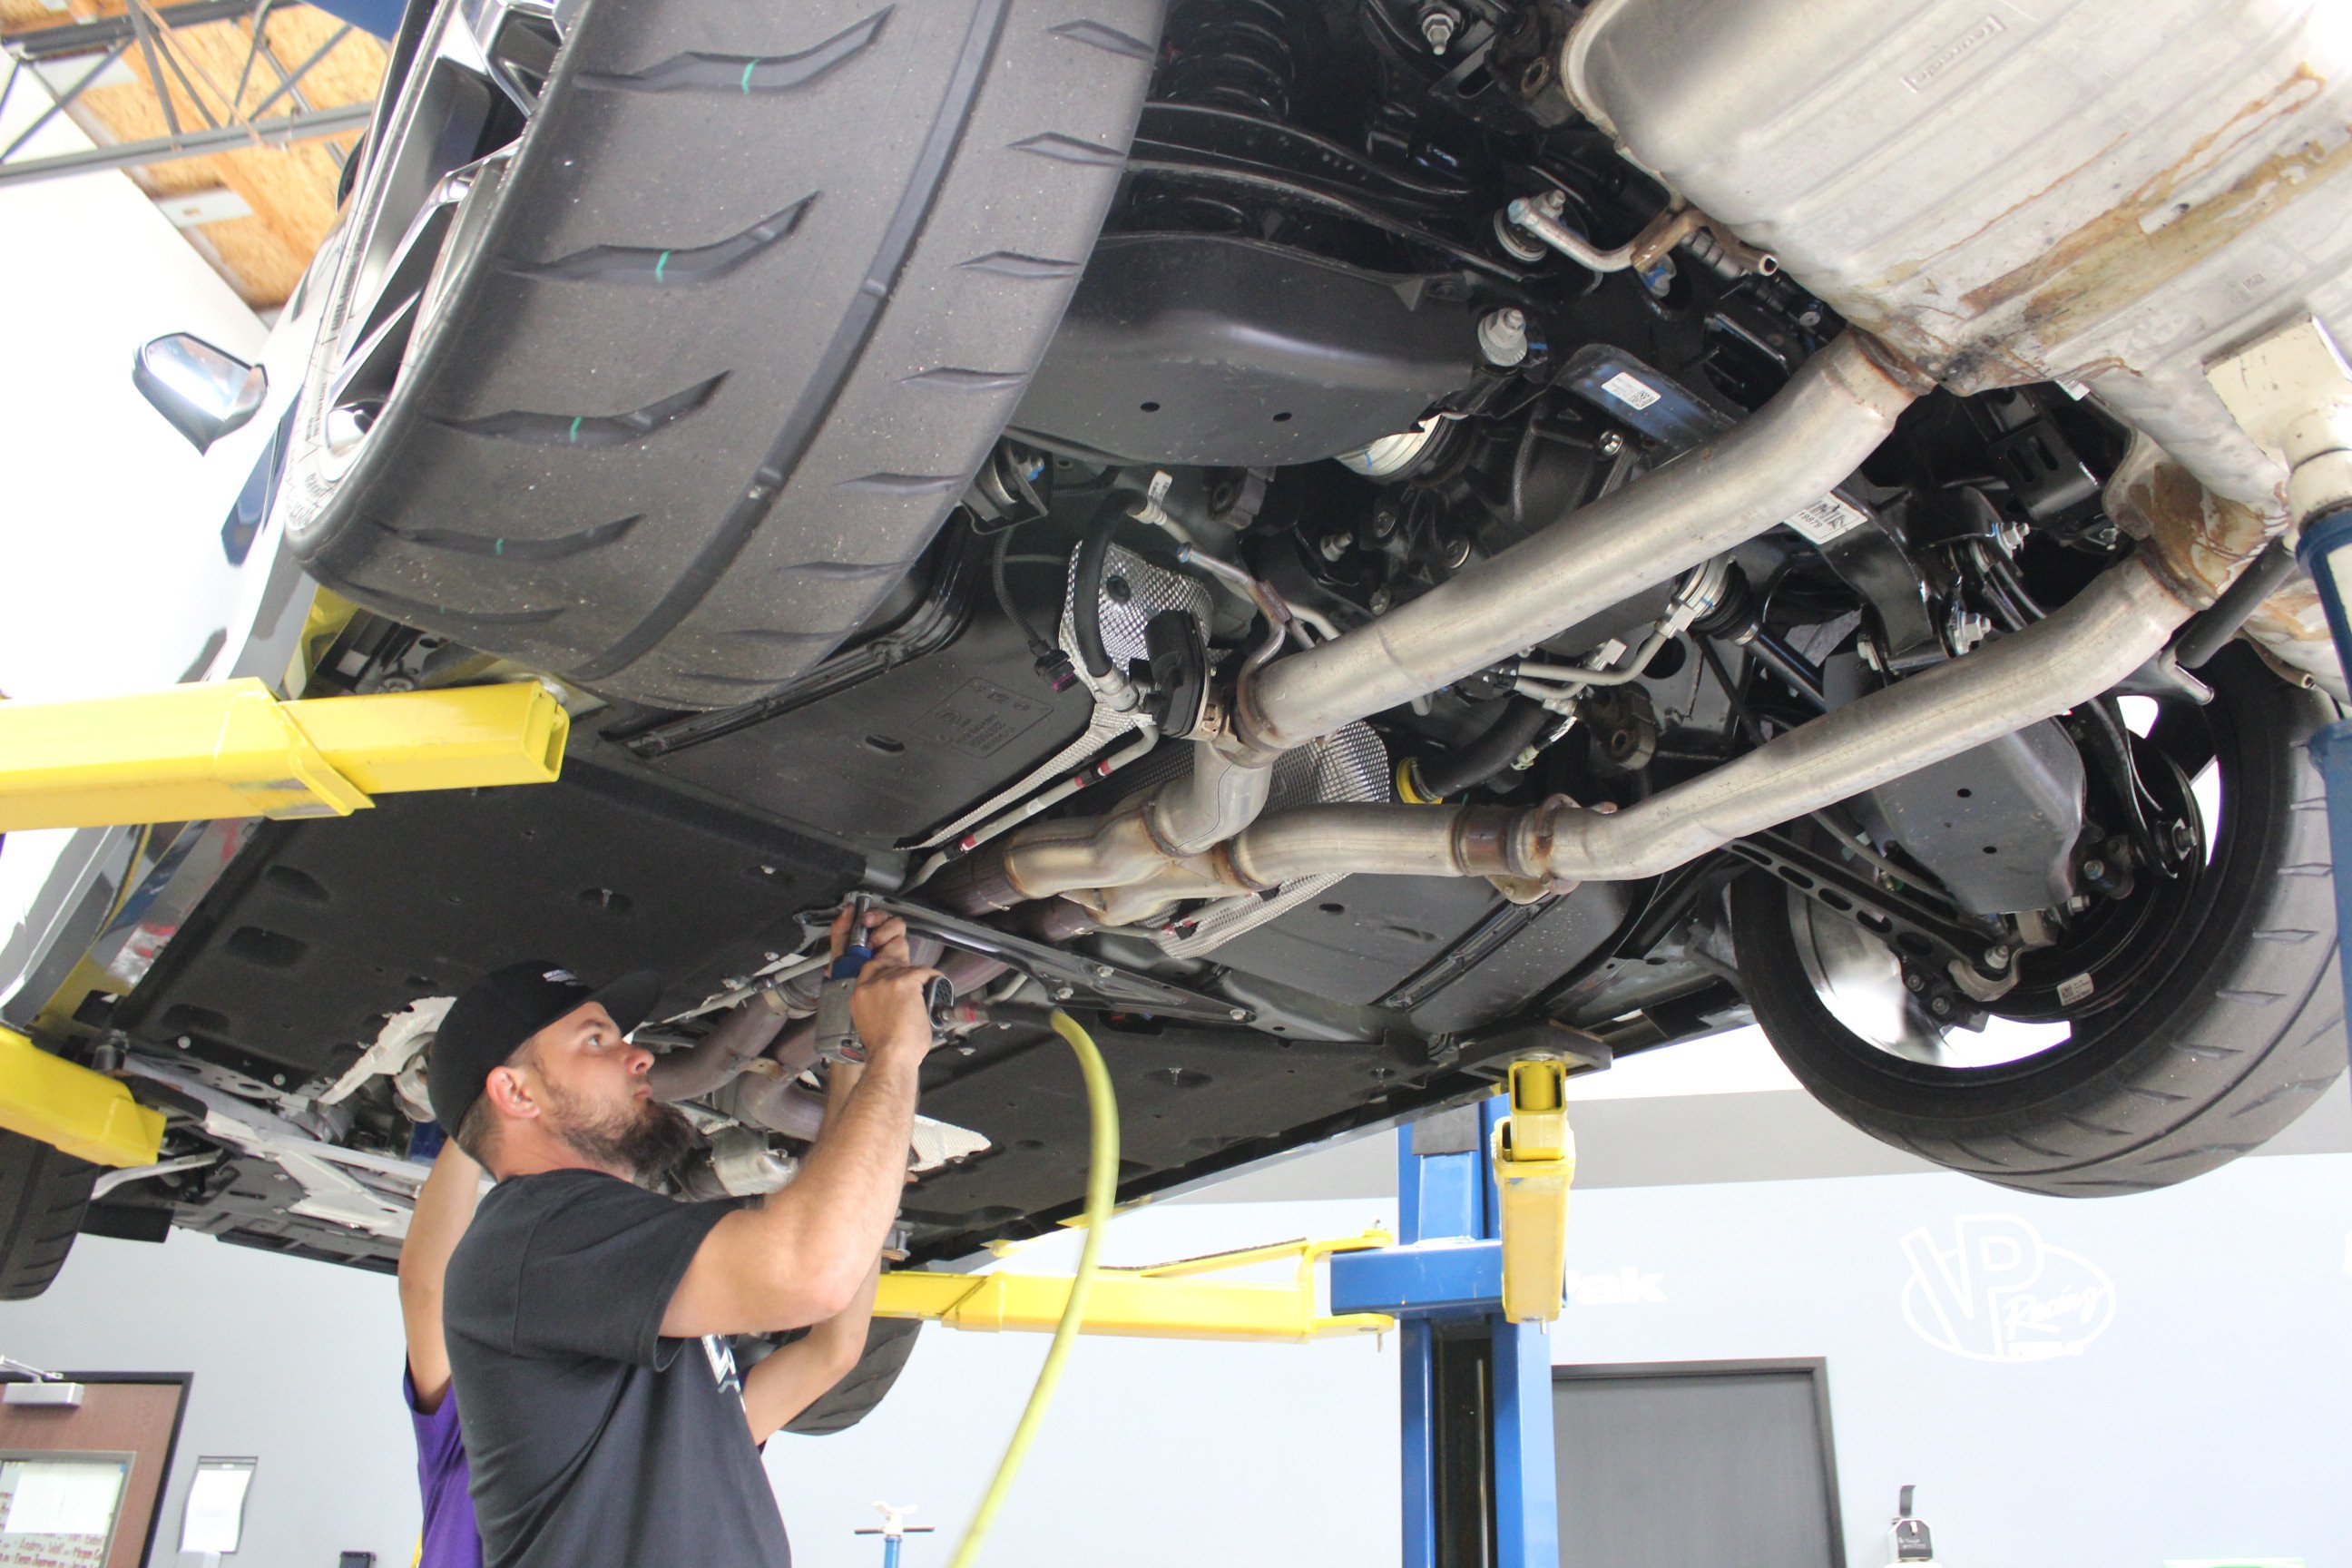


The stock manifolds and NPP exhaust system were fairly easy to remove. As with any header install, taking your time is your best friend. Well, that and universal joints. However, all of the exhaust manifold bolts were easy to access and we were ready to remove the manifolds themselves in around an hour.
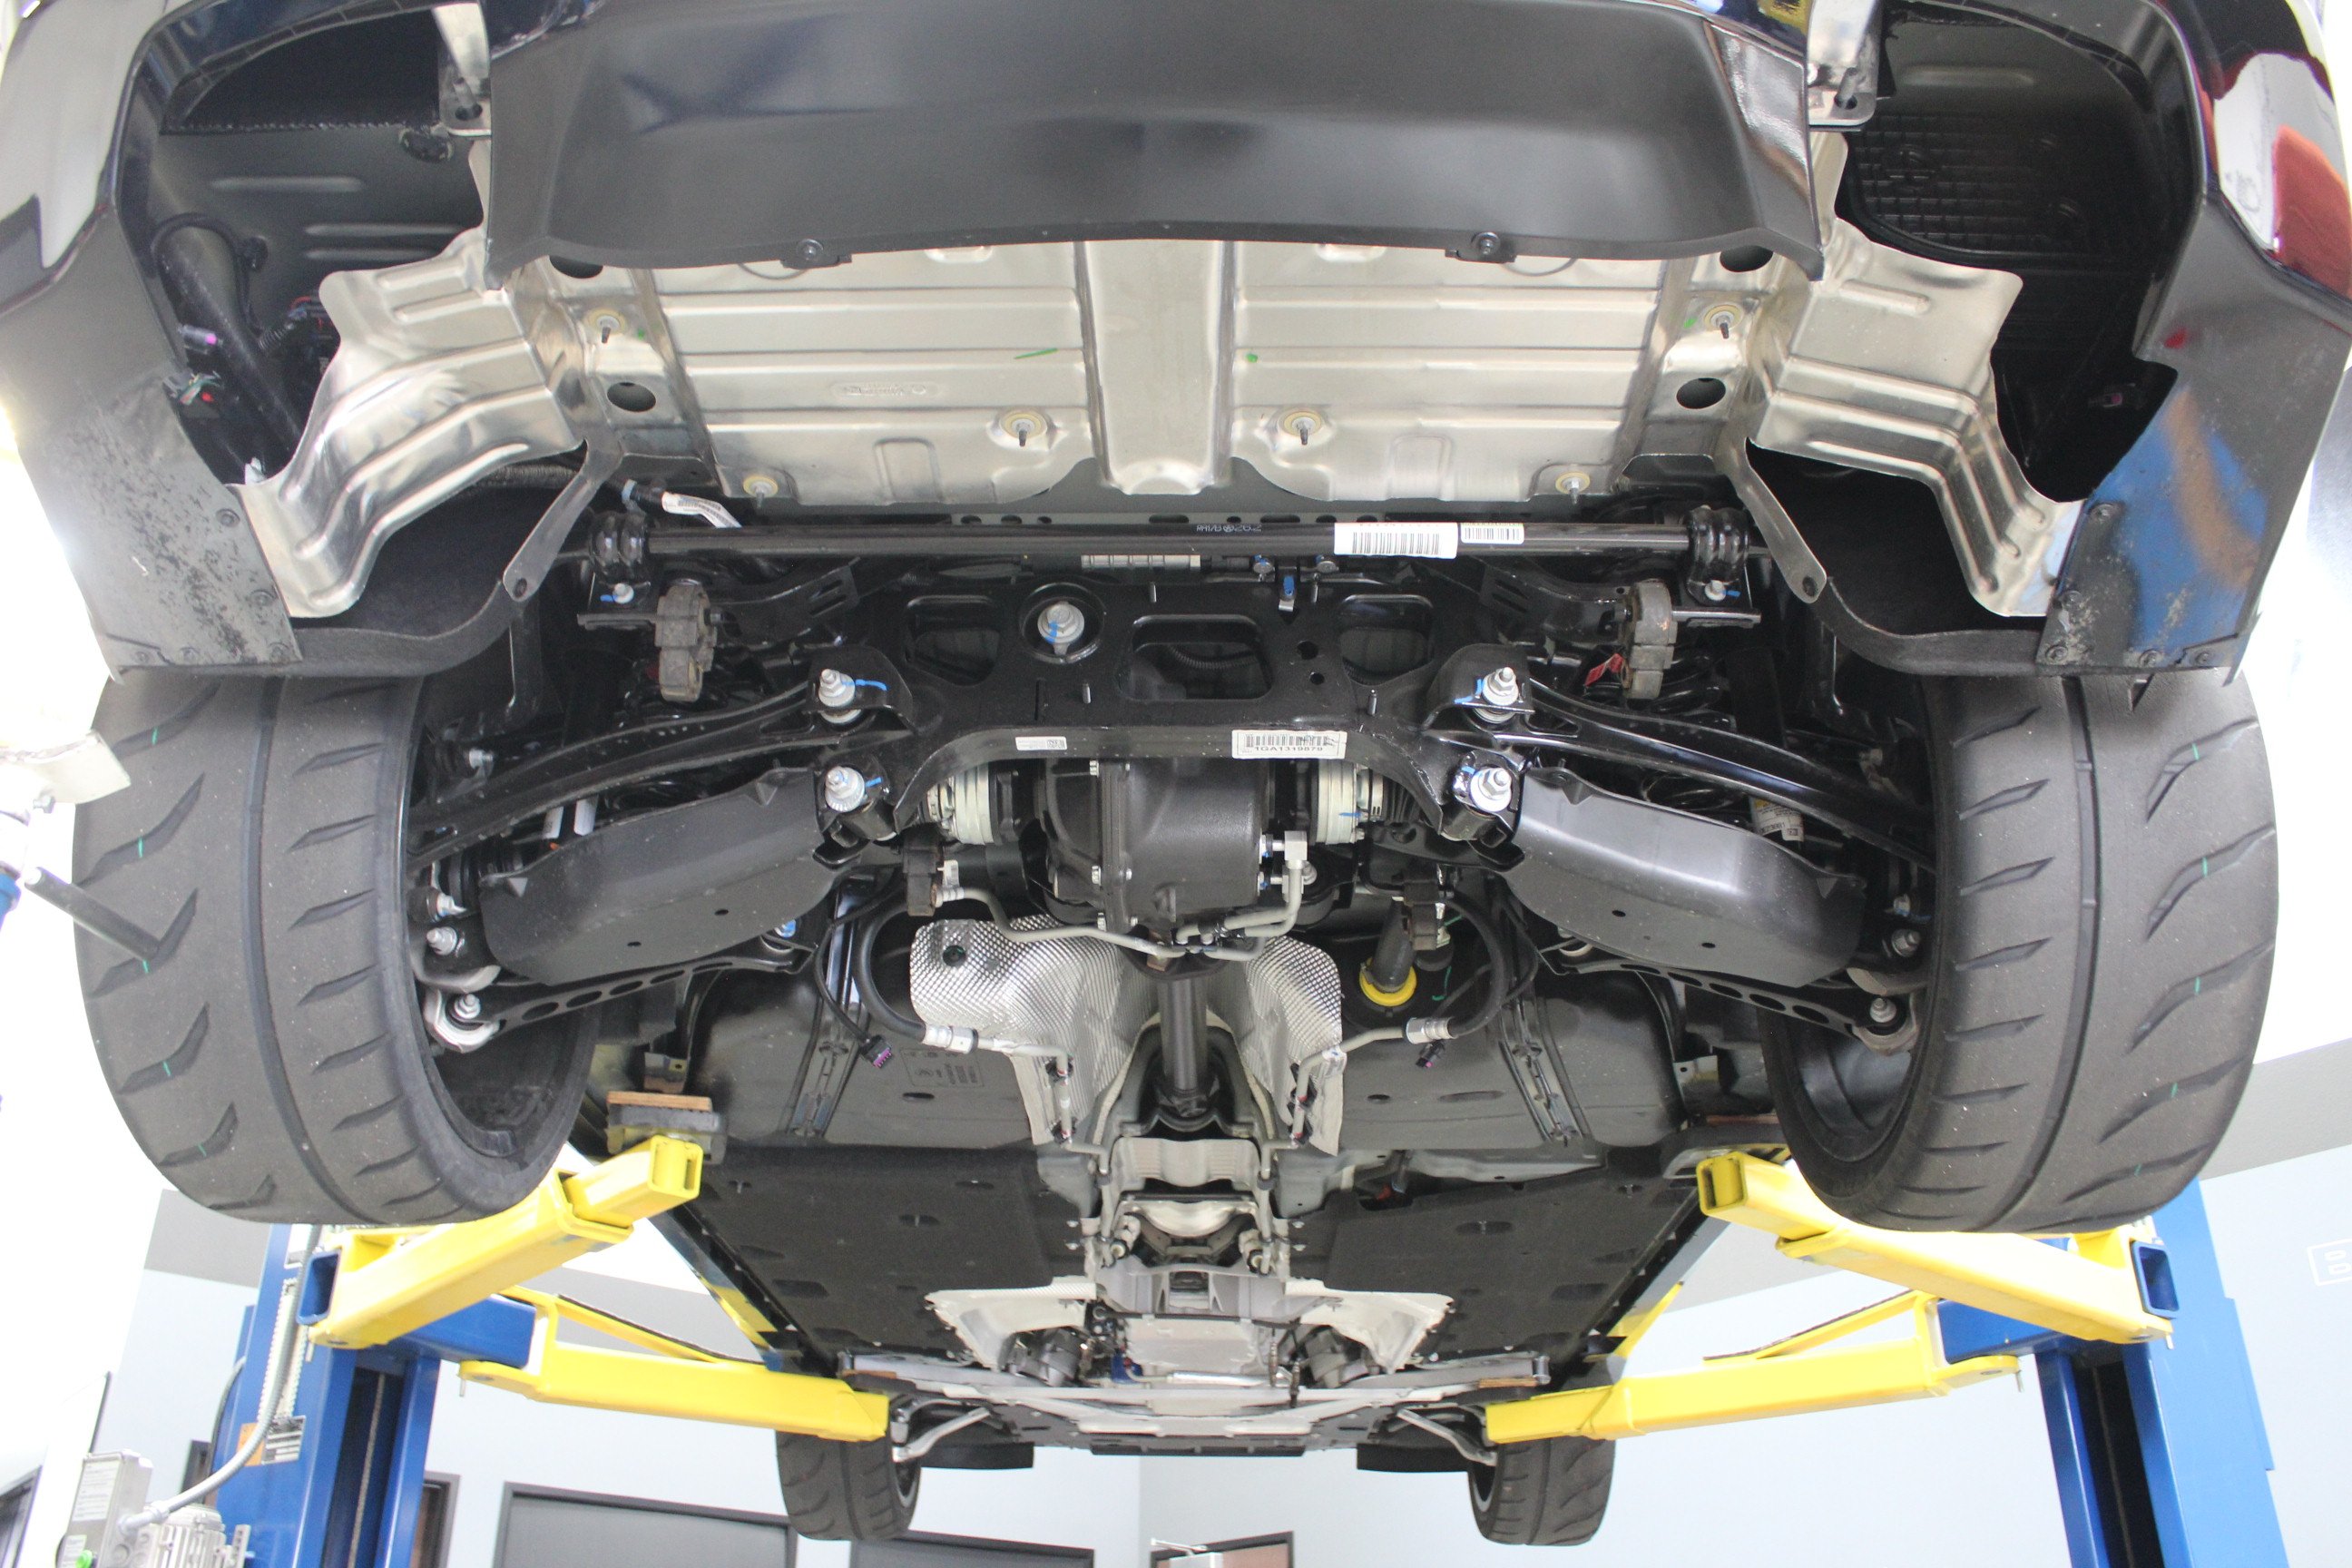
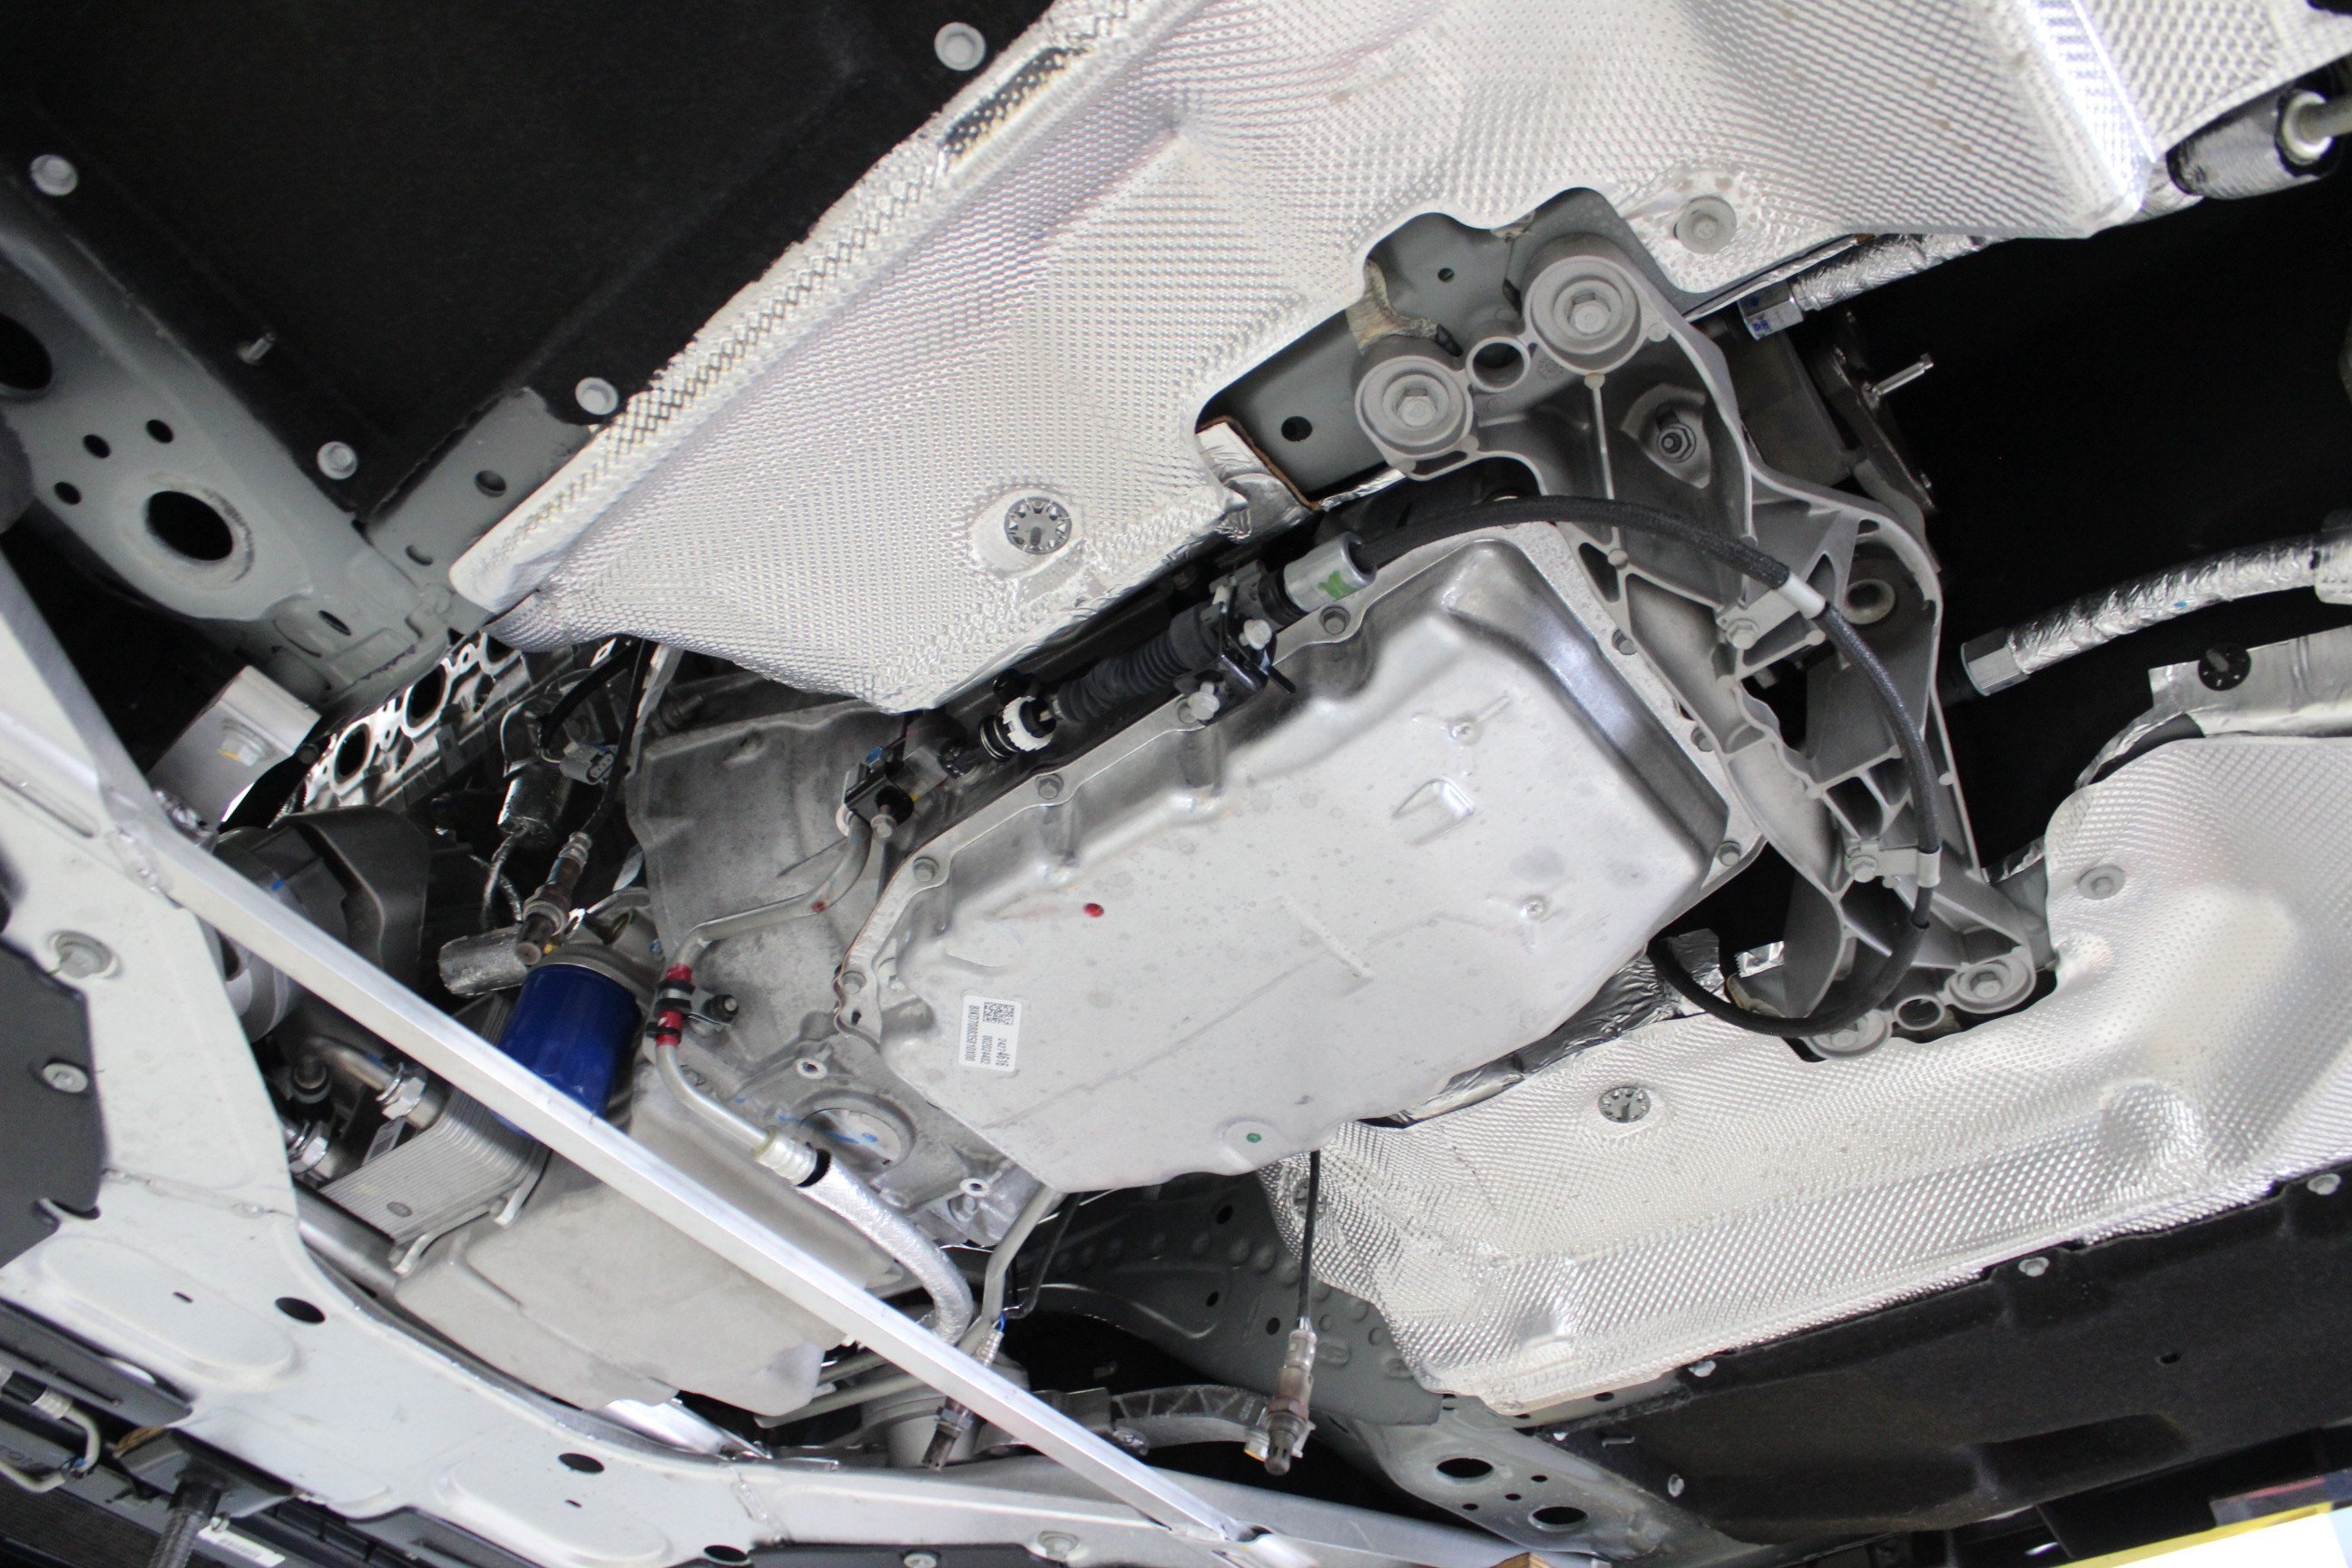
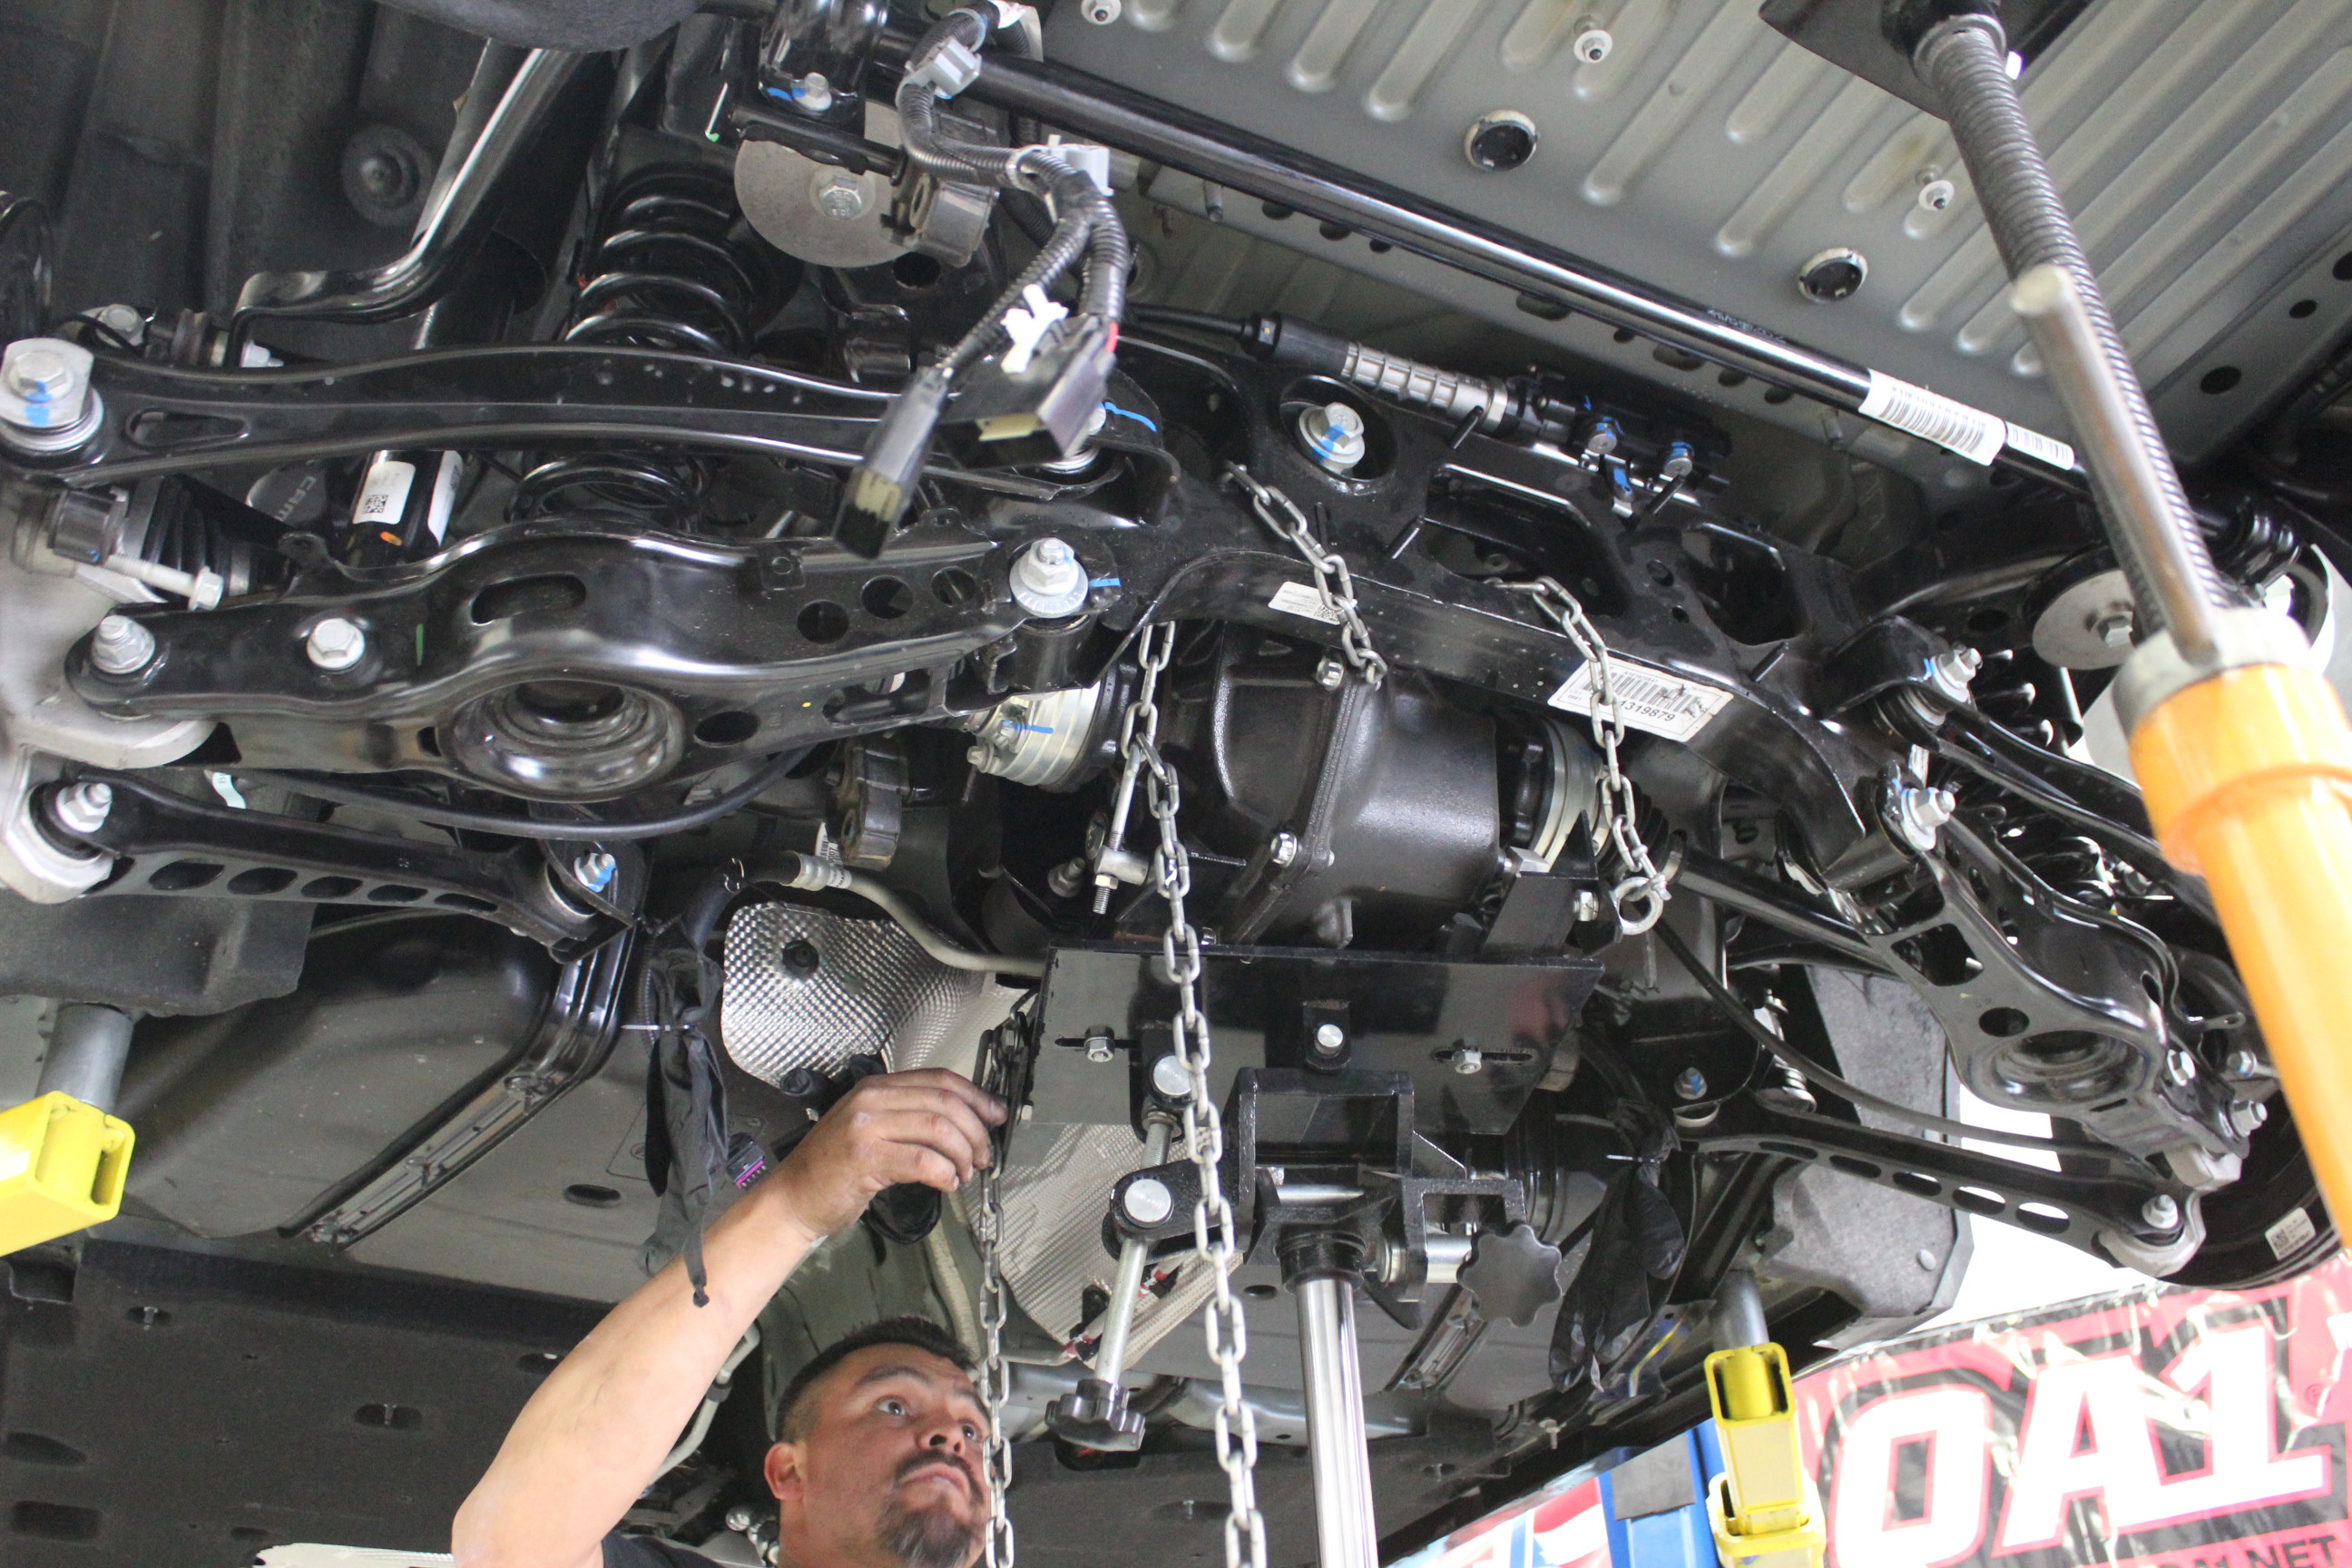
After disconnecting the manifolds from the exhaust, they slip out easily. However, before putting the new headers in, there is still more that needs to come apart. There is a trapezoidal aluminum brace under the car that appears as if it is incorporated into the engine crossmember. However, it is not. After loosening all of the bolts holding it to the car’s frame, it simply swings forward and allows you the space to slide in the passenger side header. With the frame out of the way, it was simply a process of sliding the new headers home, tightening up the bolts, replacing the dipstick, and reconnecting the spark plug wires.
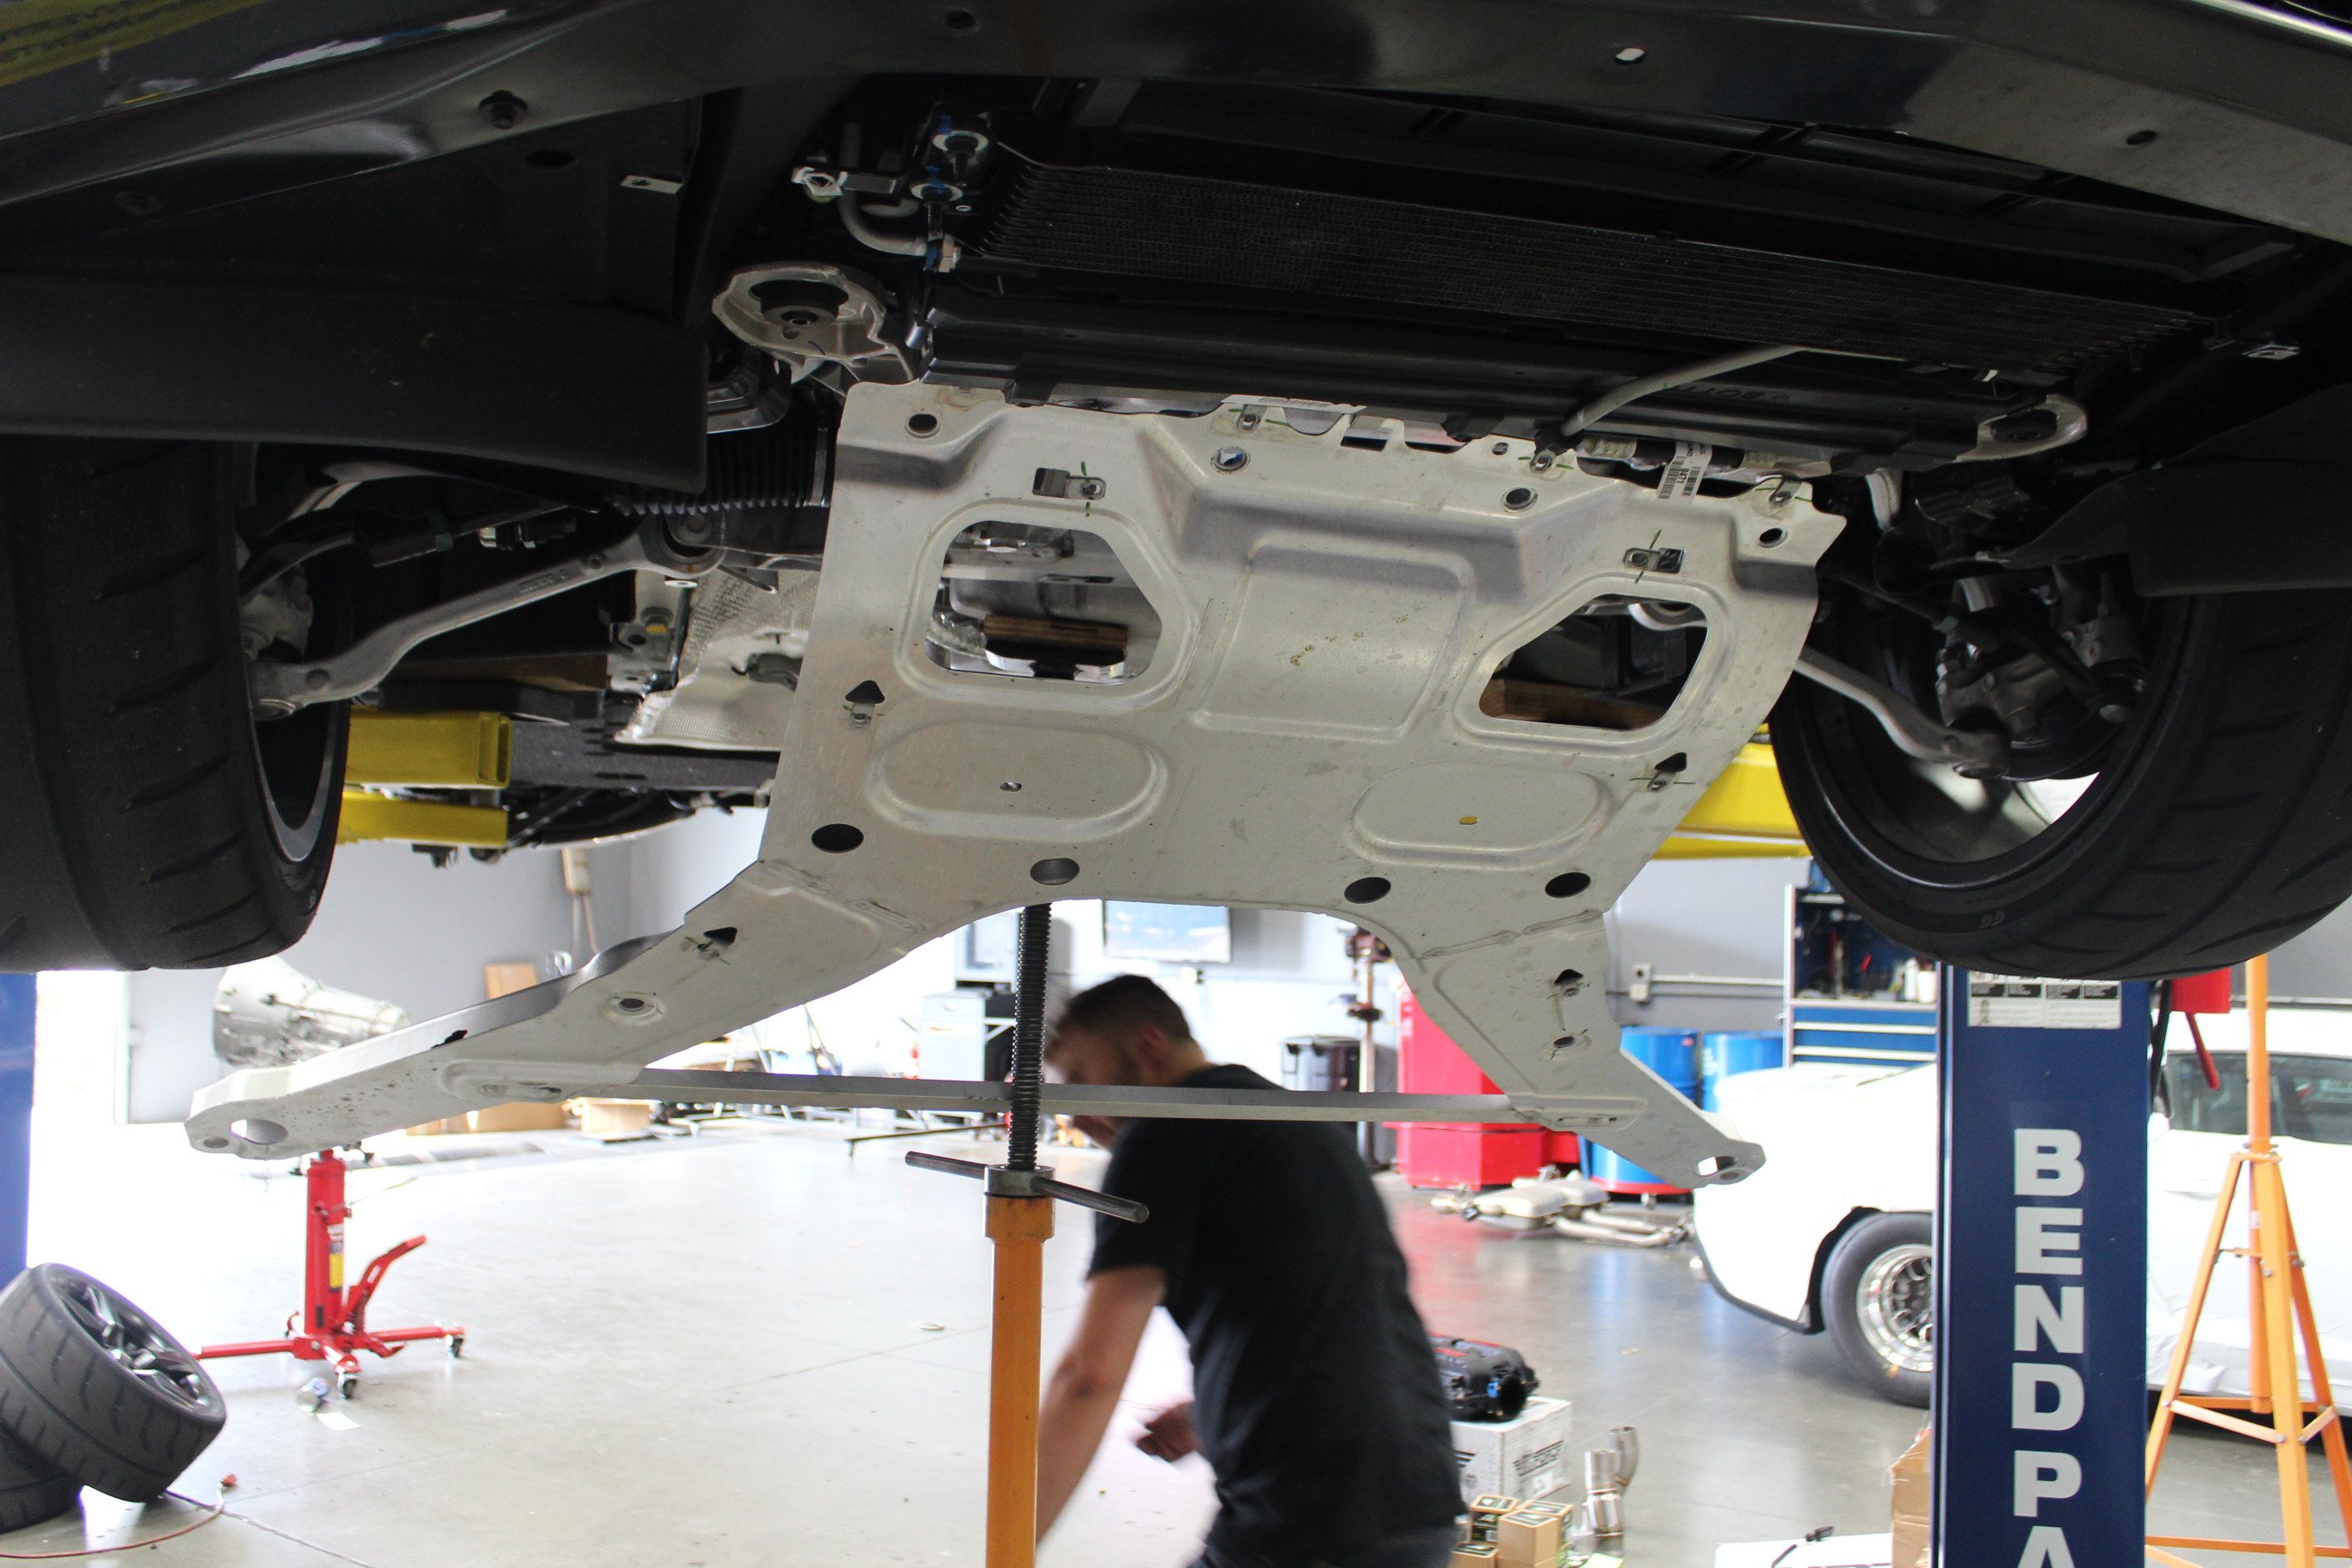
As you can see in the above picture (left), the aluminum A-frame bolted to the crossmember is removable and simply swings forward allowing enough room to install the passenger side header. With it in the way, the installation would be virtually impossible. With it out of the way, both headers slide in from the bottom.
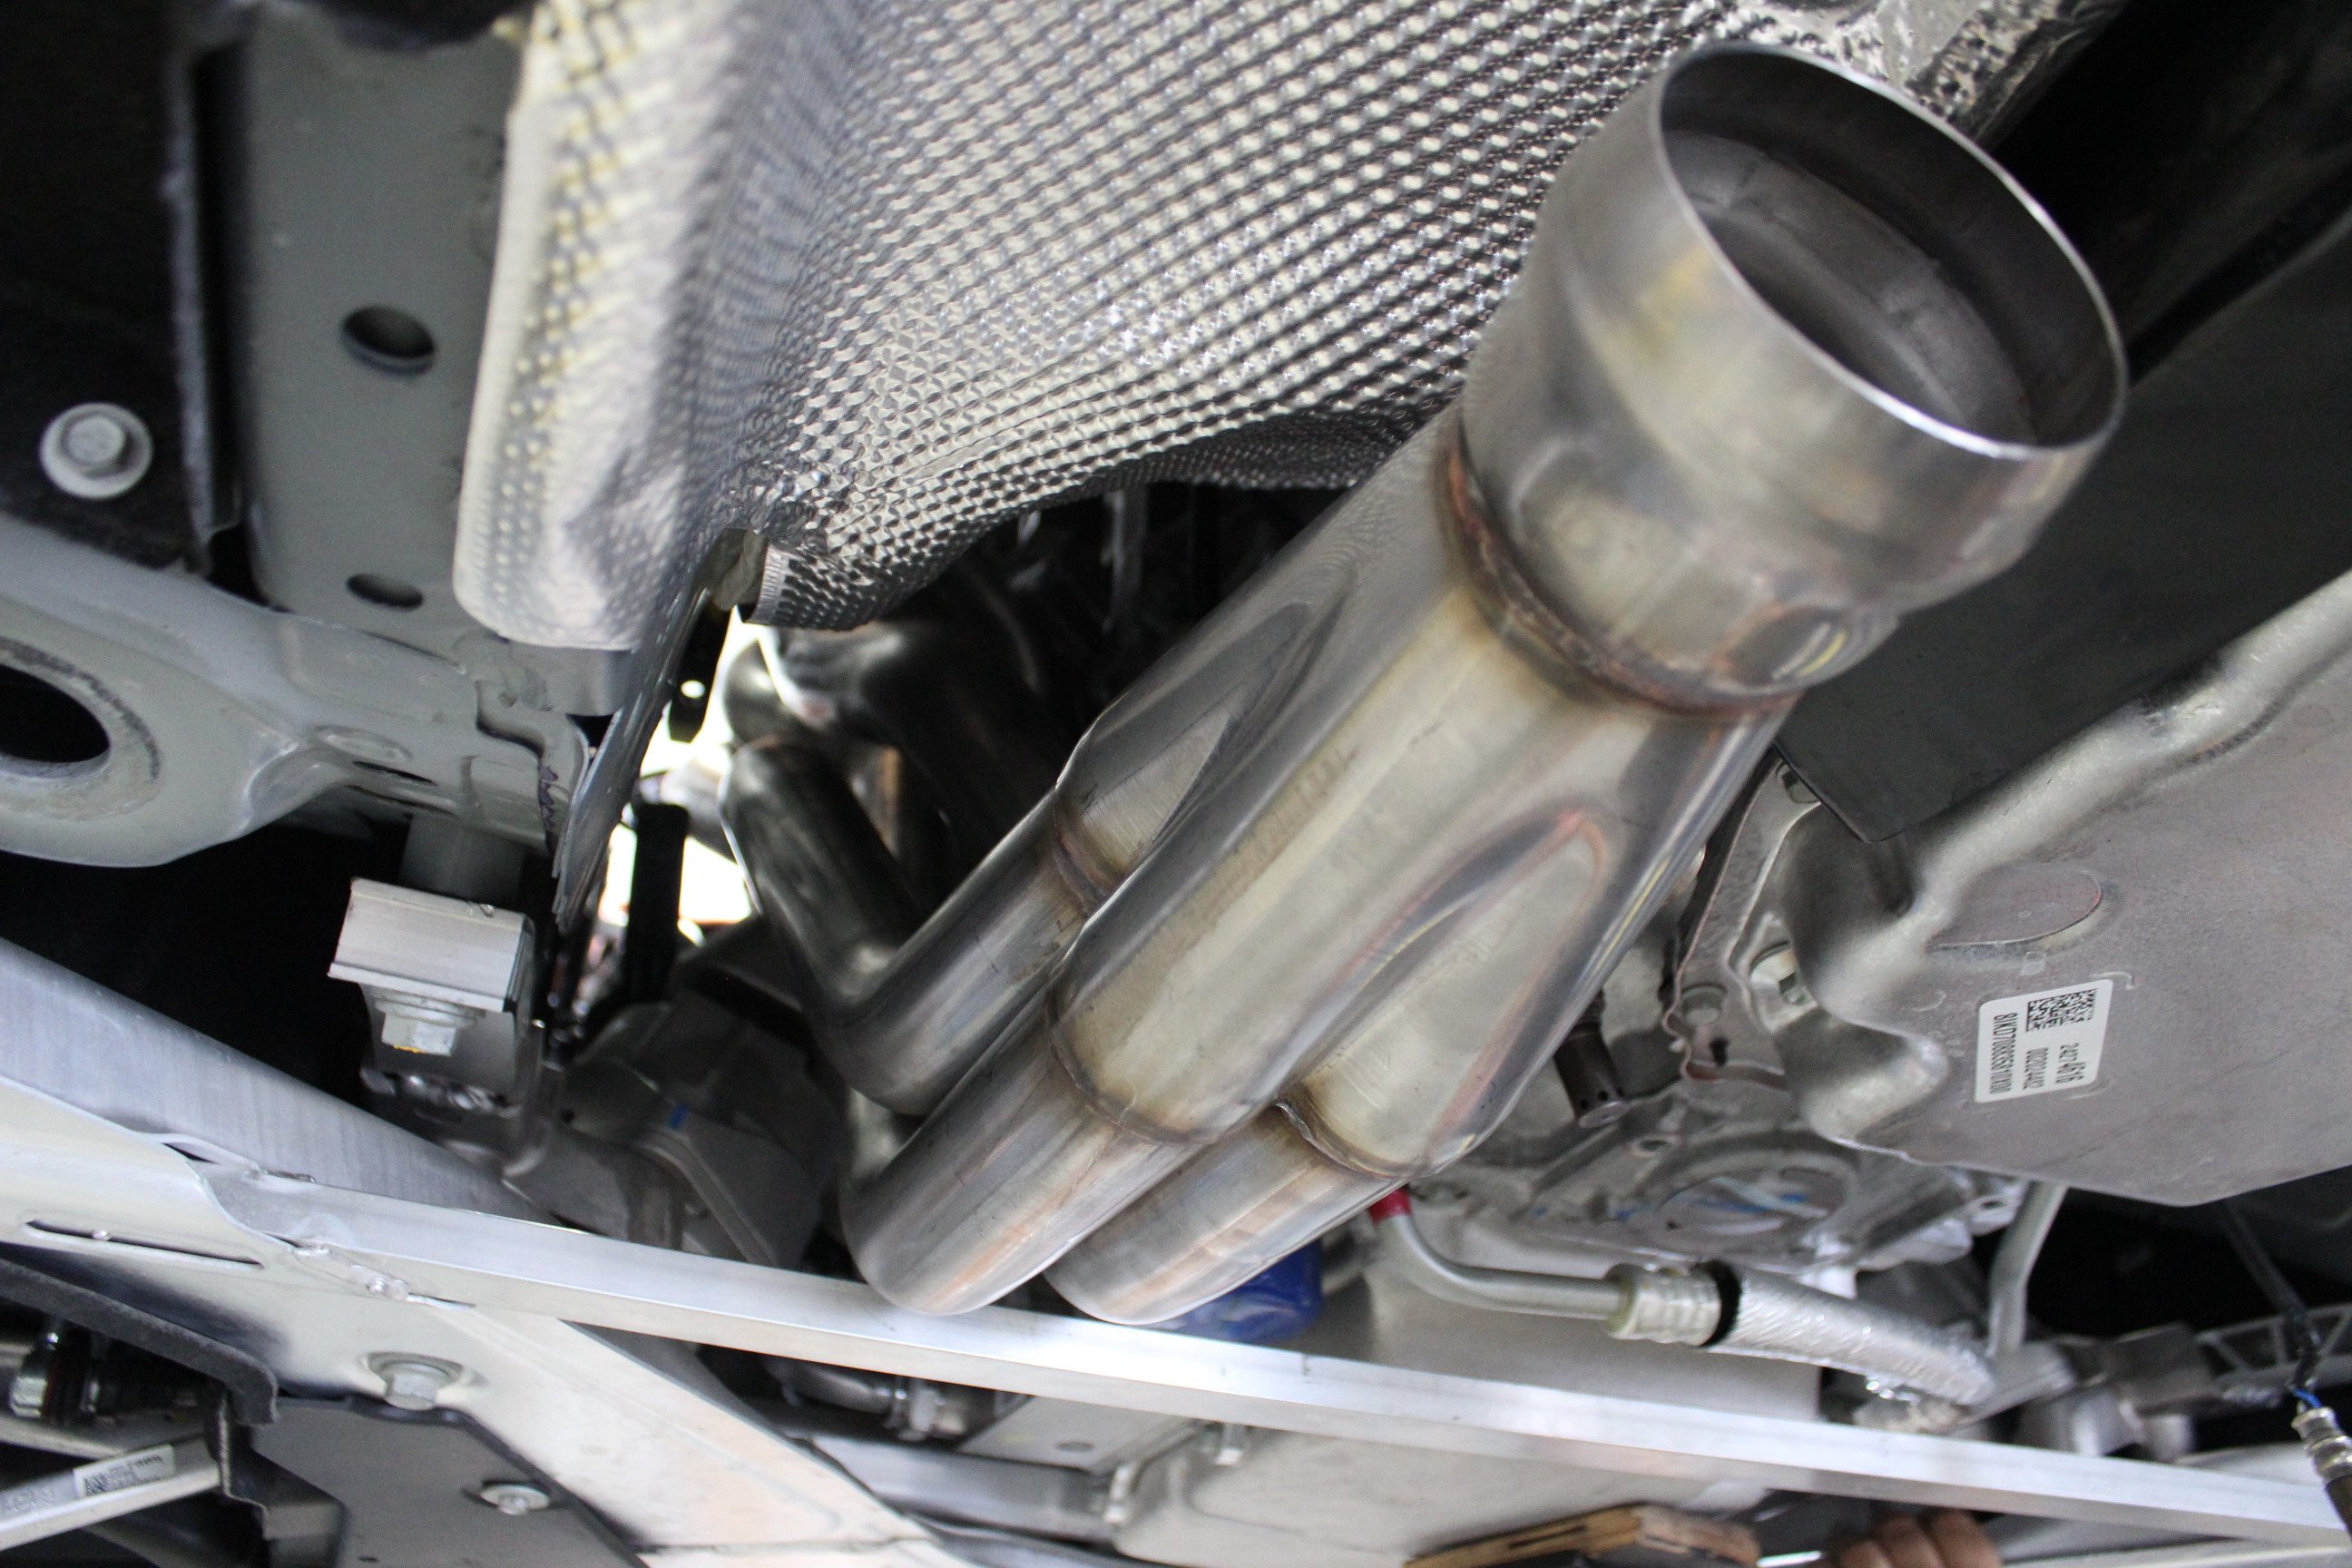
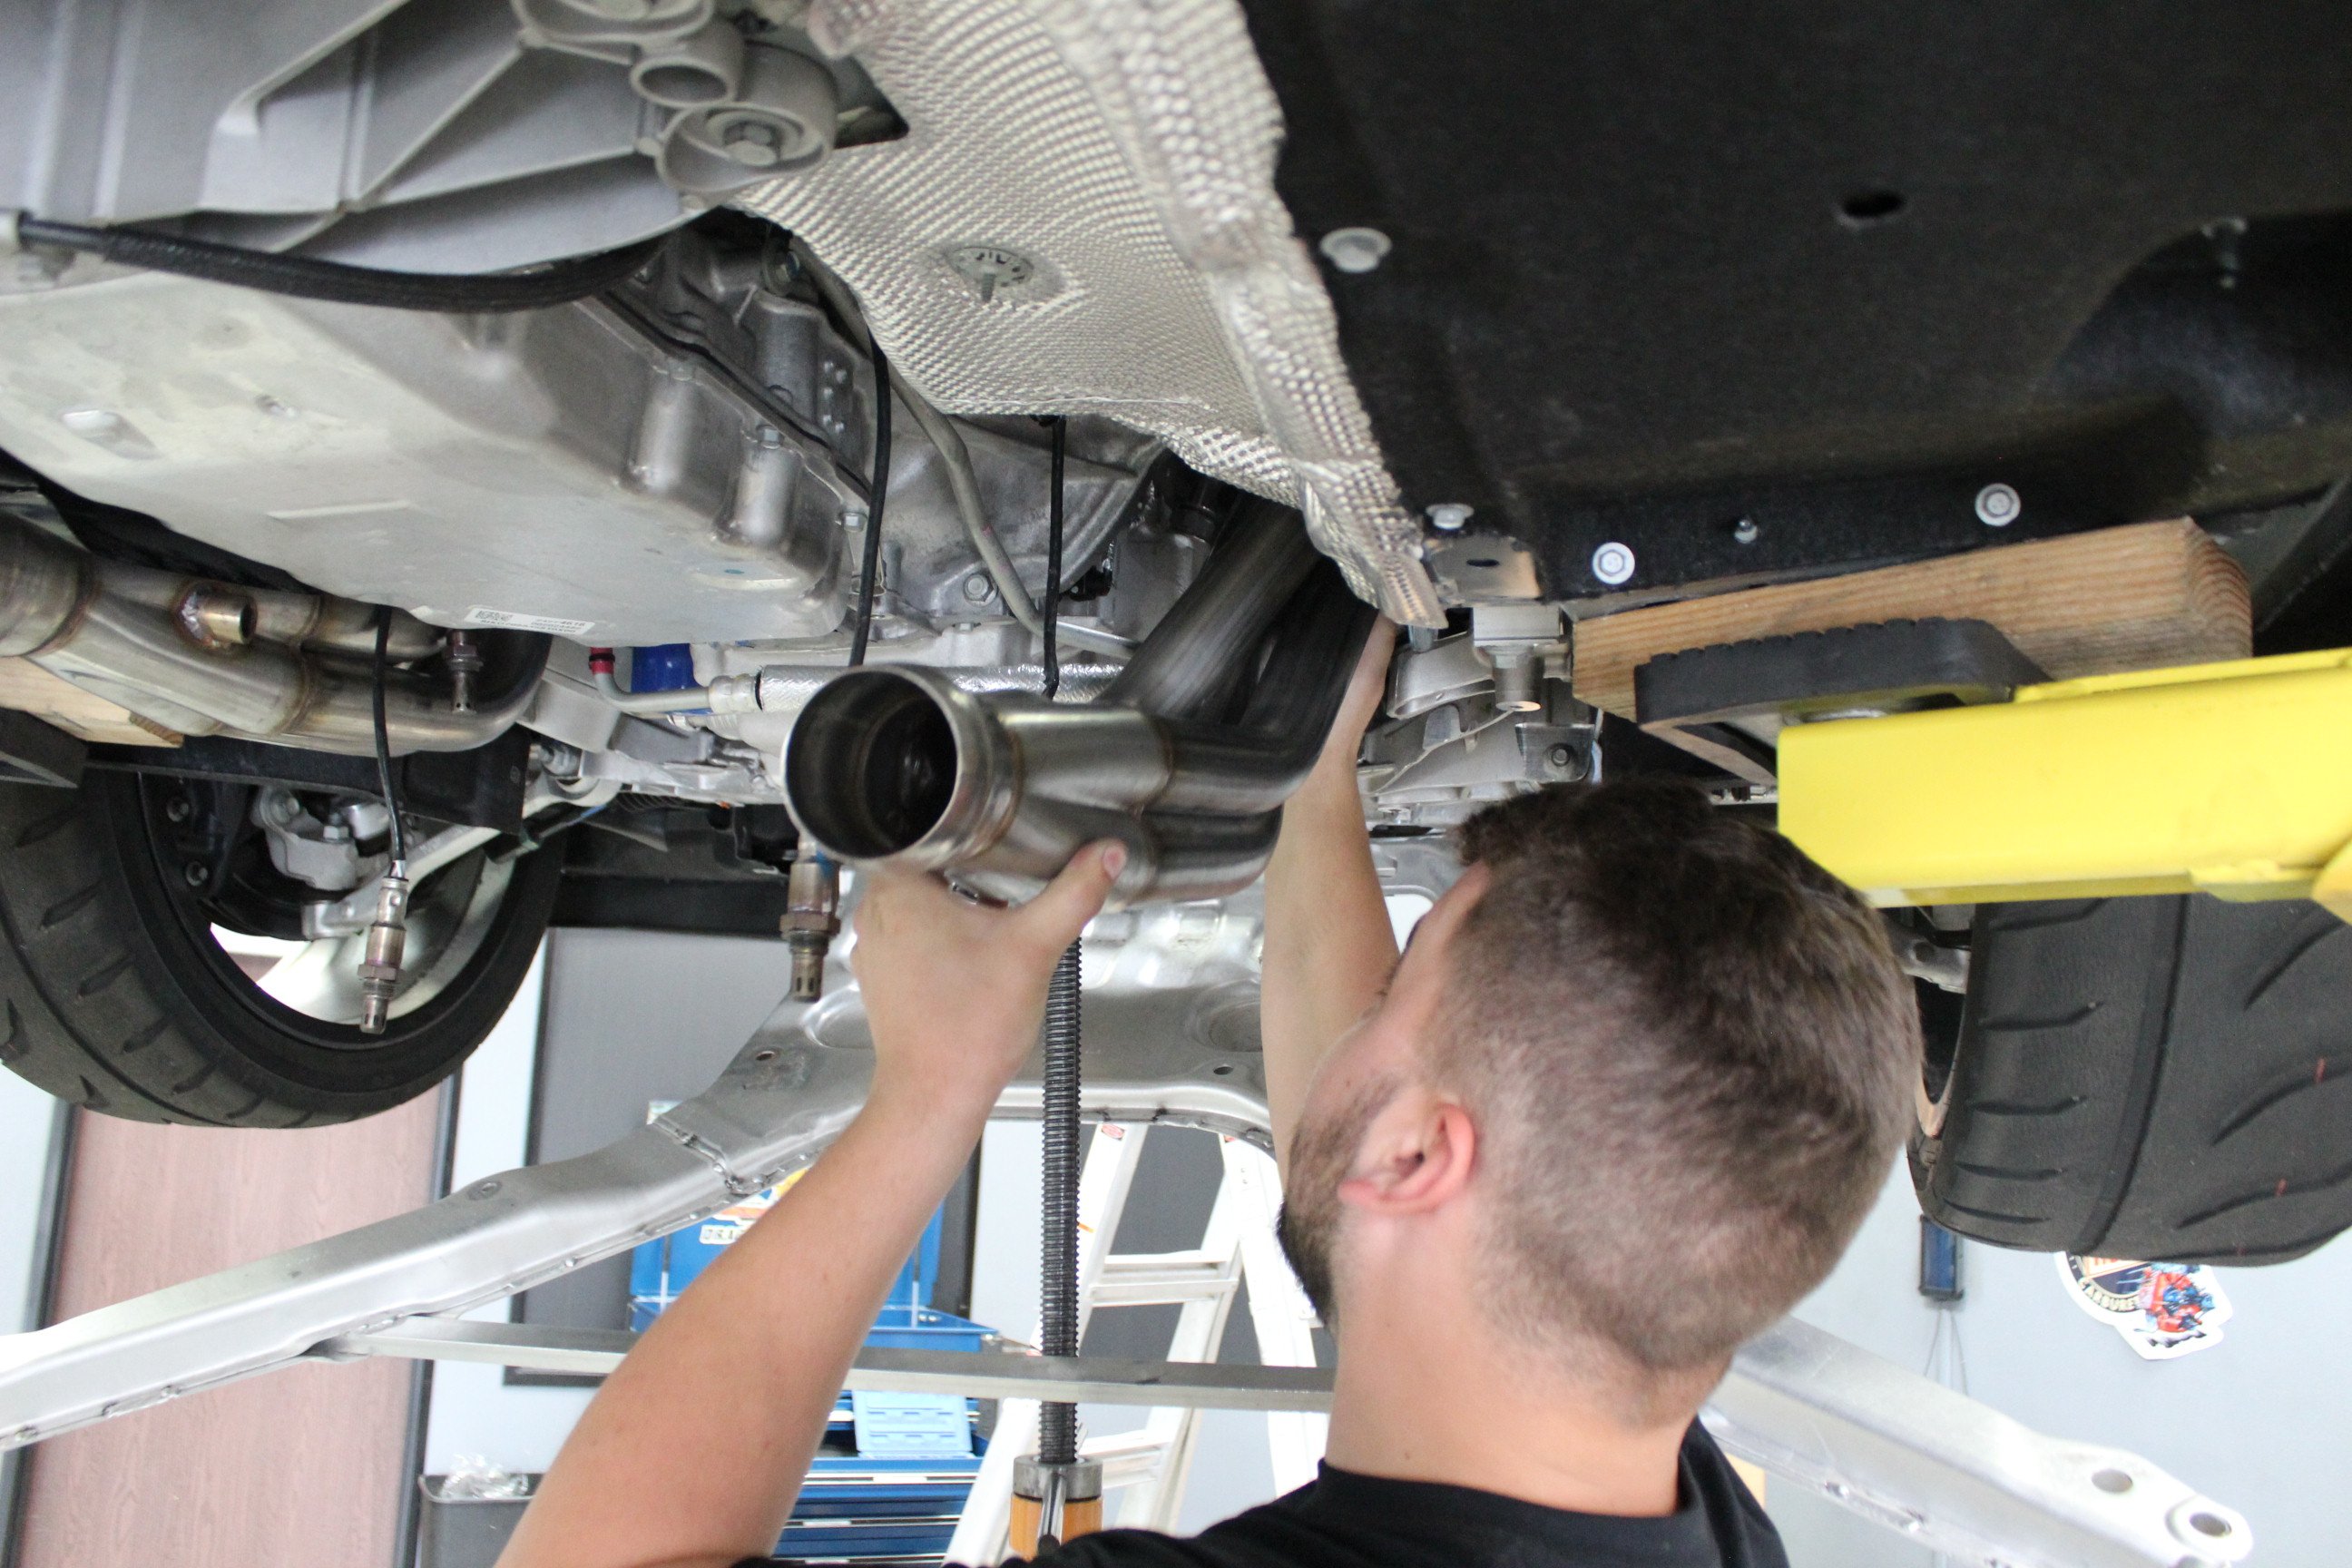
We mocked up where the new cats would sit with the stock exhaust and simply cut off the old ones. We were pretty accurate as the new converters simply slipped right into place. We did have to finagle them to figure out which angles they would work best, but once we rotated them around several times, we got them into place. Only one oxygen sensor extension was required to make the oxygen sensor work and it is provided with the headers.
One of the most important parts of installing Texas-Speed’s headers is that you use the provided button-head bolt in the steering linkage. It is taped to the collector of one of the headers and will save you a lot of headache down the road (we found out the hard way). With the stock bolt in the linkage, it appears that it will clear the headers no problem. However, when you are pushing the car through a corner, the engine shifts and binds up on the stock bolt. Be sure you use the button head bolt in the linkage which eliminates this problem.
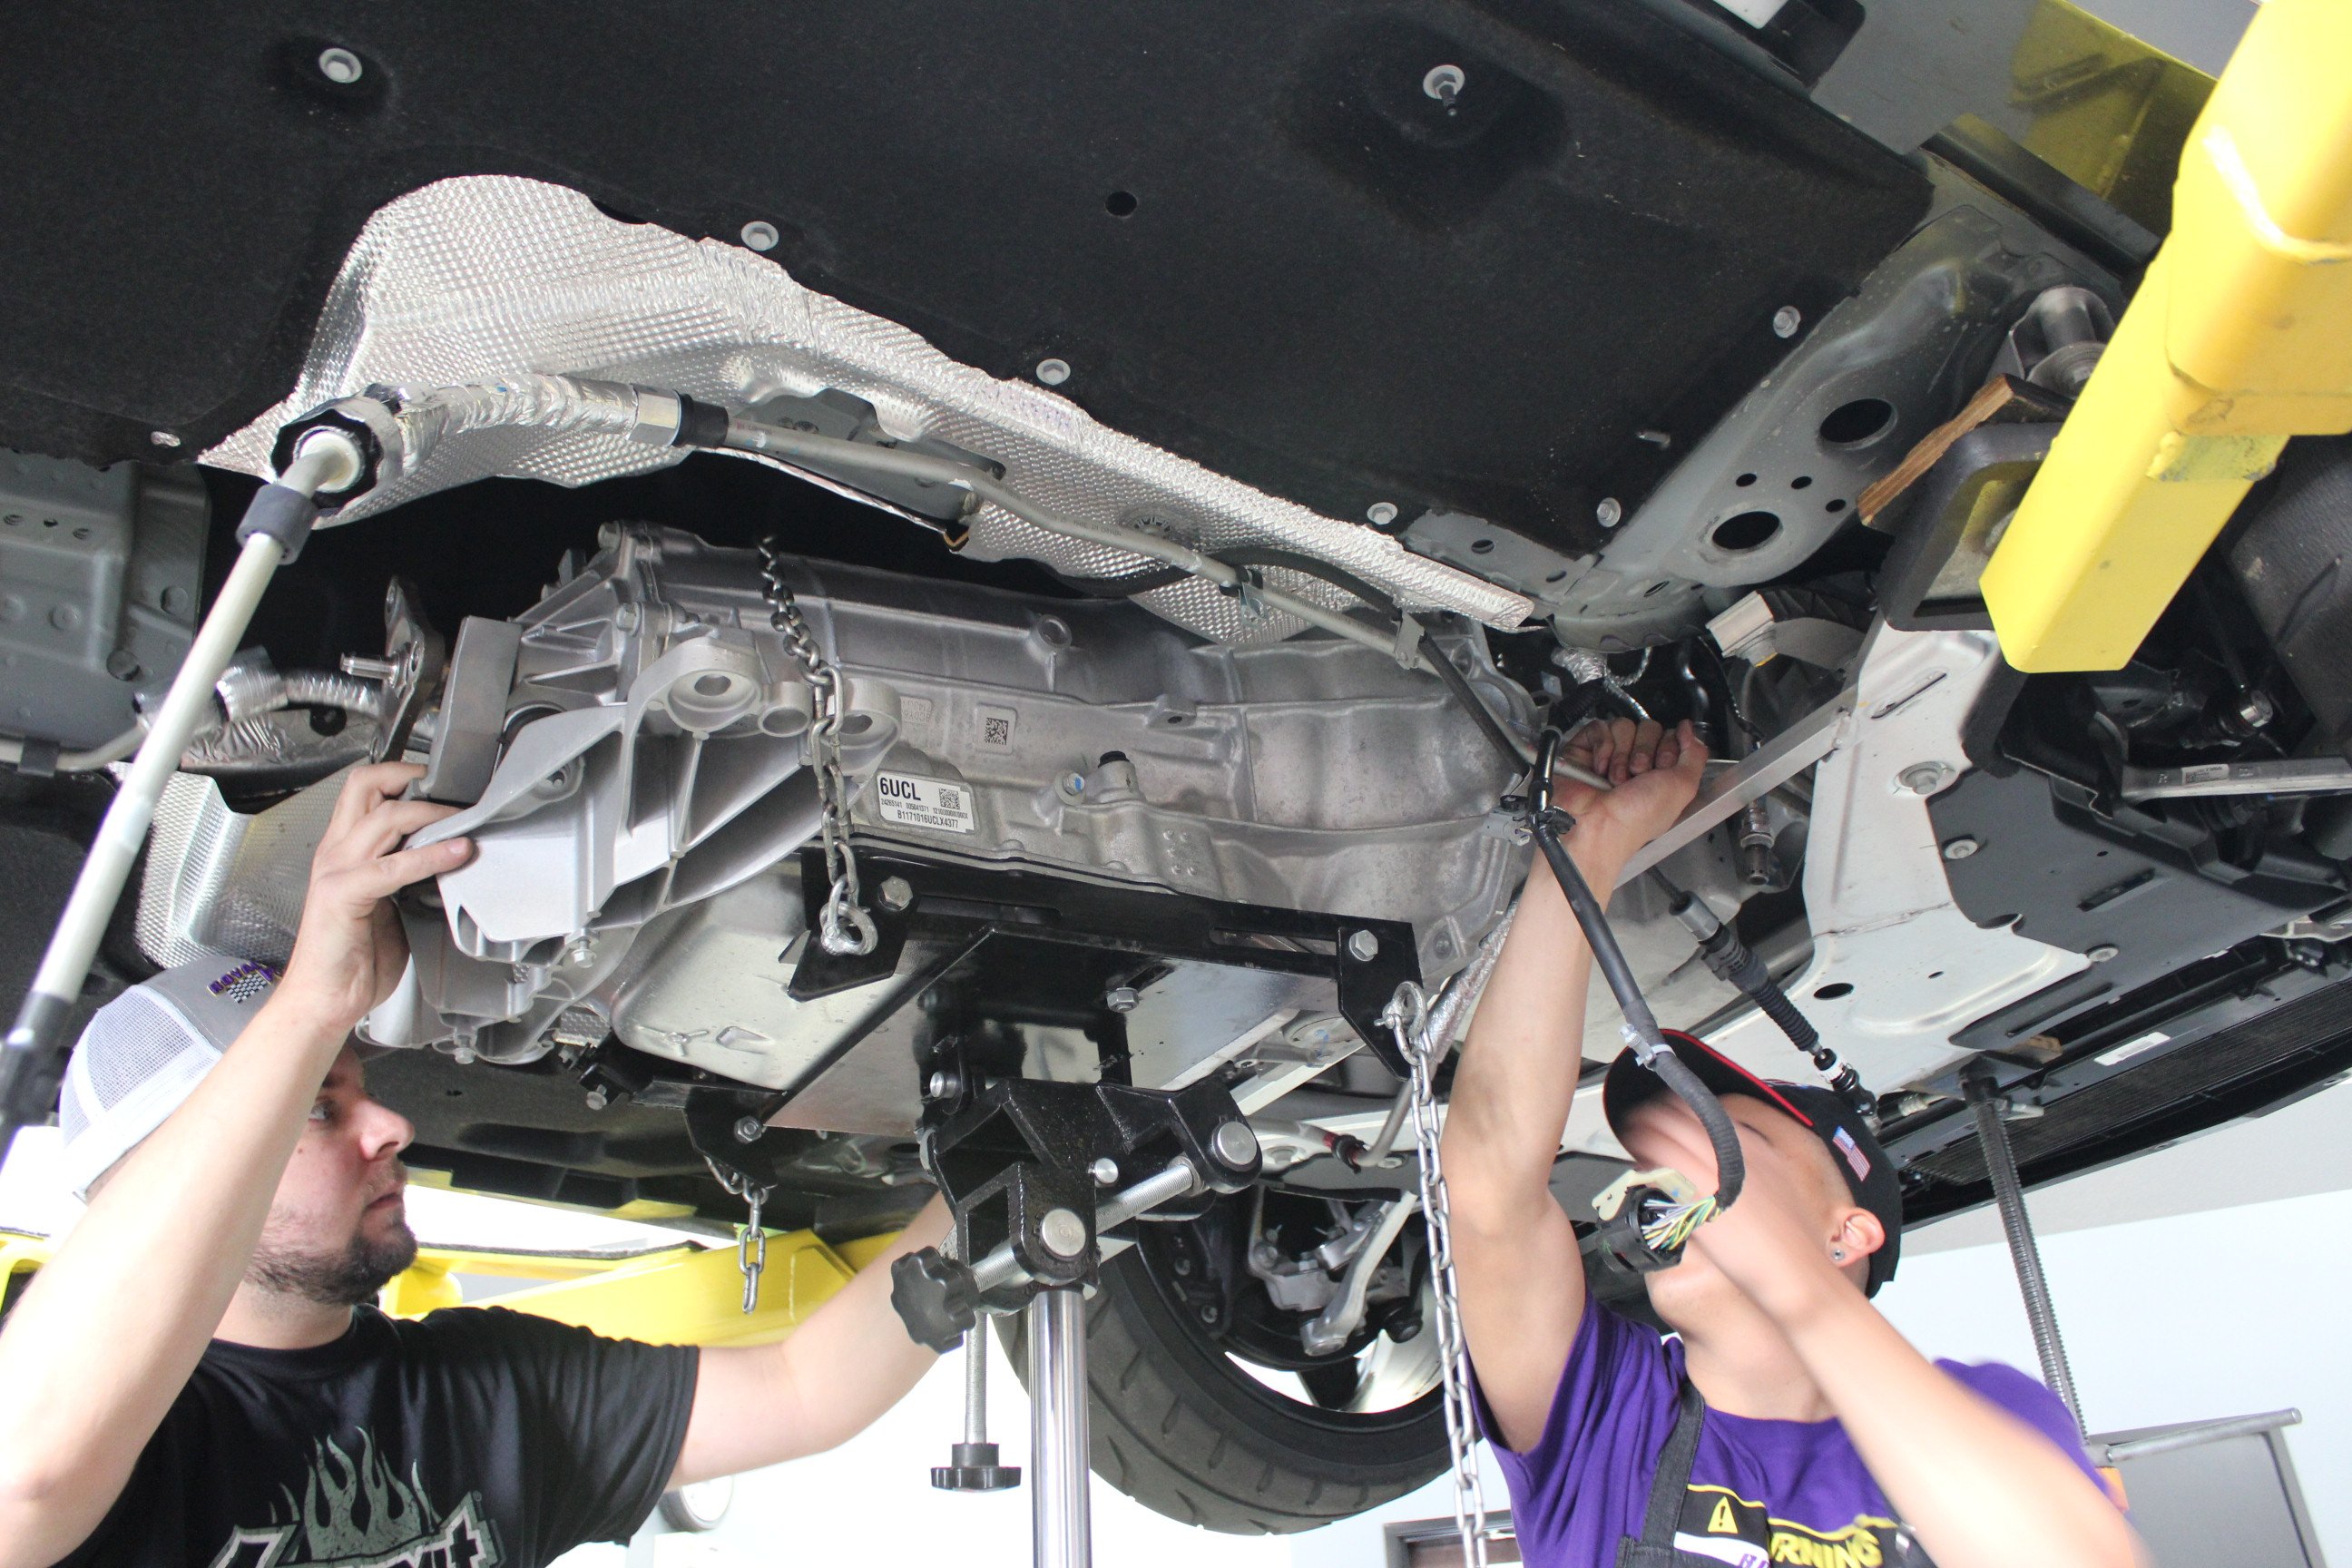
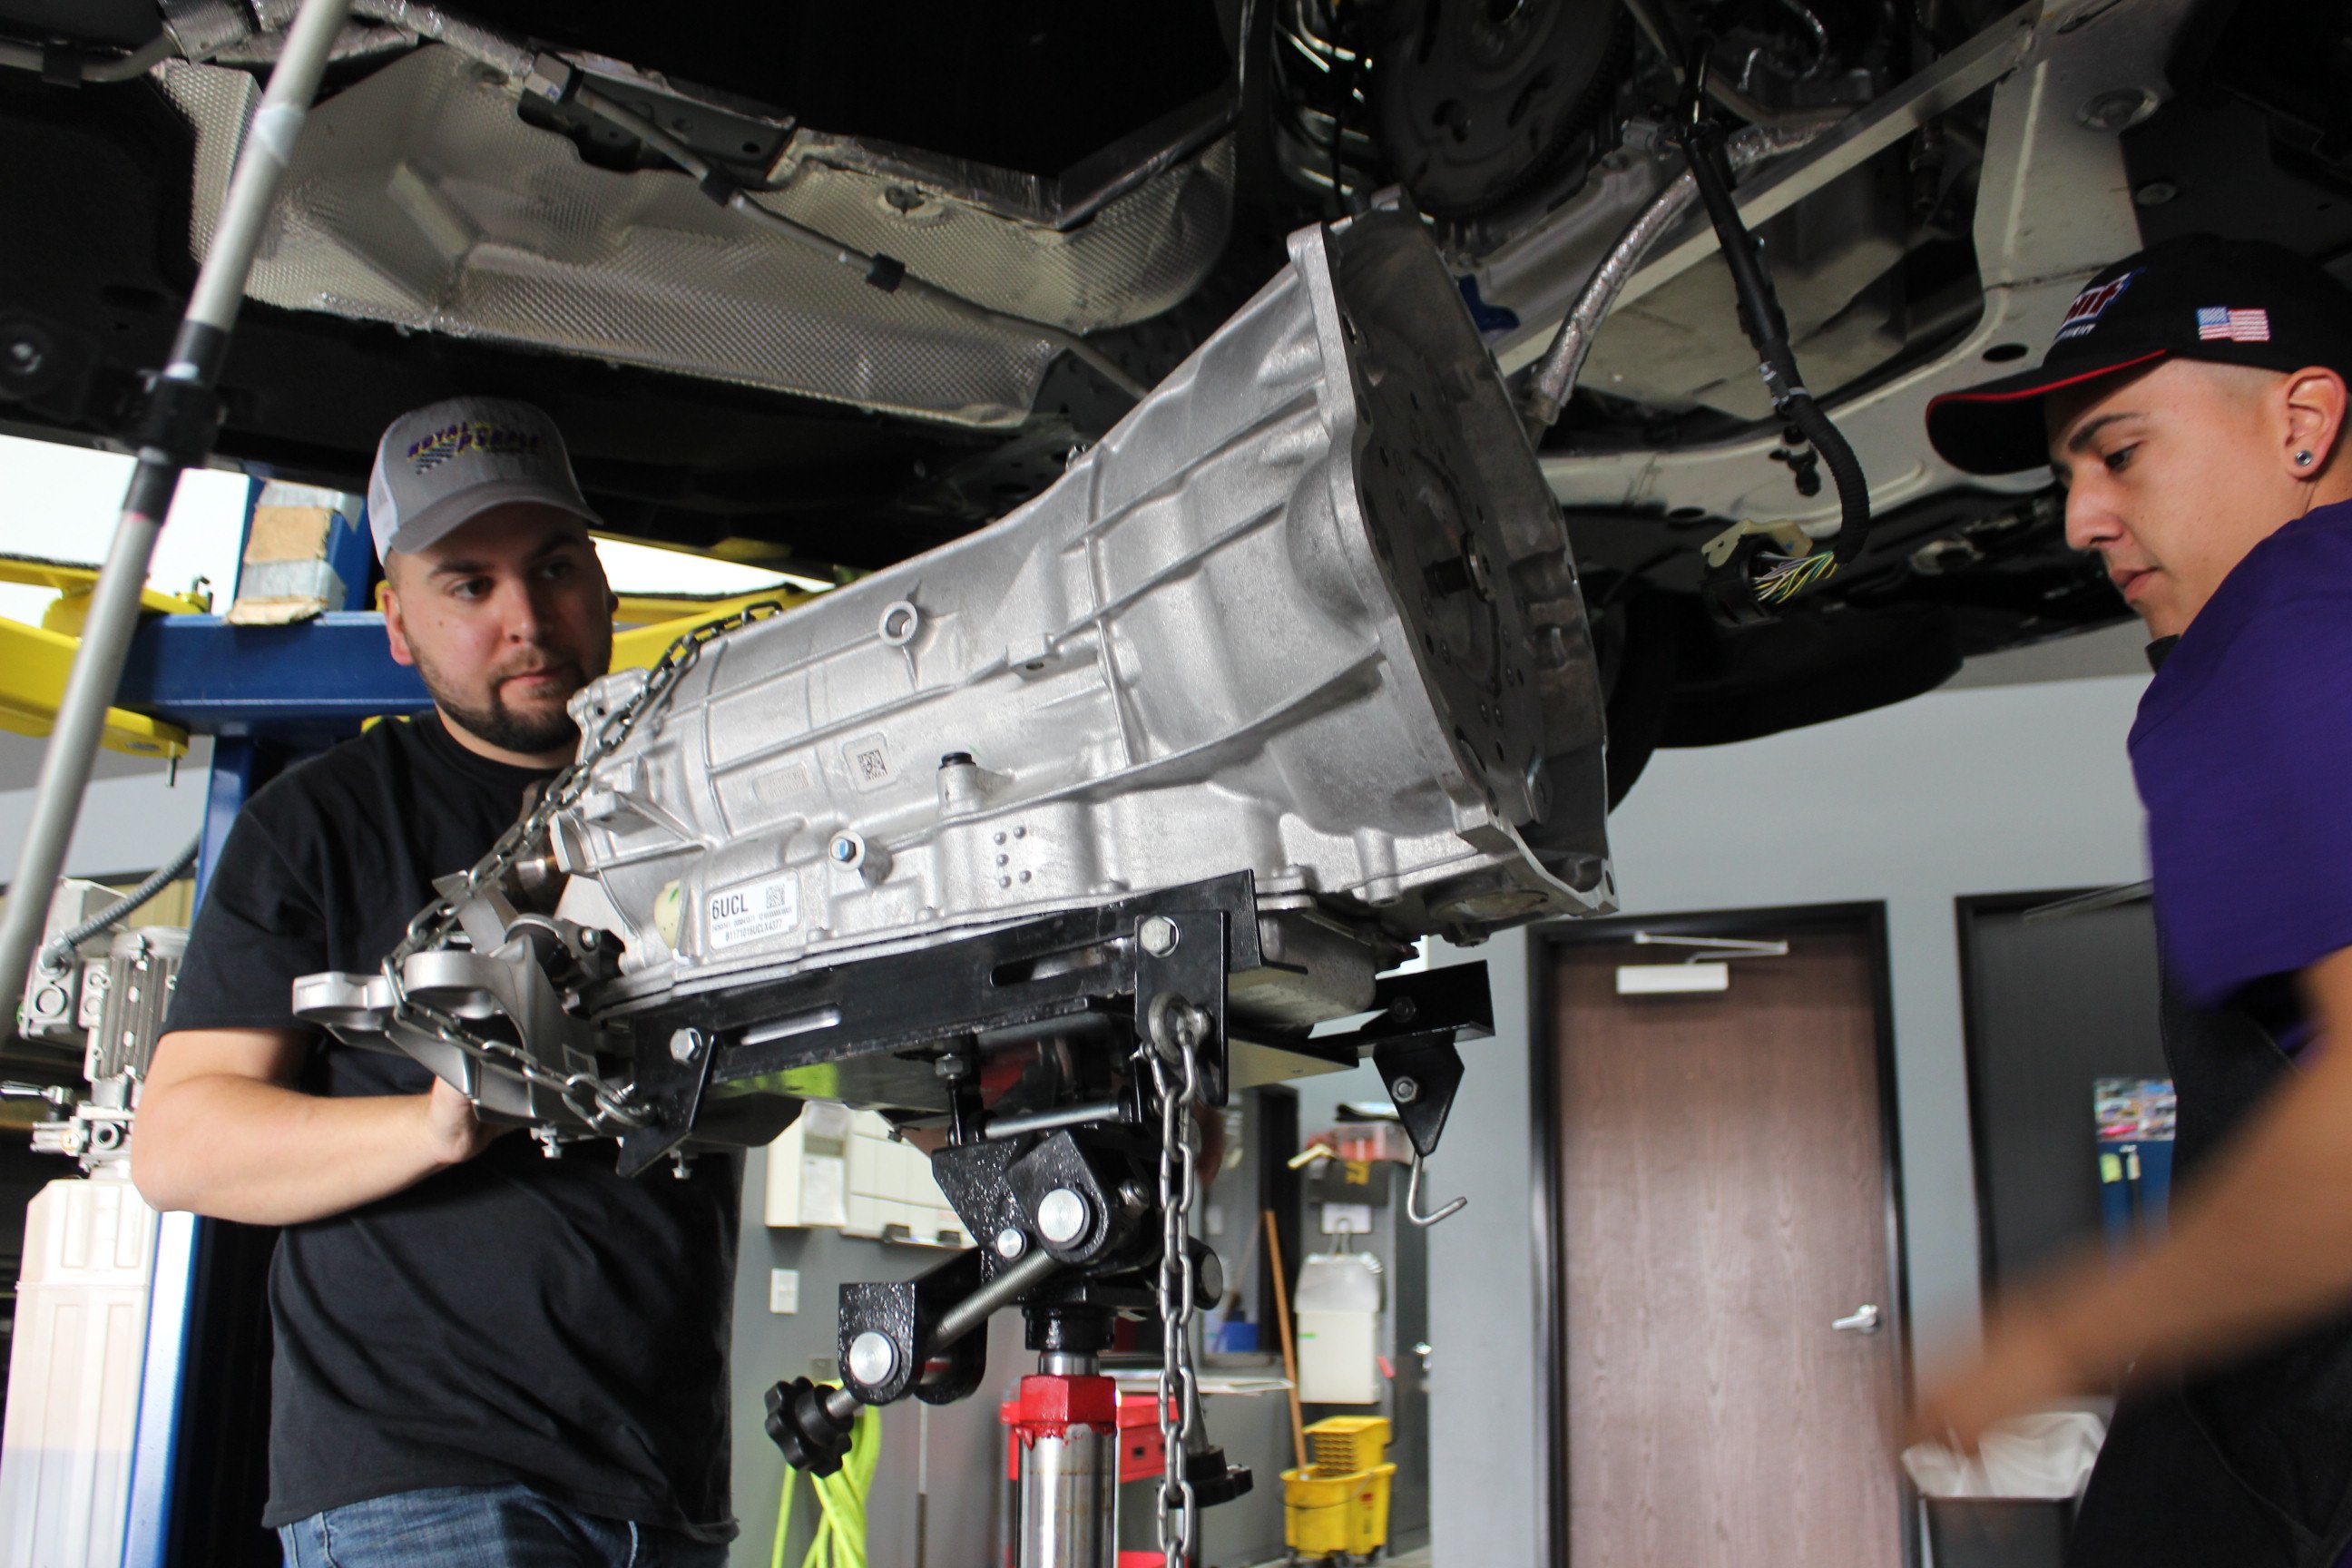

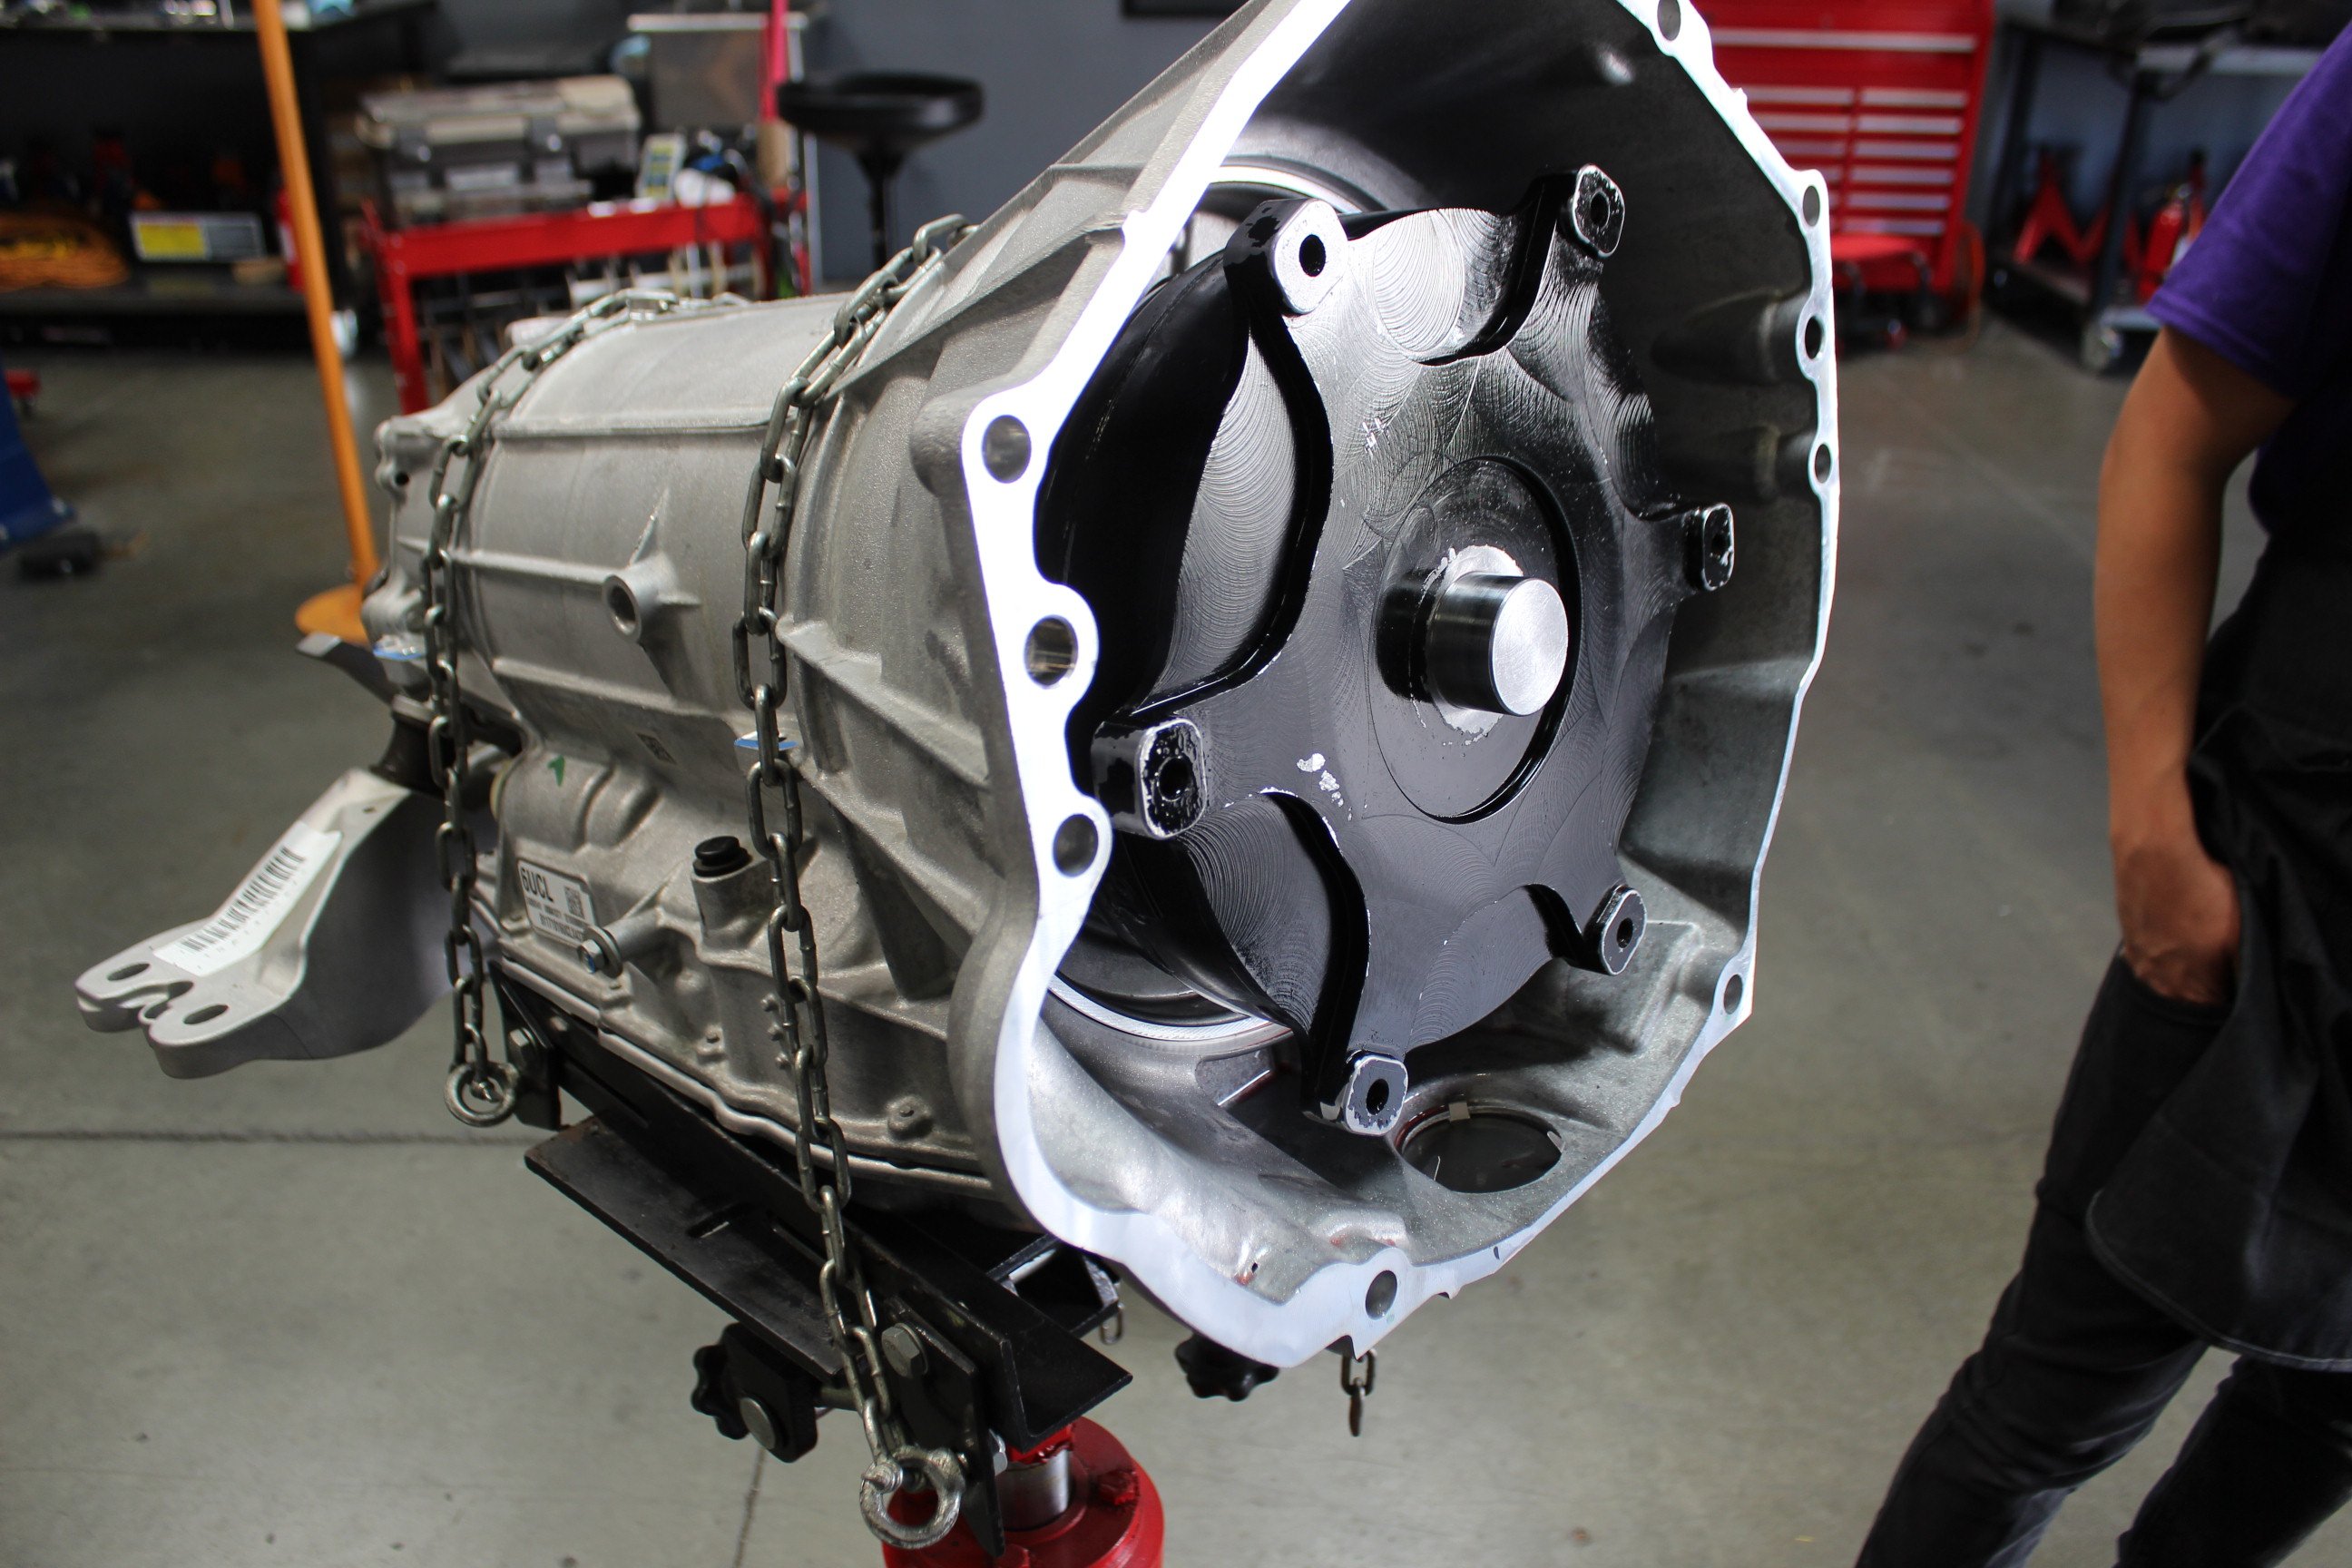
After removing the driveshaft and disconnecting the shift linkage, it was only a matter of using some extensions, universals, and some patience to access the bellhousing bolts that held our 8L90 transmission in place. Once they were removed, we unbolted the transmission crossmember and lower the gearbox out of the car.
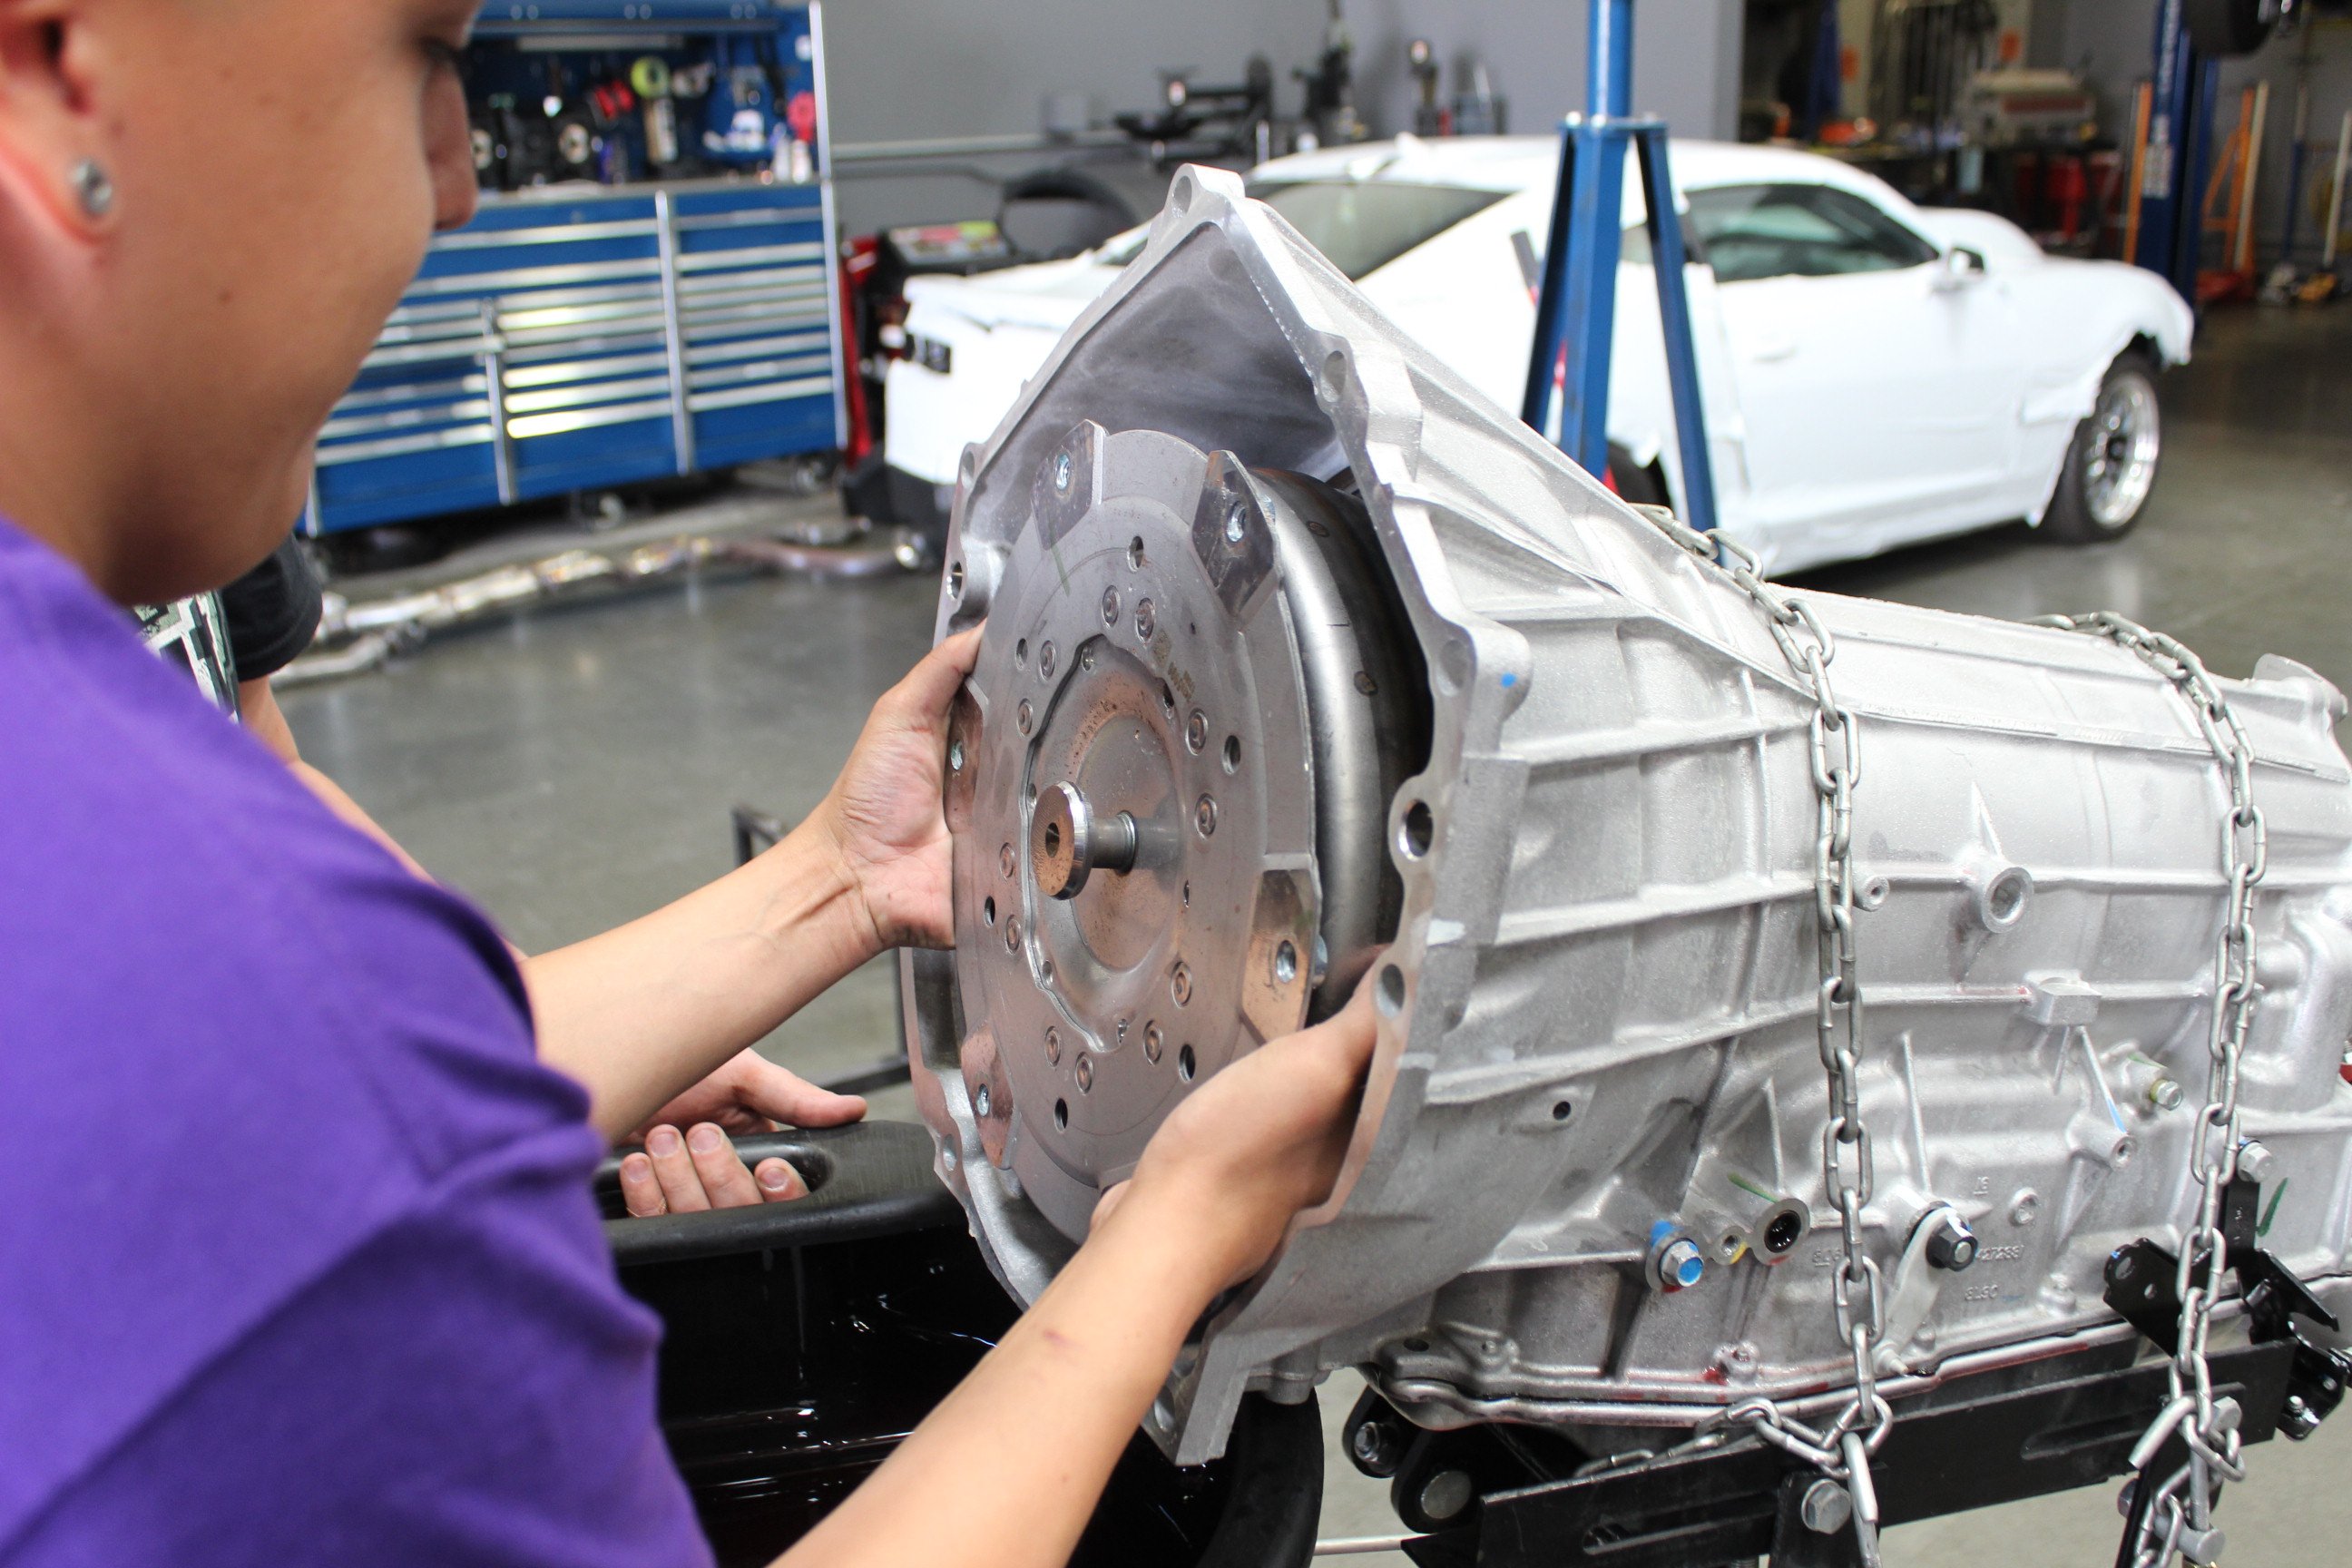
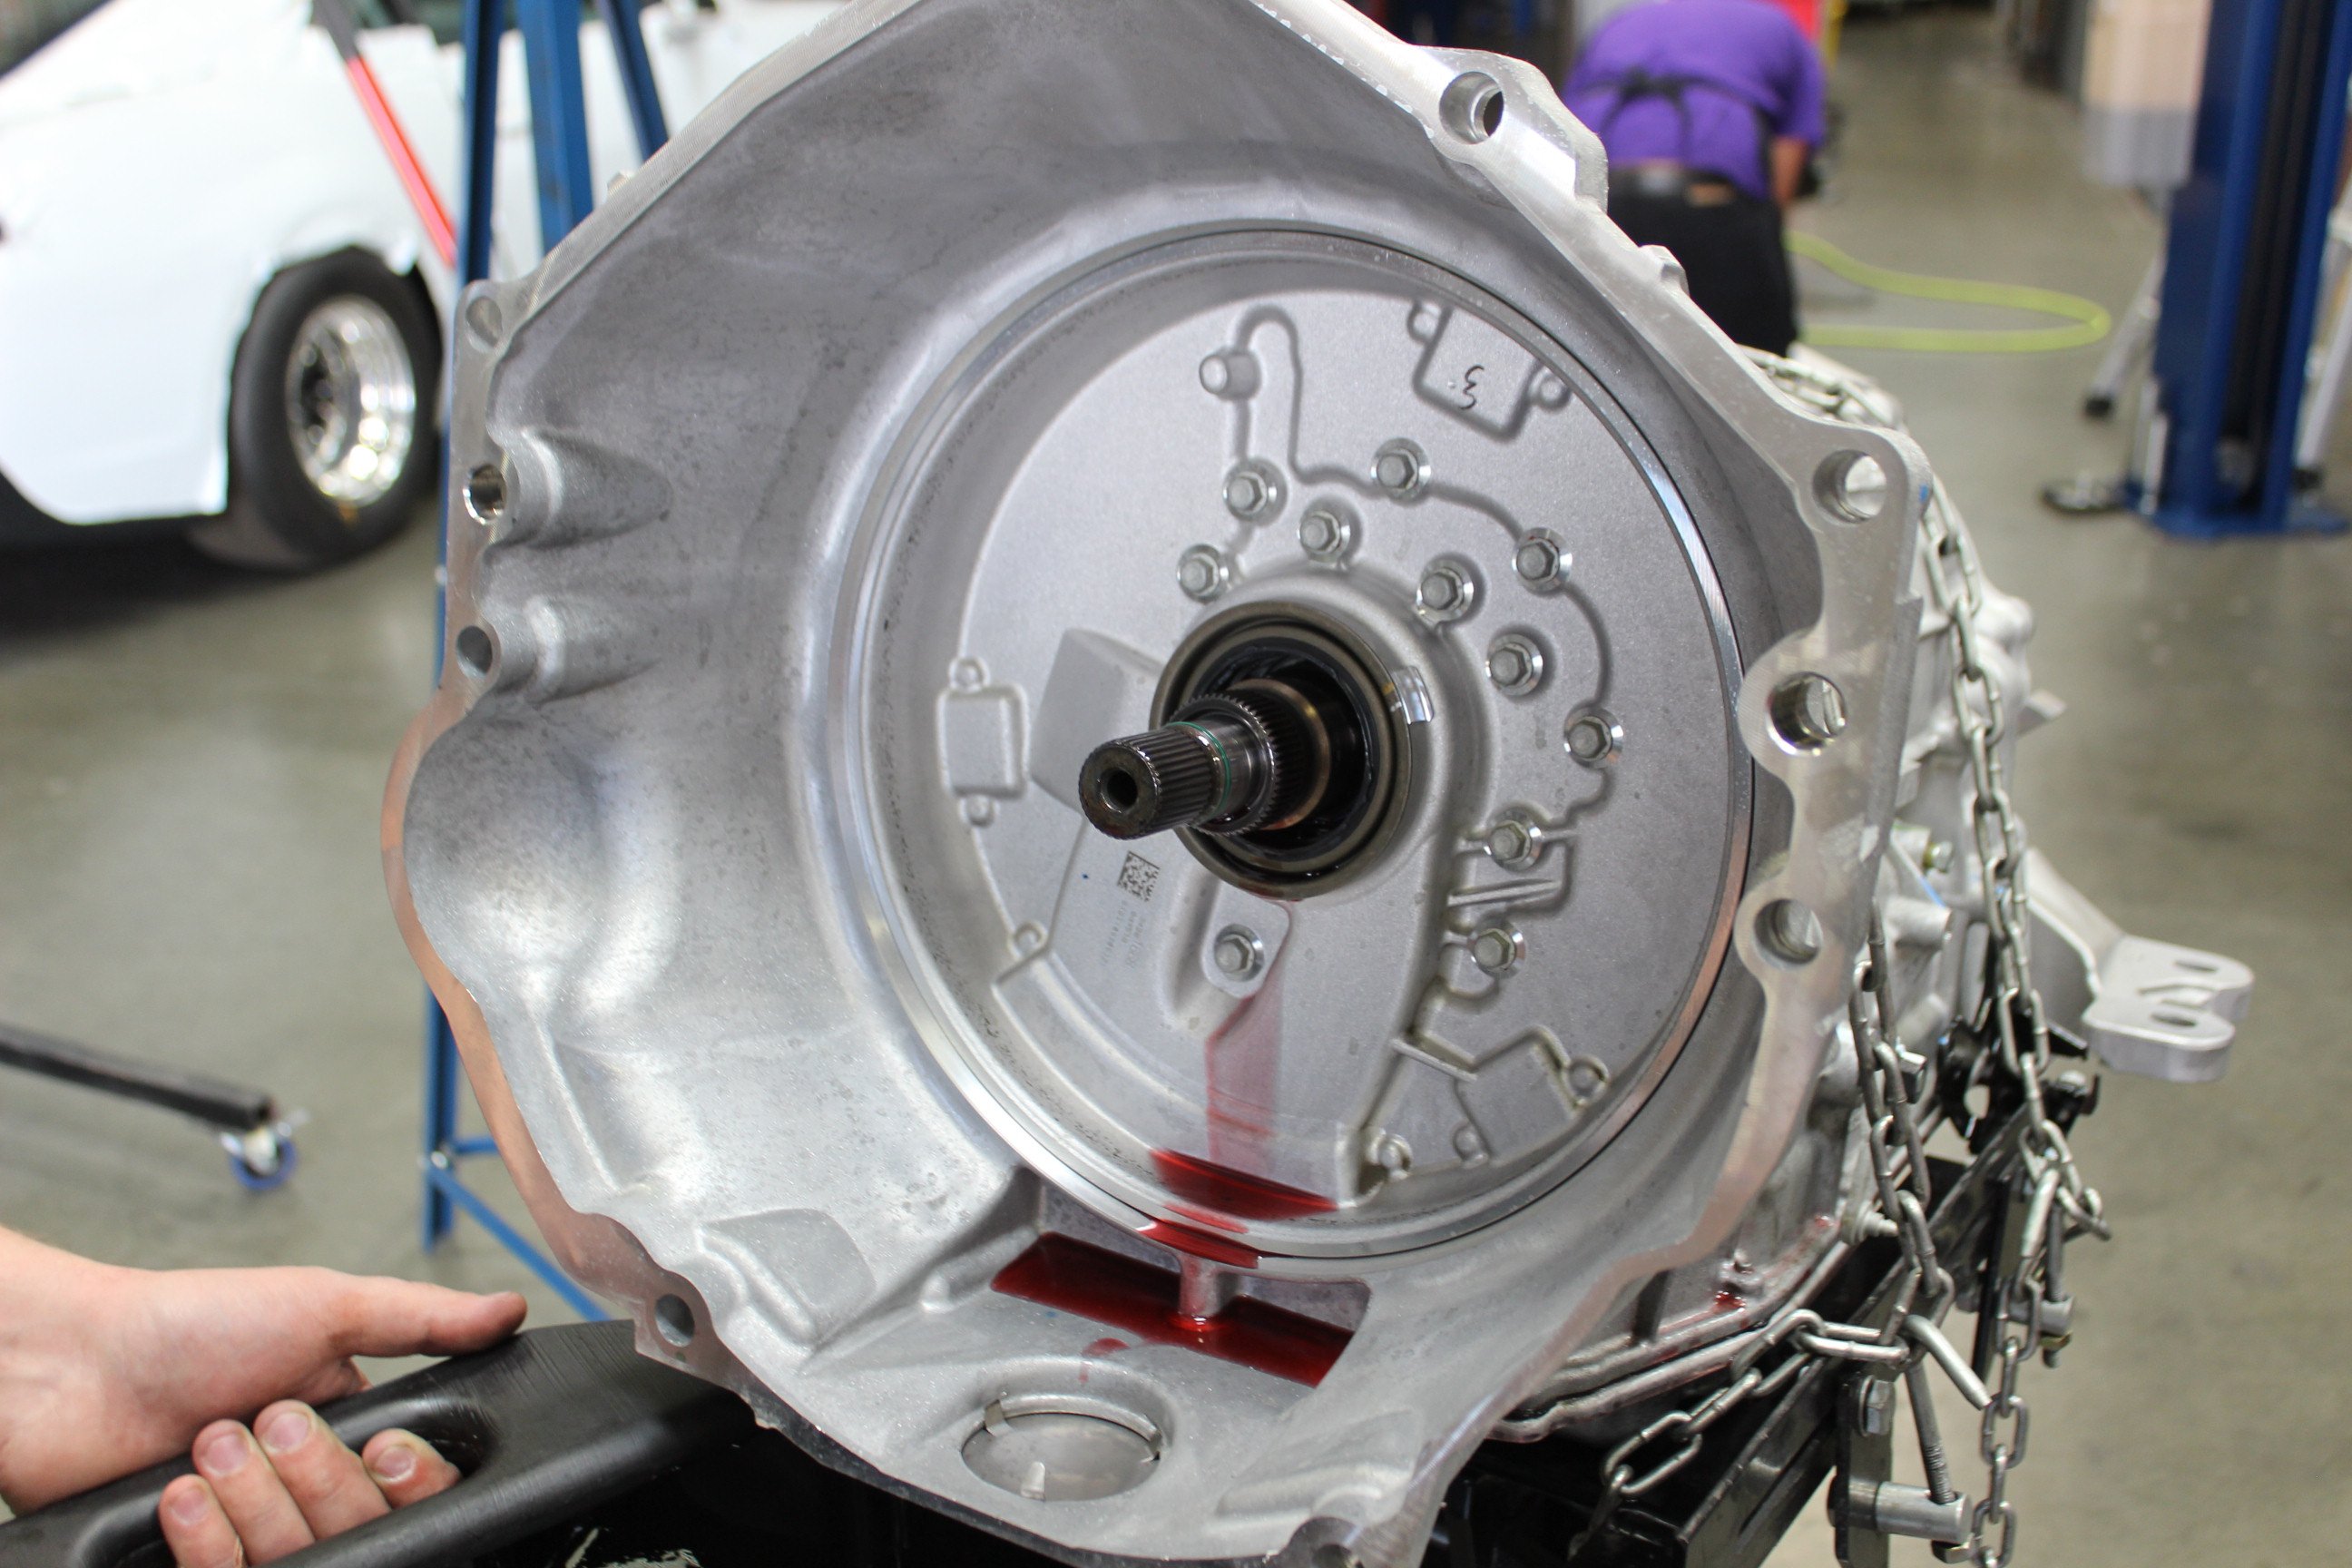

After removal of the factory converter, the ATI unit was filled with Dexron SP and slid back into the transmission. Be sure to spin in while pressing in to ensure the torque converter is engaging fully with the transmission pump.
Next on the list was the torque converter and rear cradle bushings. The transmission came out relatively easy with some long extensions and universal joints to reach the bellhousing bolts. With the wiring disconnected, the trans crossmember unbolted, and the driveshaft removed, the transmission slid out of its home. After filling the new converter with Dexron SP (it has to be Dexron SP for the 8L90), we simply slid the new converter home and reversed our procedure.
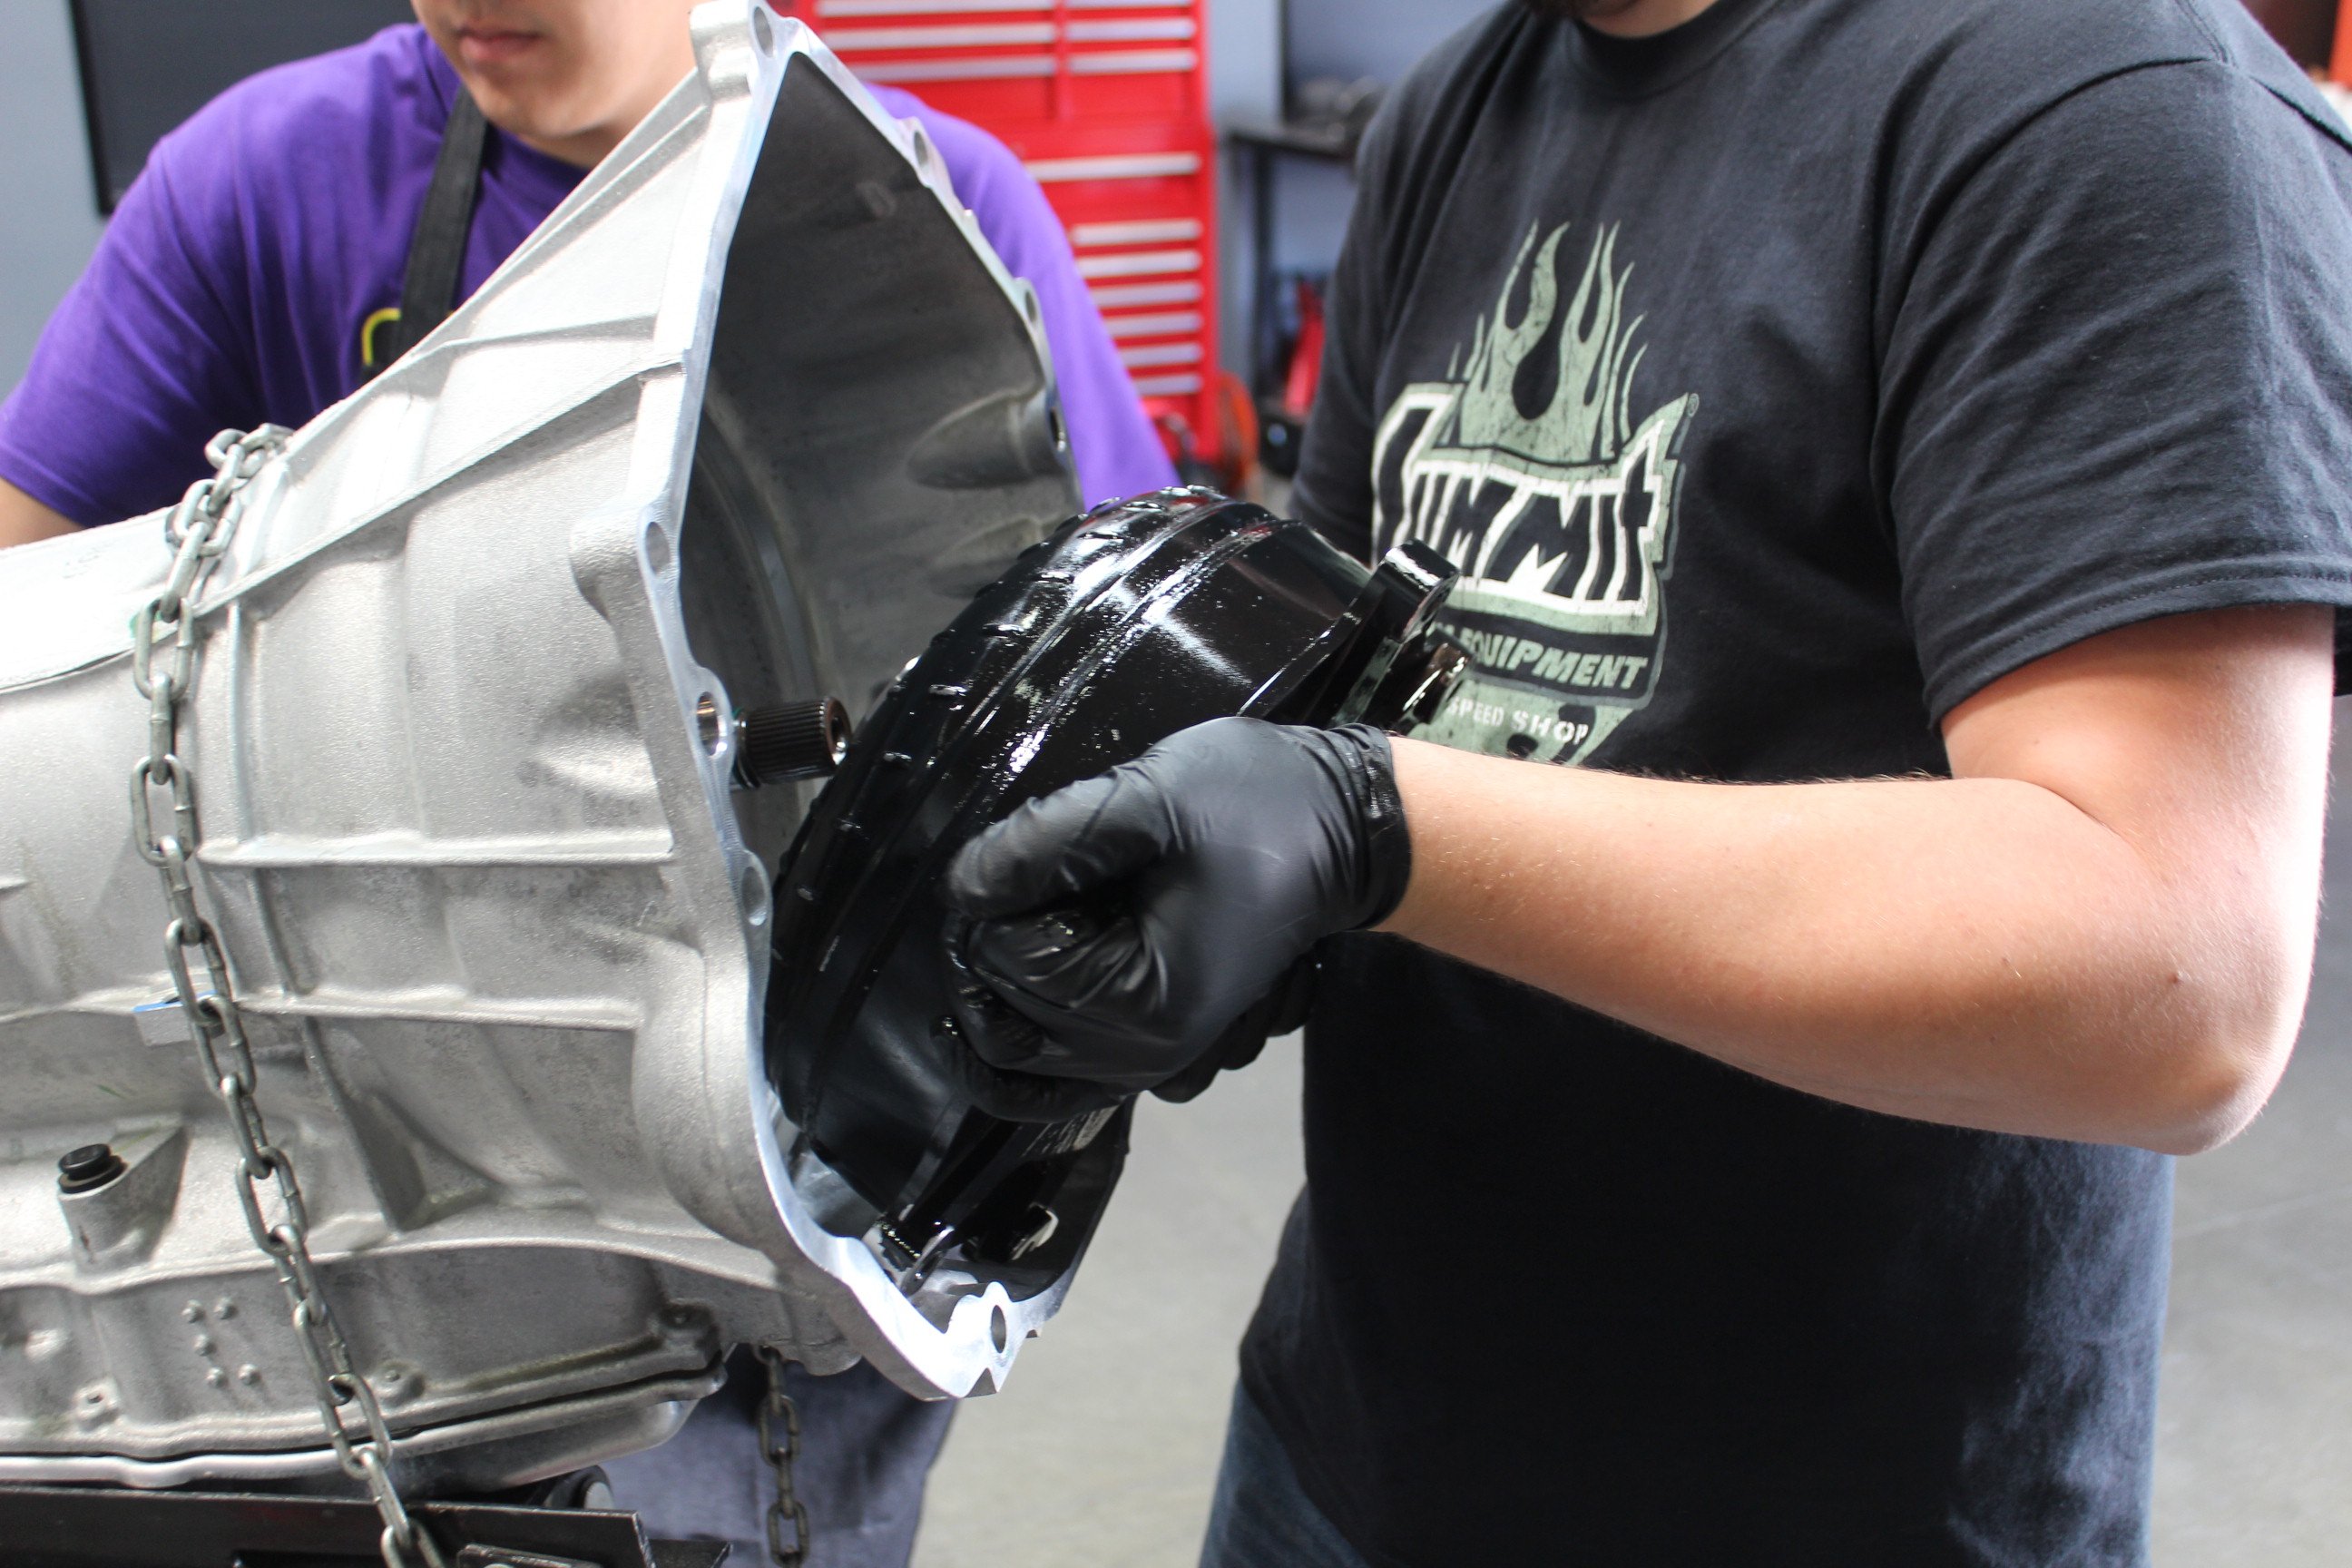
With the torque converter filled and mated to the transmission, it was ready to be bolted back up to our LT1 using the reverse of the previously mentioned procedure.
To fill the transmission back up, we removed the access plug on the passenger’s side of the transmission and filled it up. We left the plug out and fired the car up in order to bring the transmission up to temperature. Using a scan tool, we monitored the trans until the fluid temperature reached 150-160 degrees and waited until the fluid had ceased seeping from the plug. The car was then shut off and the plug was reinstalled.

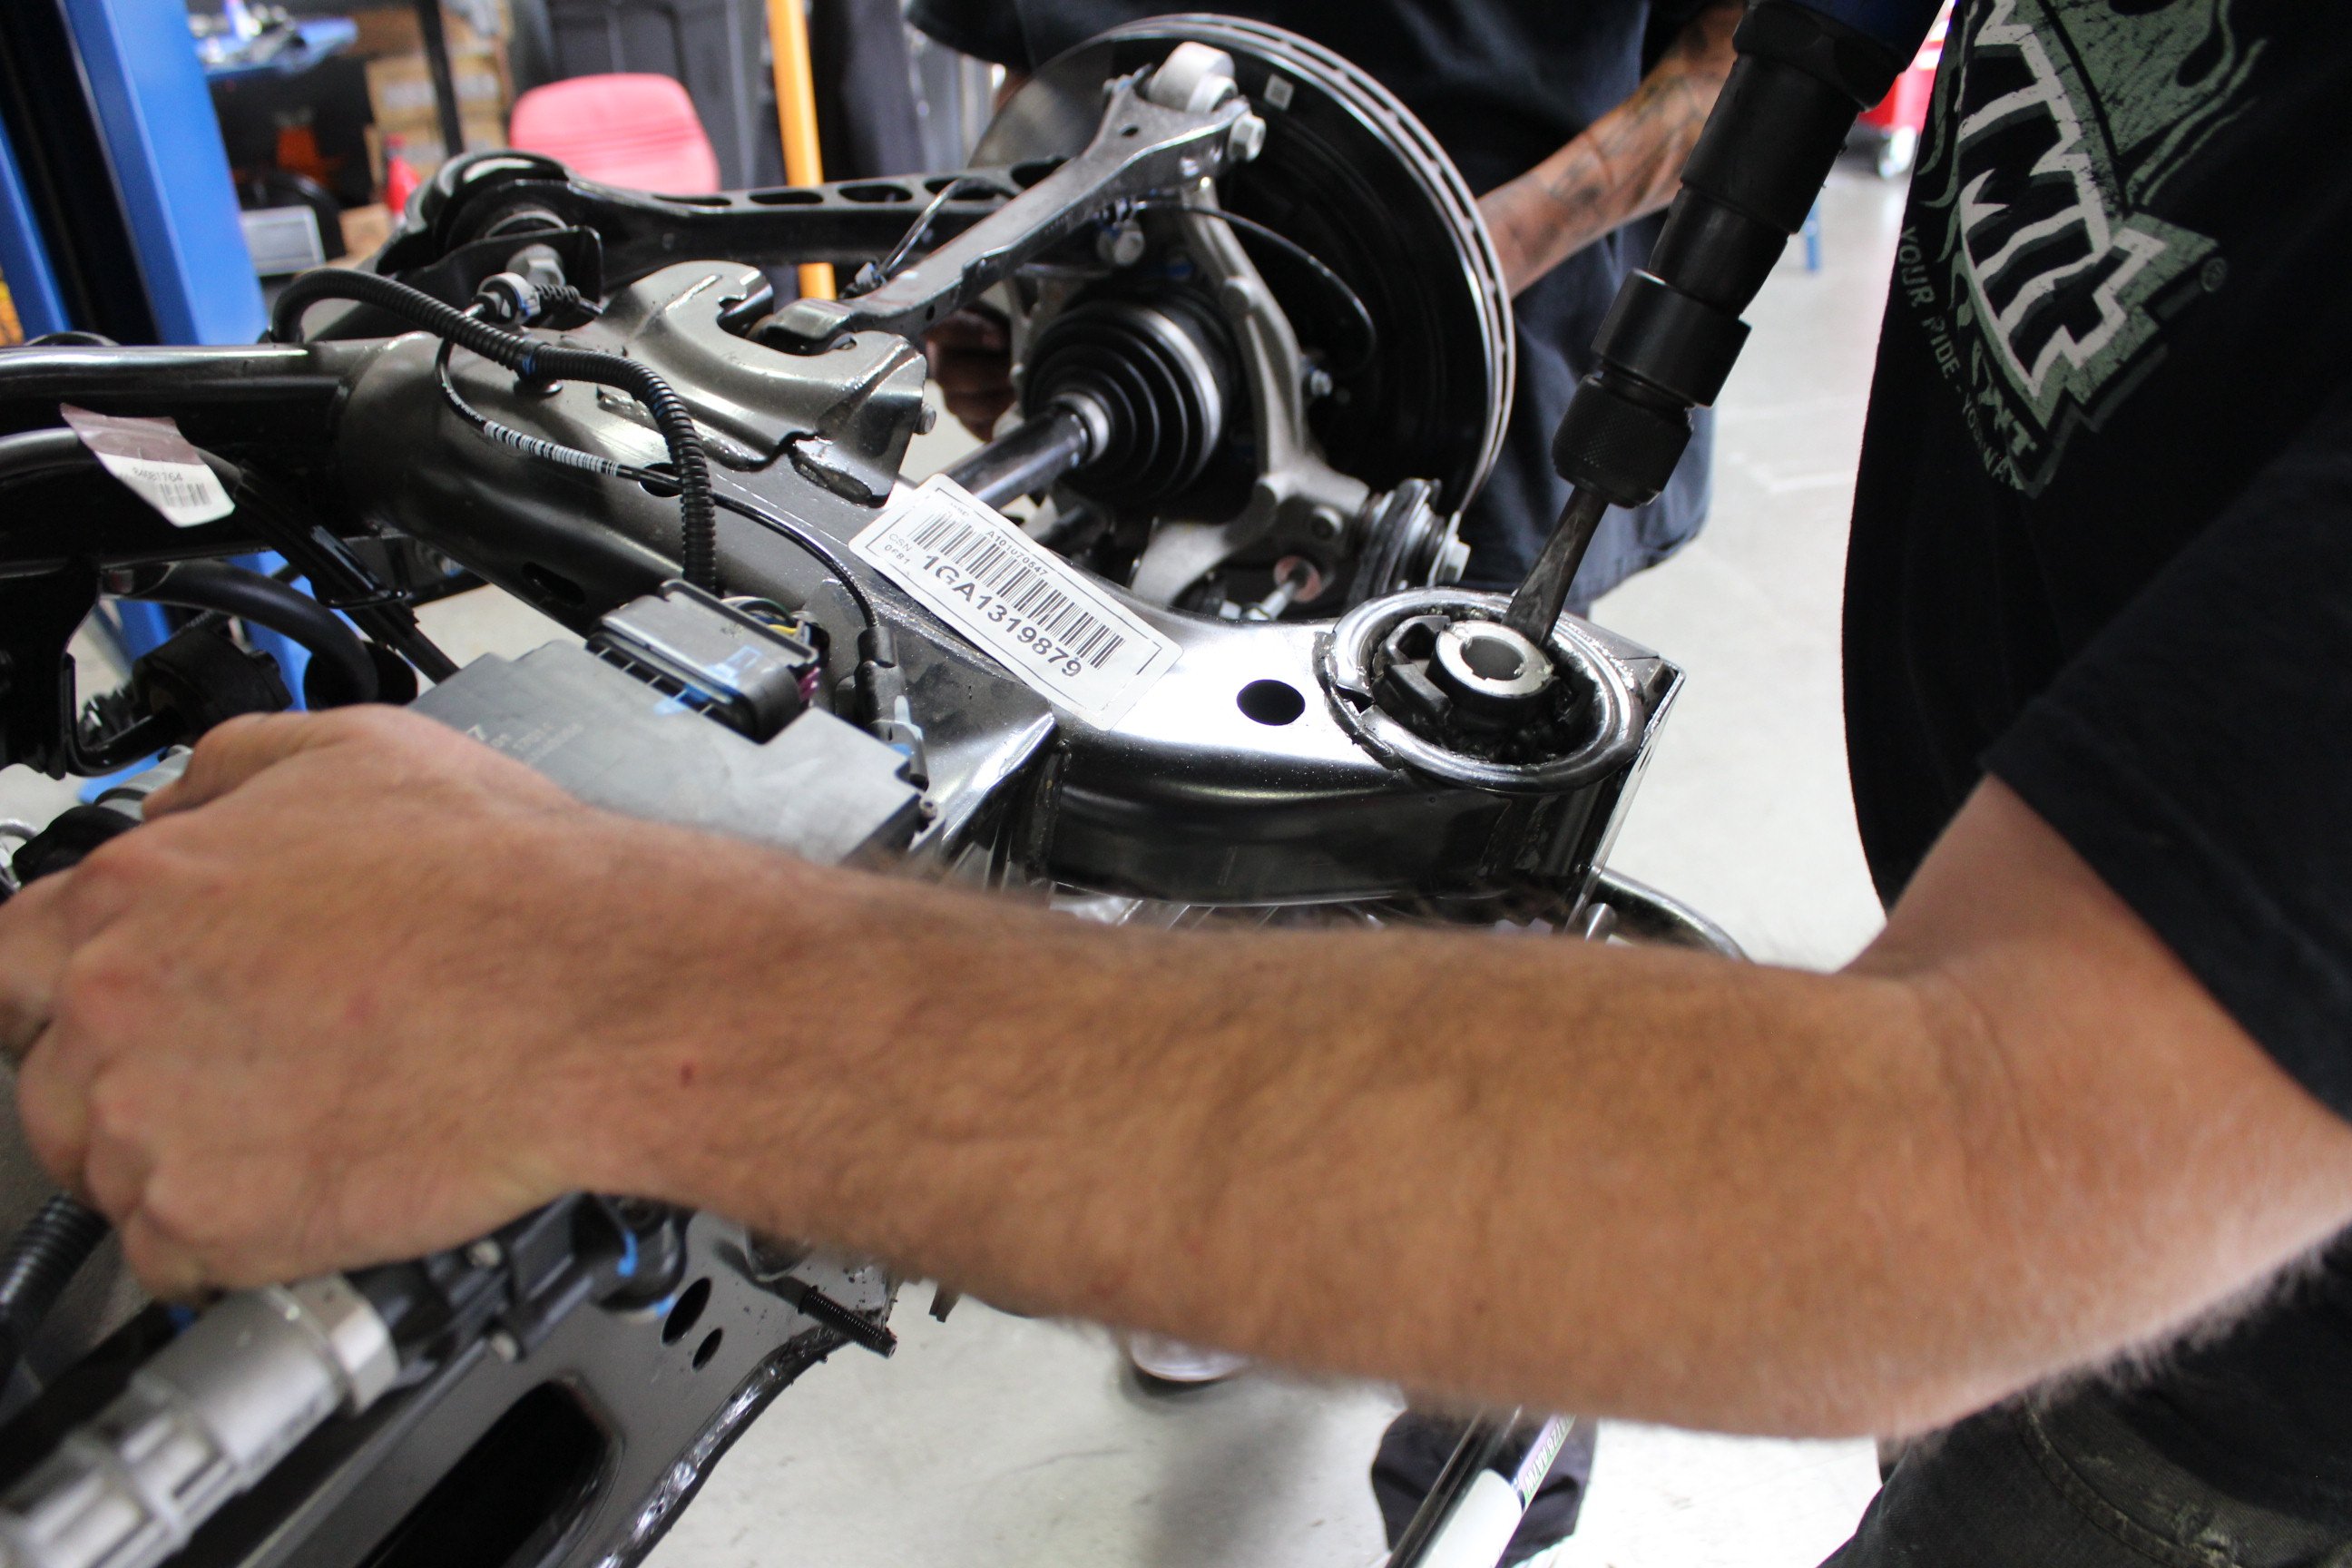
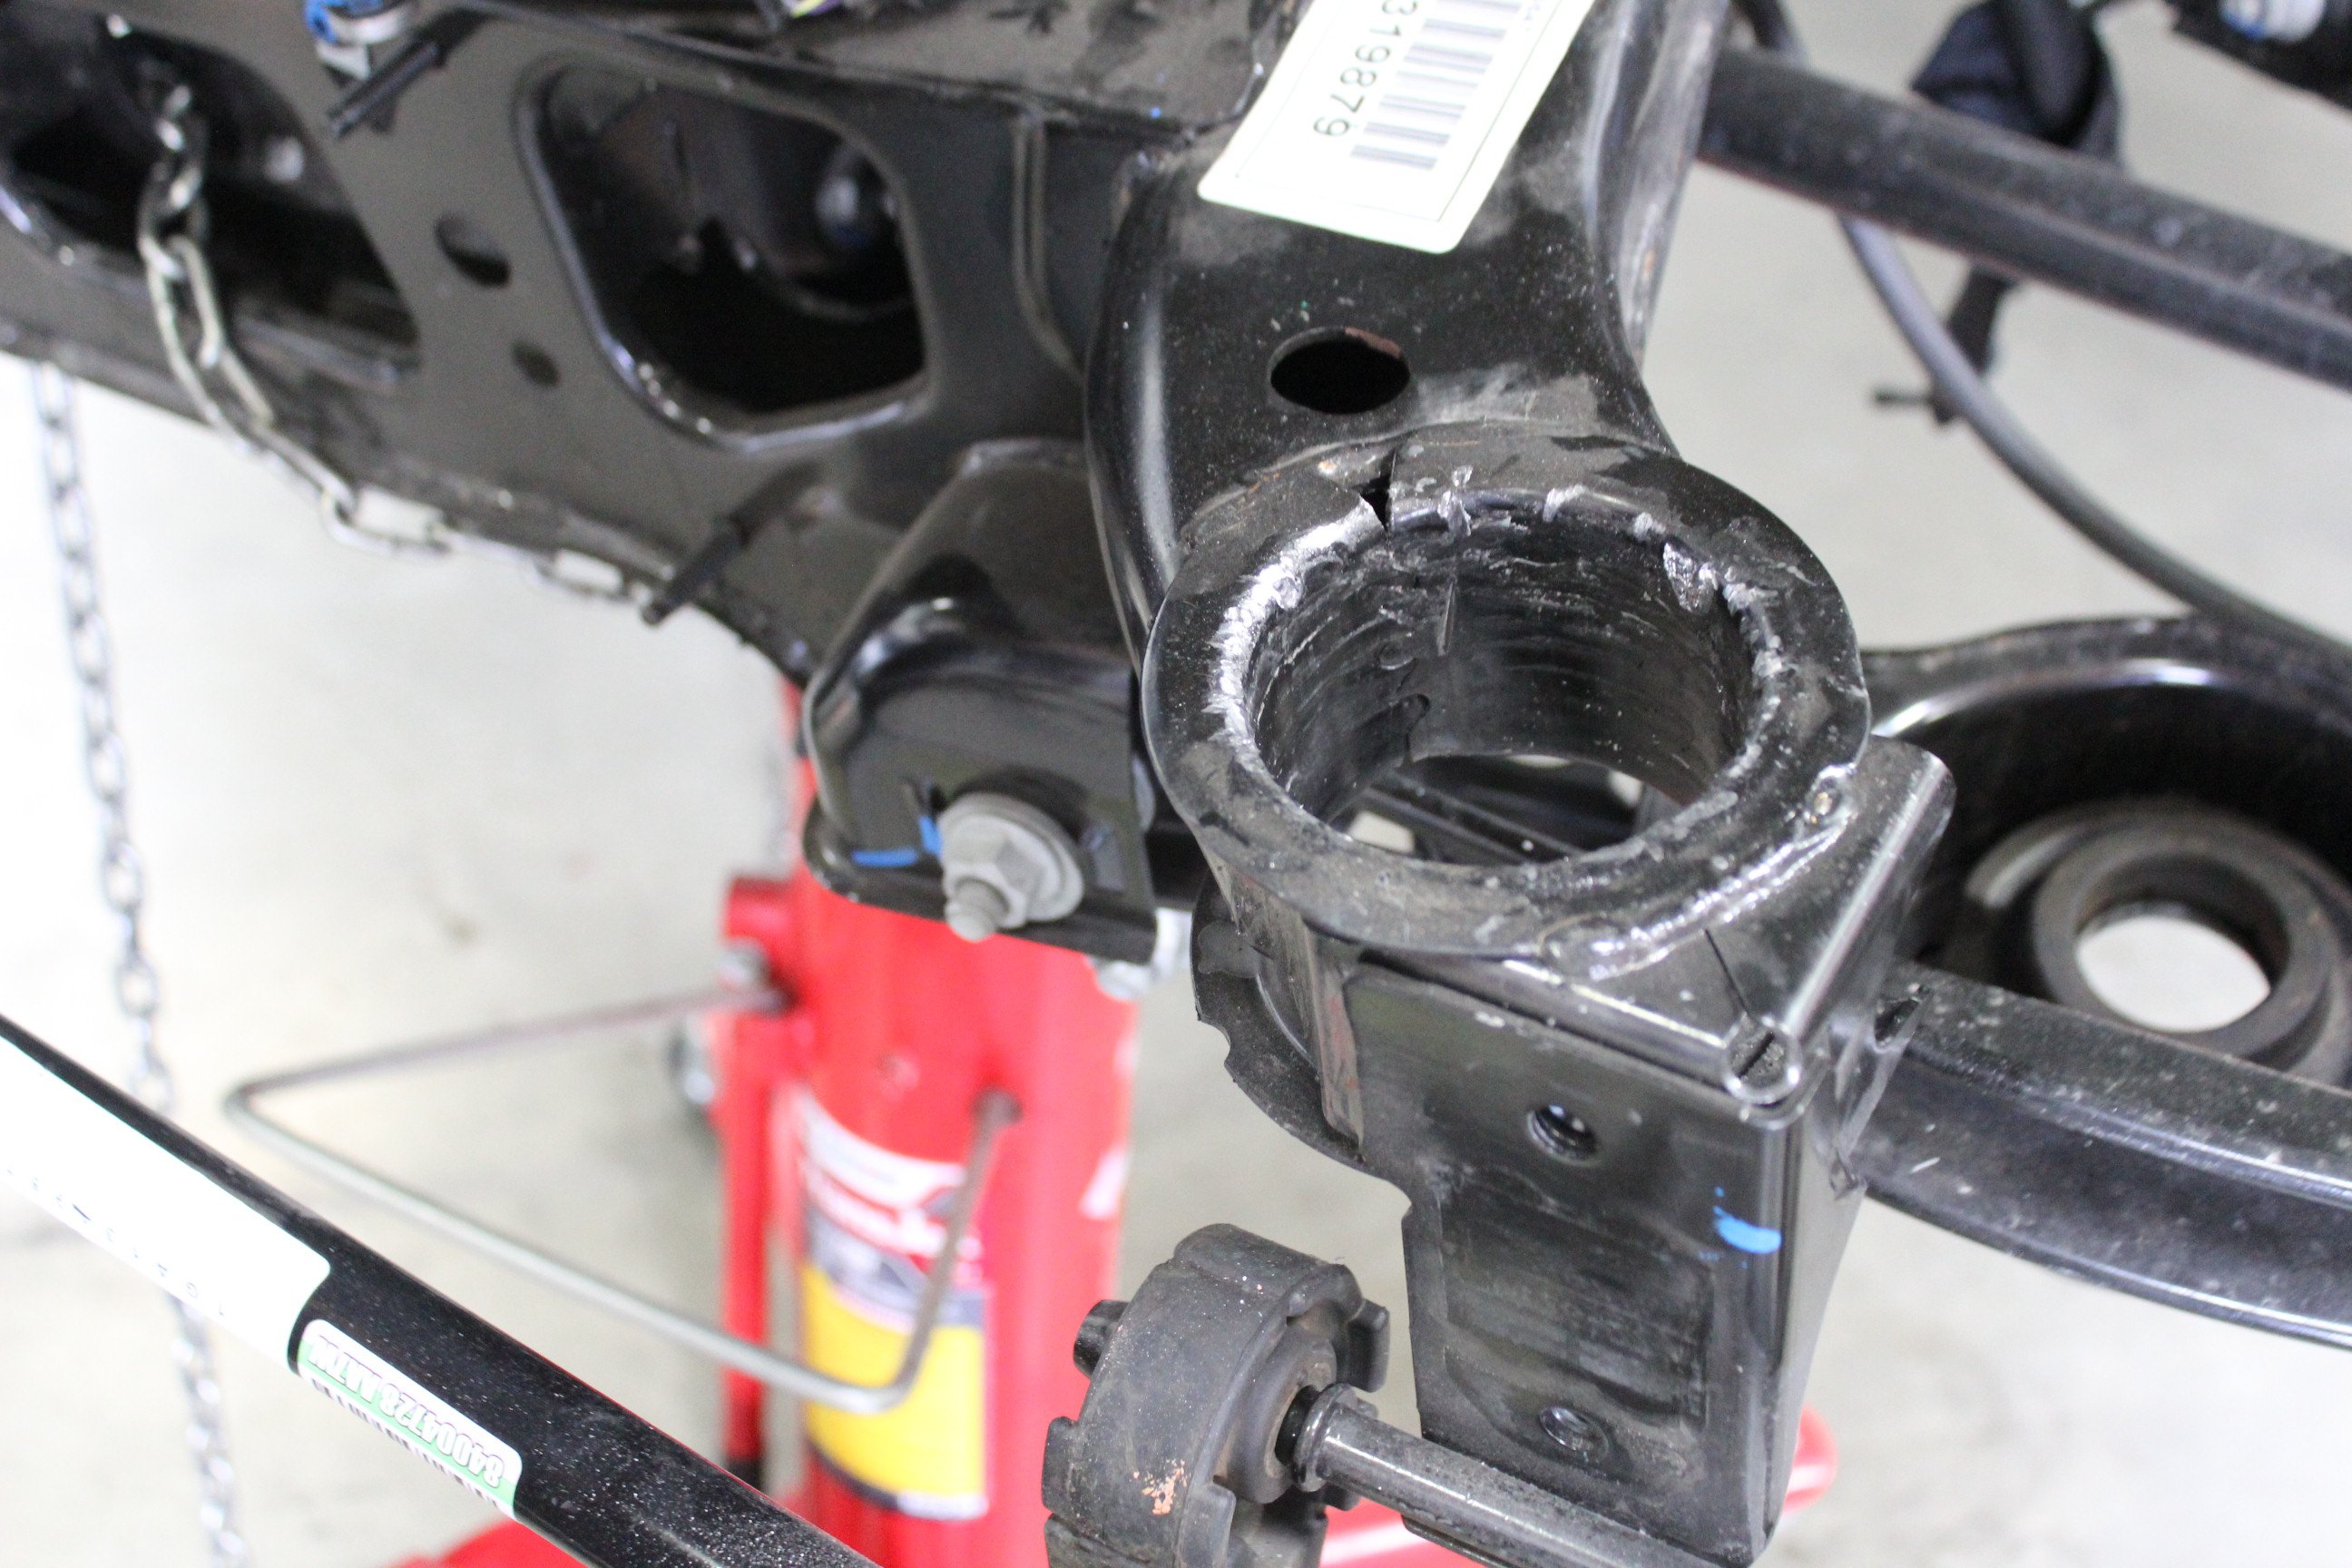
Removing the rear cradle bushings may have been one of the most involved pieces of our $5,000 parts. The stock bushings are pretty snug and we had to pretty much destroy them to get them out of their bores. We used a Sawsall and an air chisel to do most of the work. A 5-pound sledge finished off the work once they had already budged.
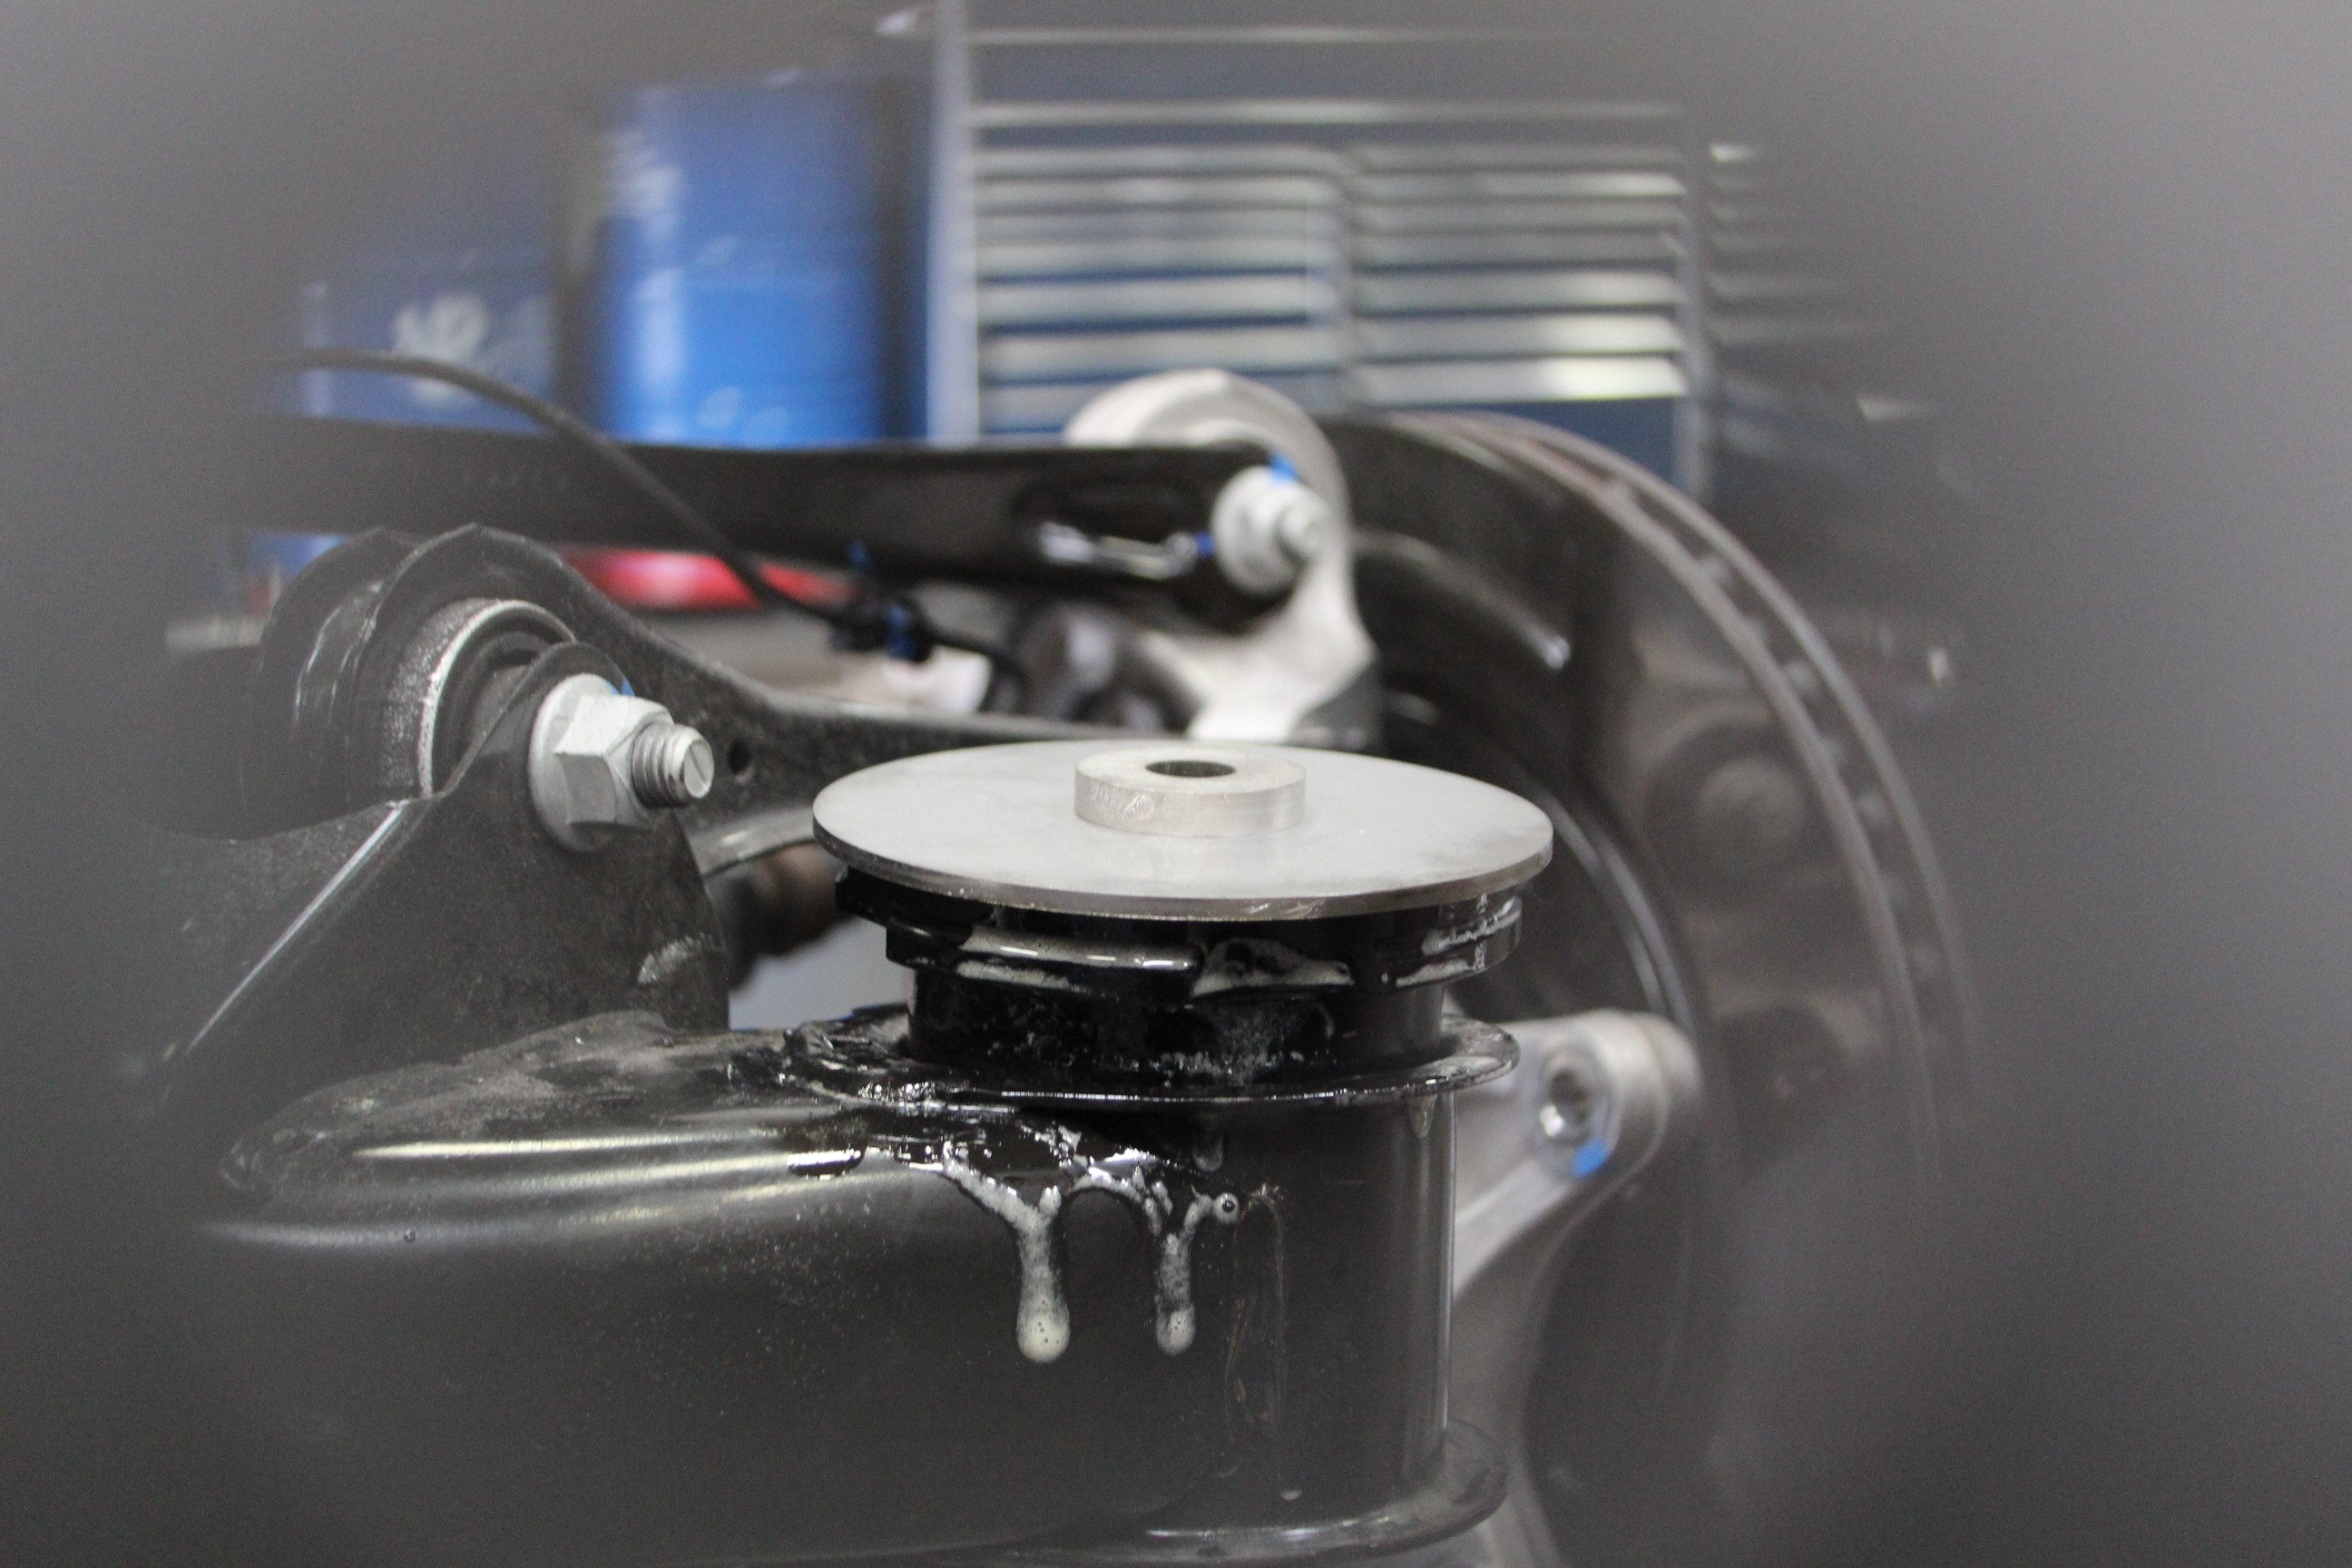
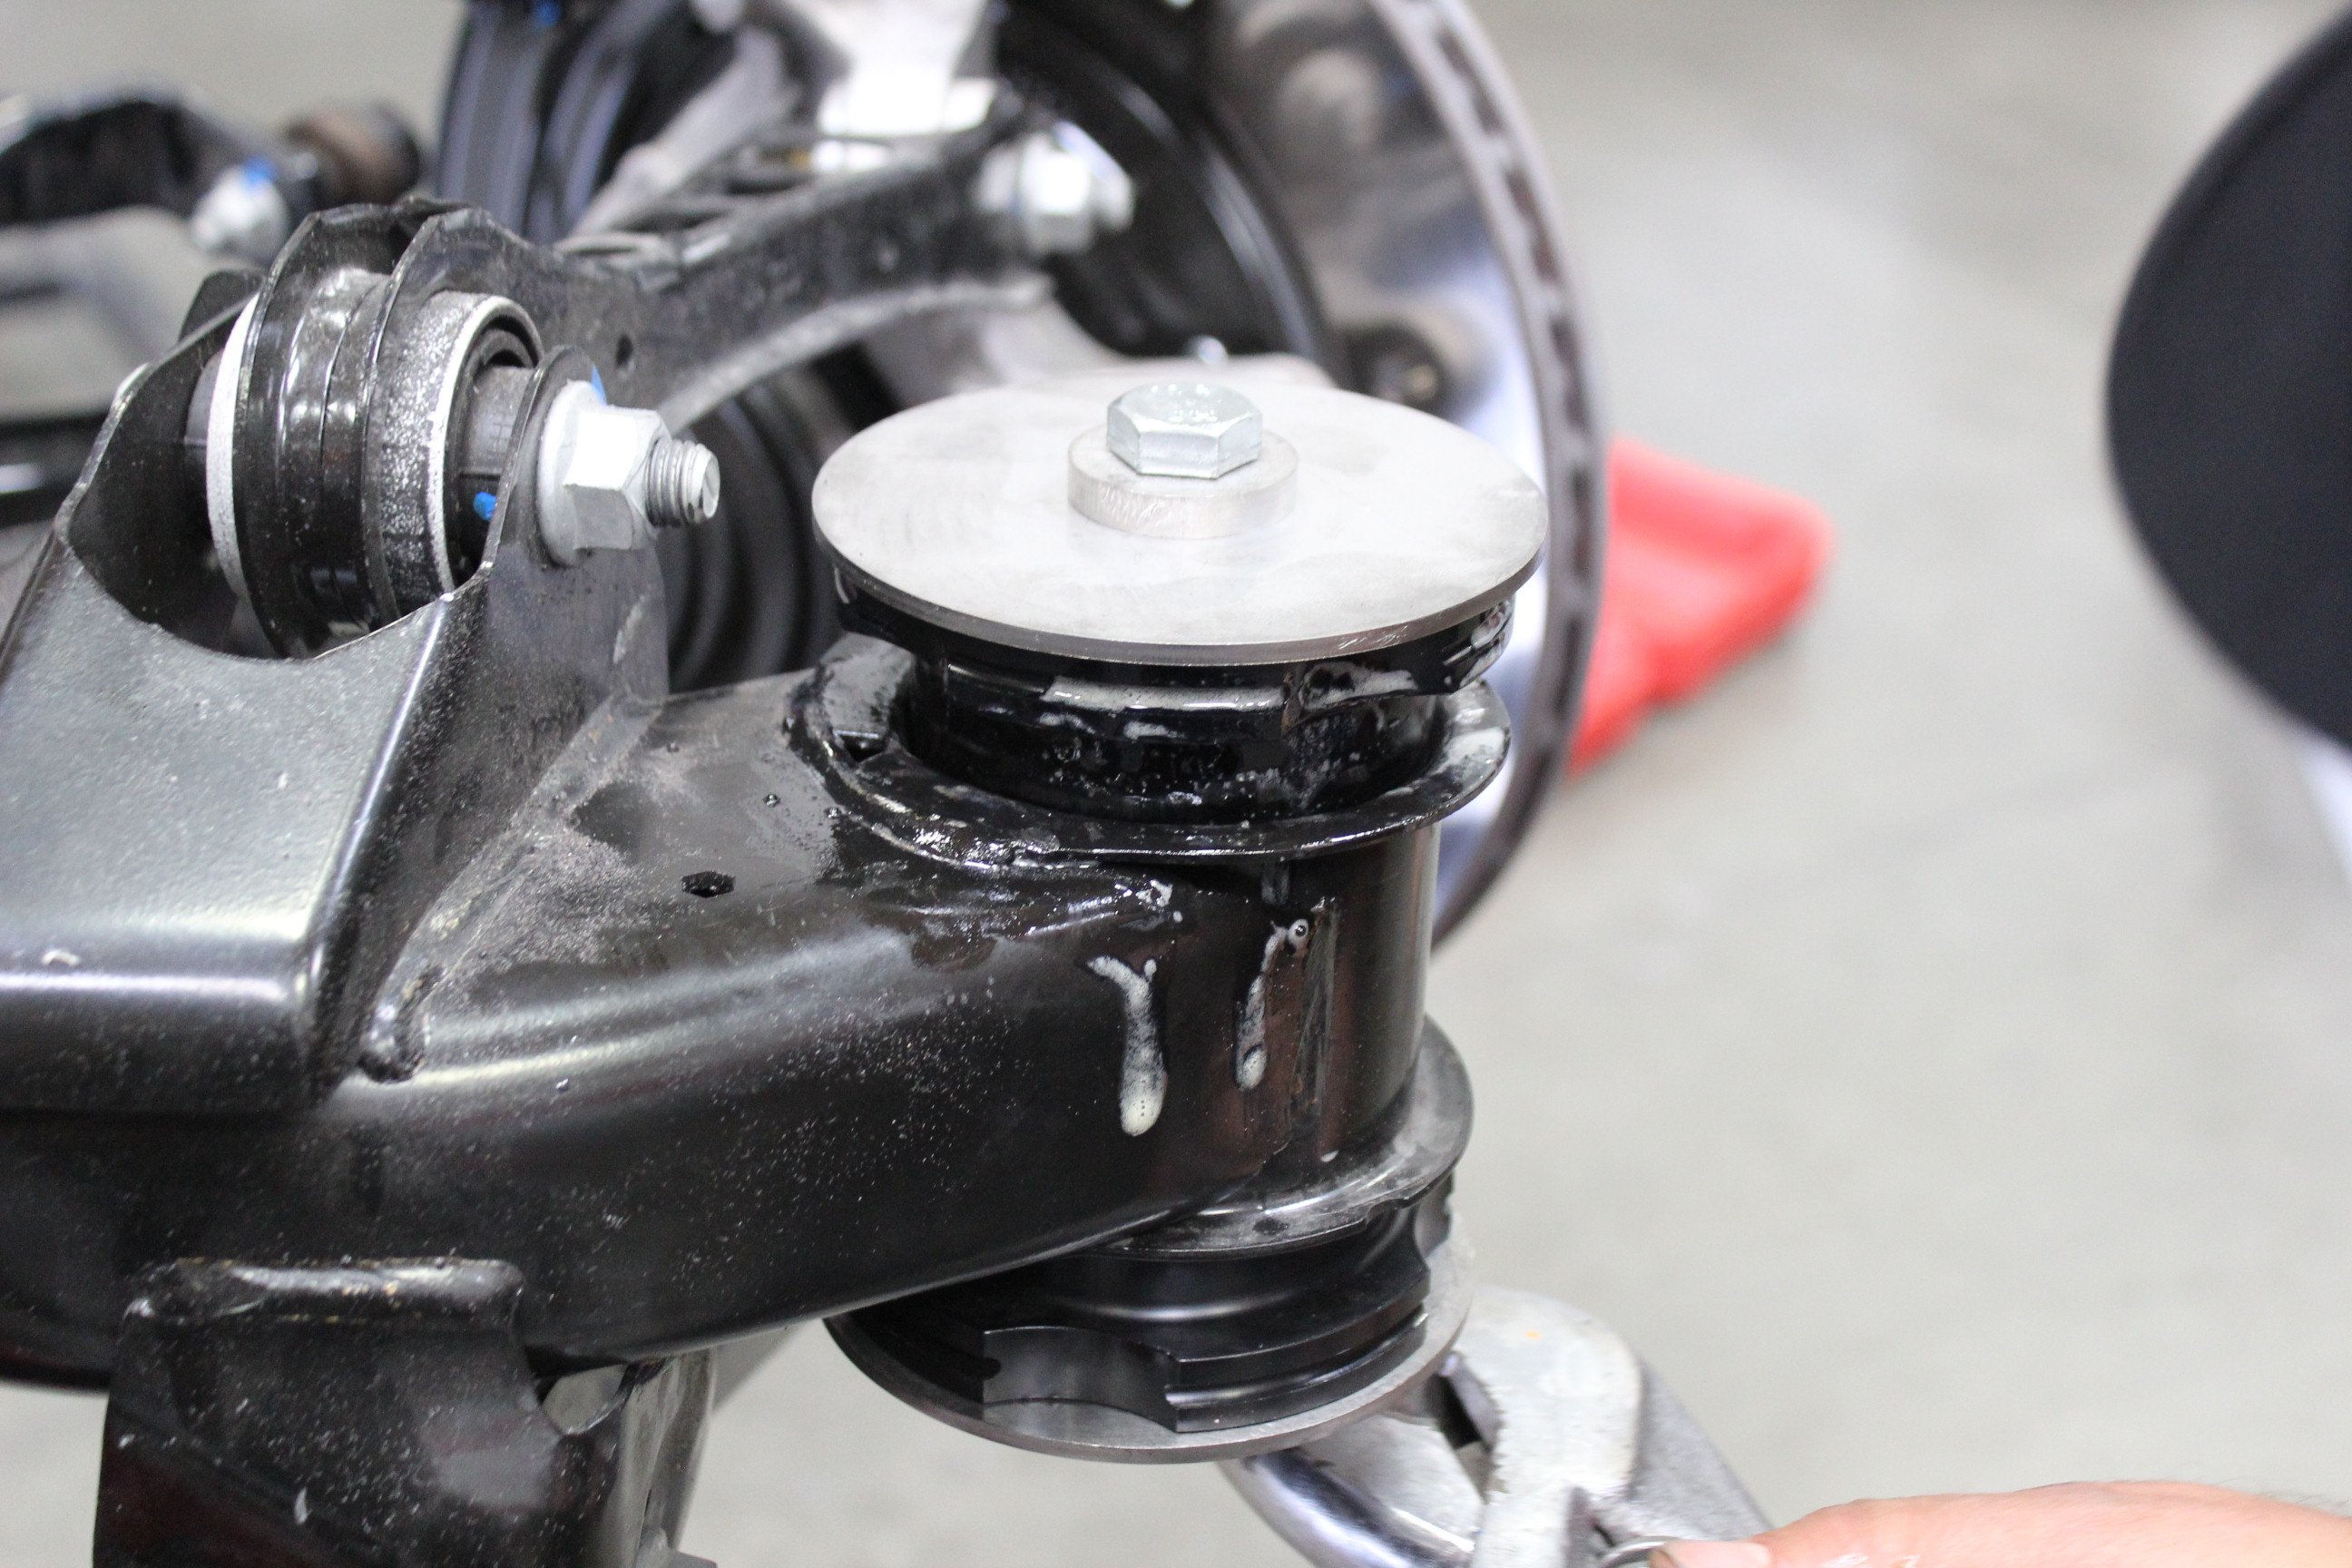
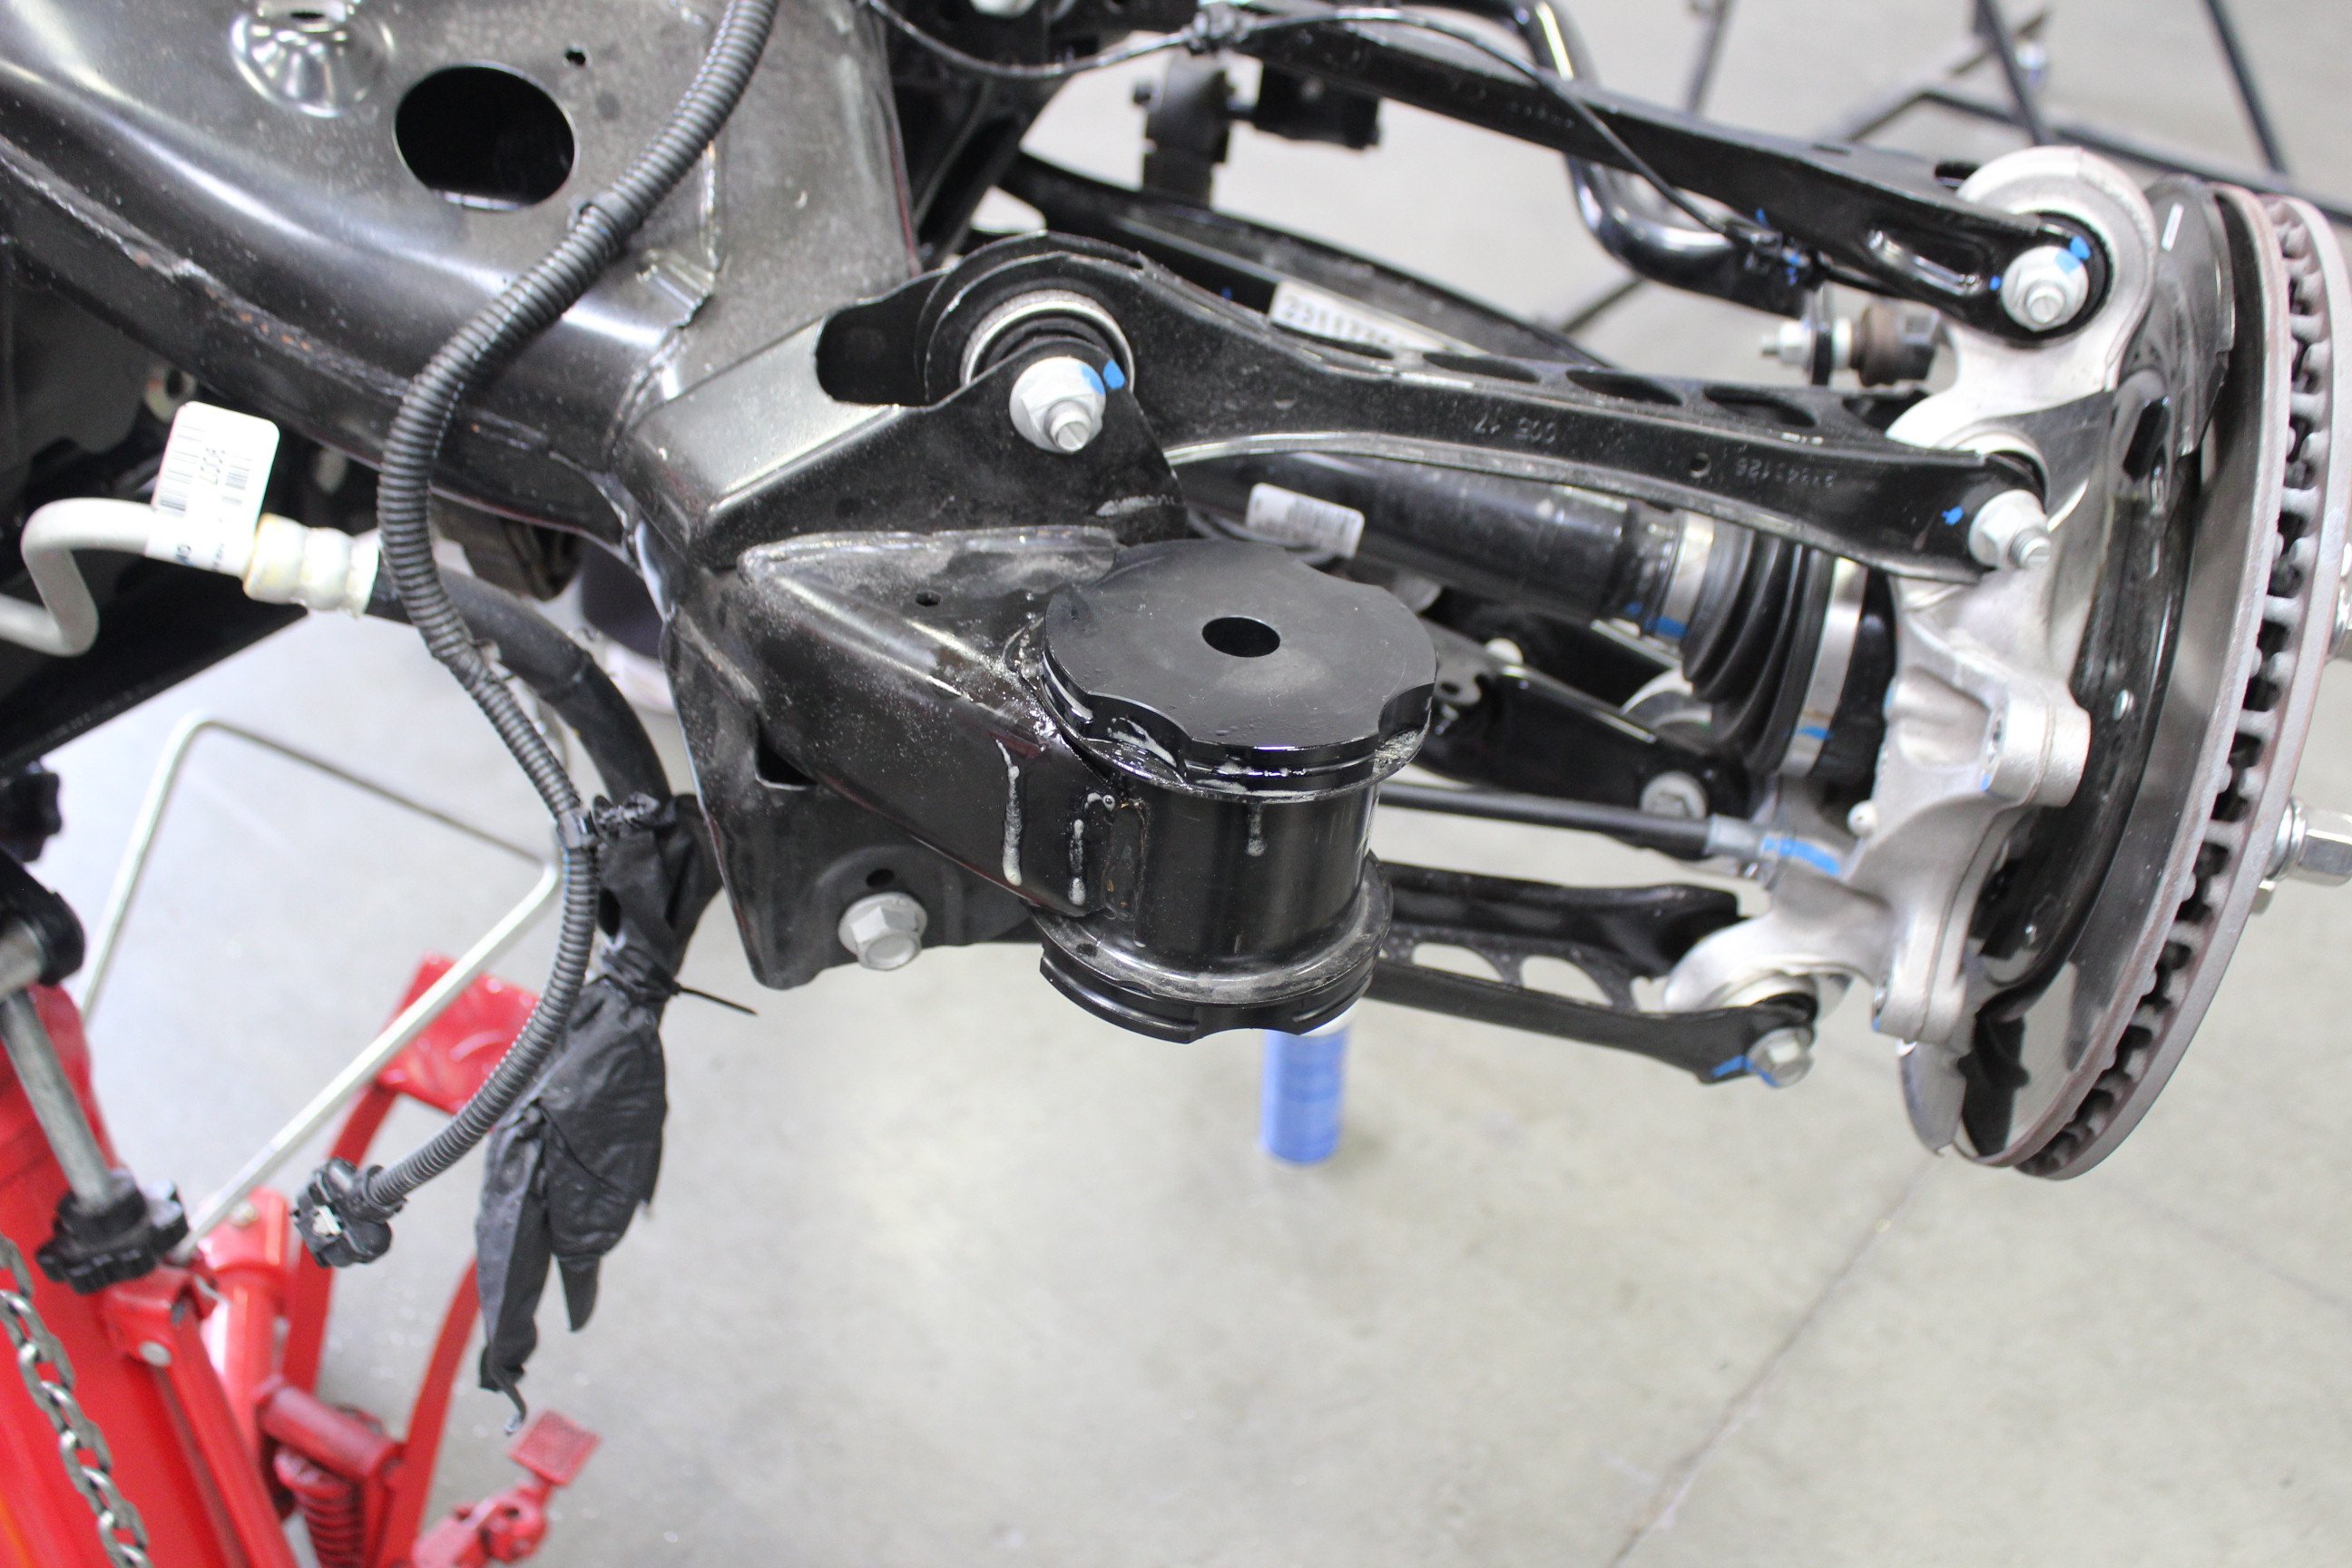
The new Delrin bushings have to be pressed in so we used some of the washers from the cradle, the stock bolt, and a nut we sourced to press them in place. Also, we lubed up the bores to make the process a little more easy on ourselves.
The rear cradle bushings may be the most involved of our modifications as they required cutting and air tools to get them out of the cradle. On the bright side, the entire rear cradle can be lowered without affecting the alignment on the rear suspension and thus doesn’t require re-alignment. Once the old bushings were out, the new Delrin units from BMR dropped right back in and the cradle was reattached to the vehicle.
With the driveshaft reinstalled and all of the important components topped off with Royal Purple fluids, we were ready to hit the rollers with our Camaro.
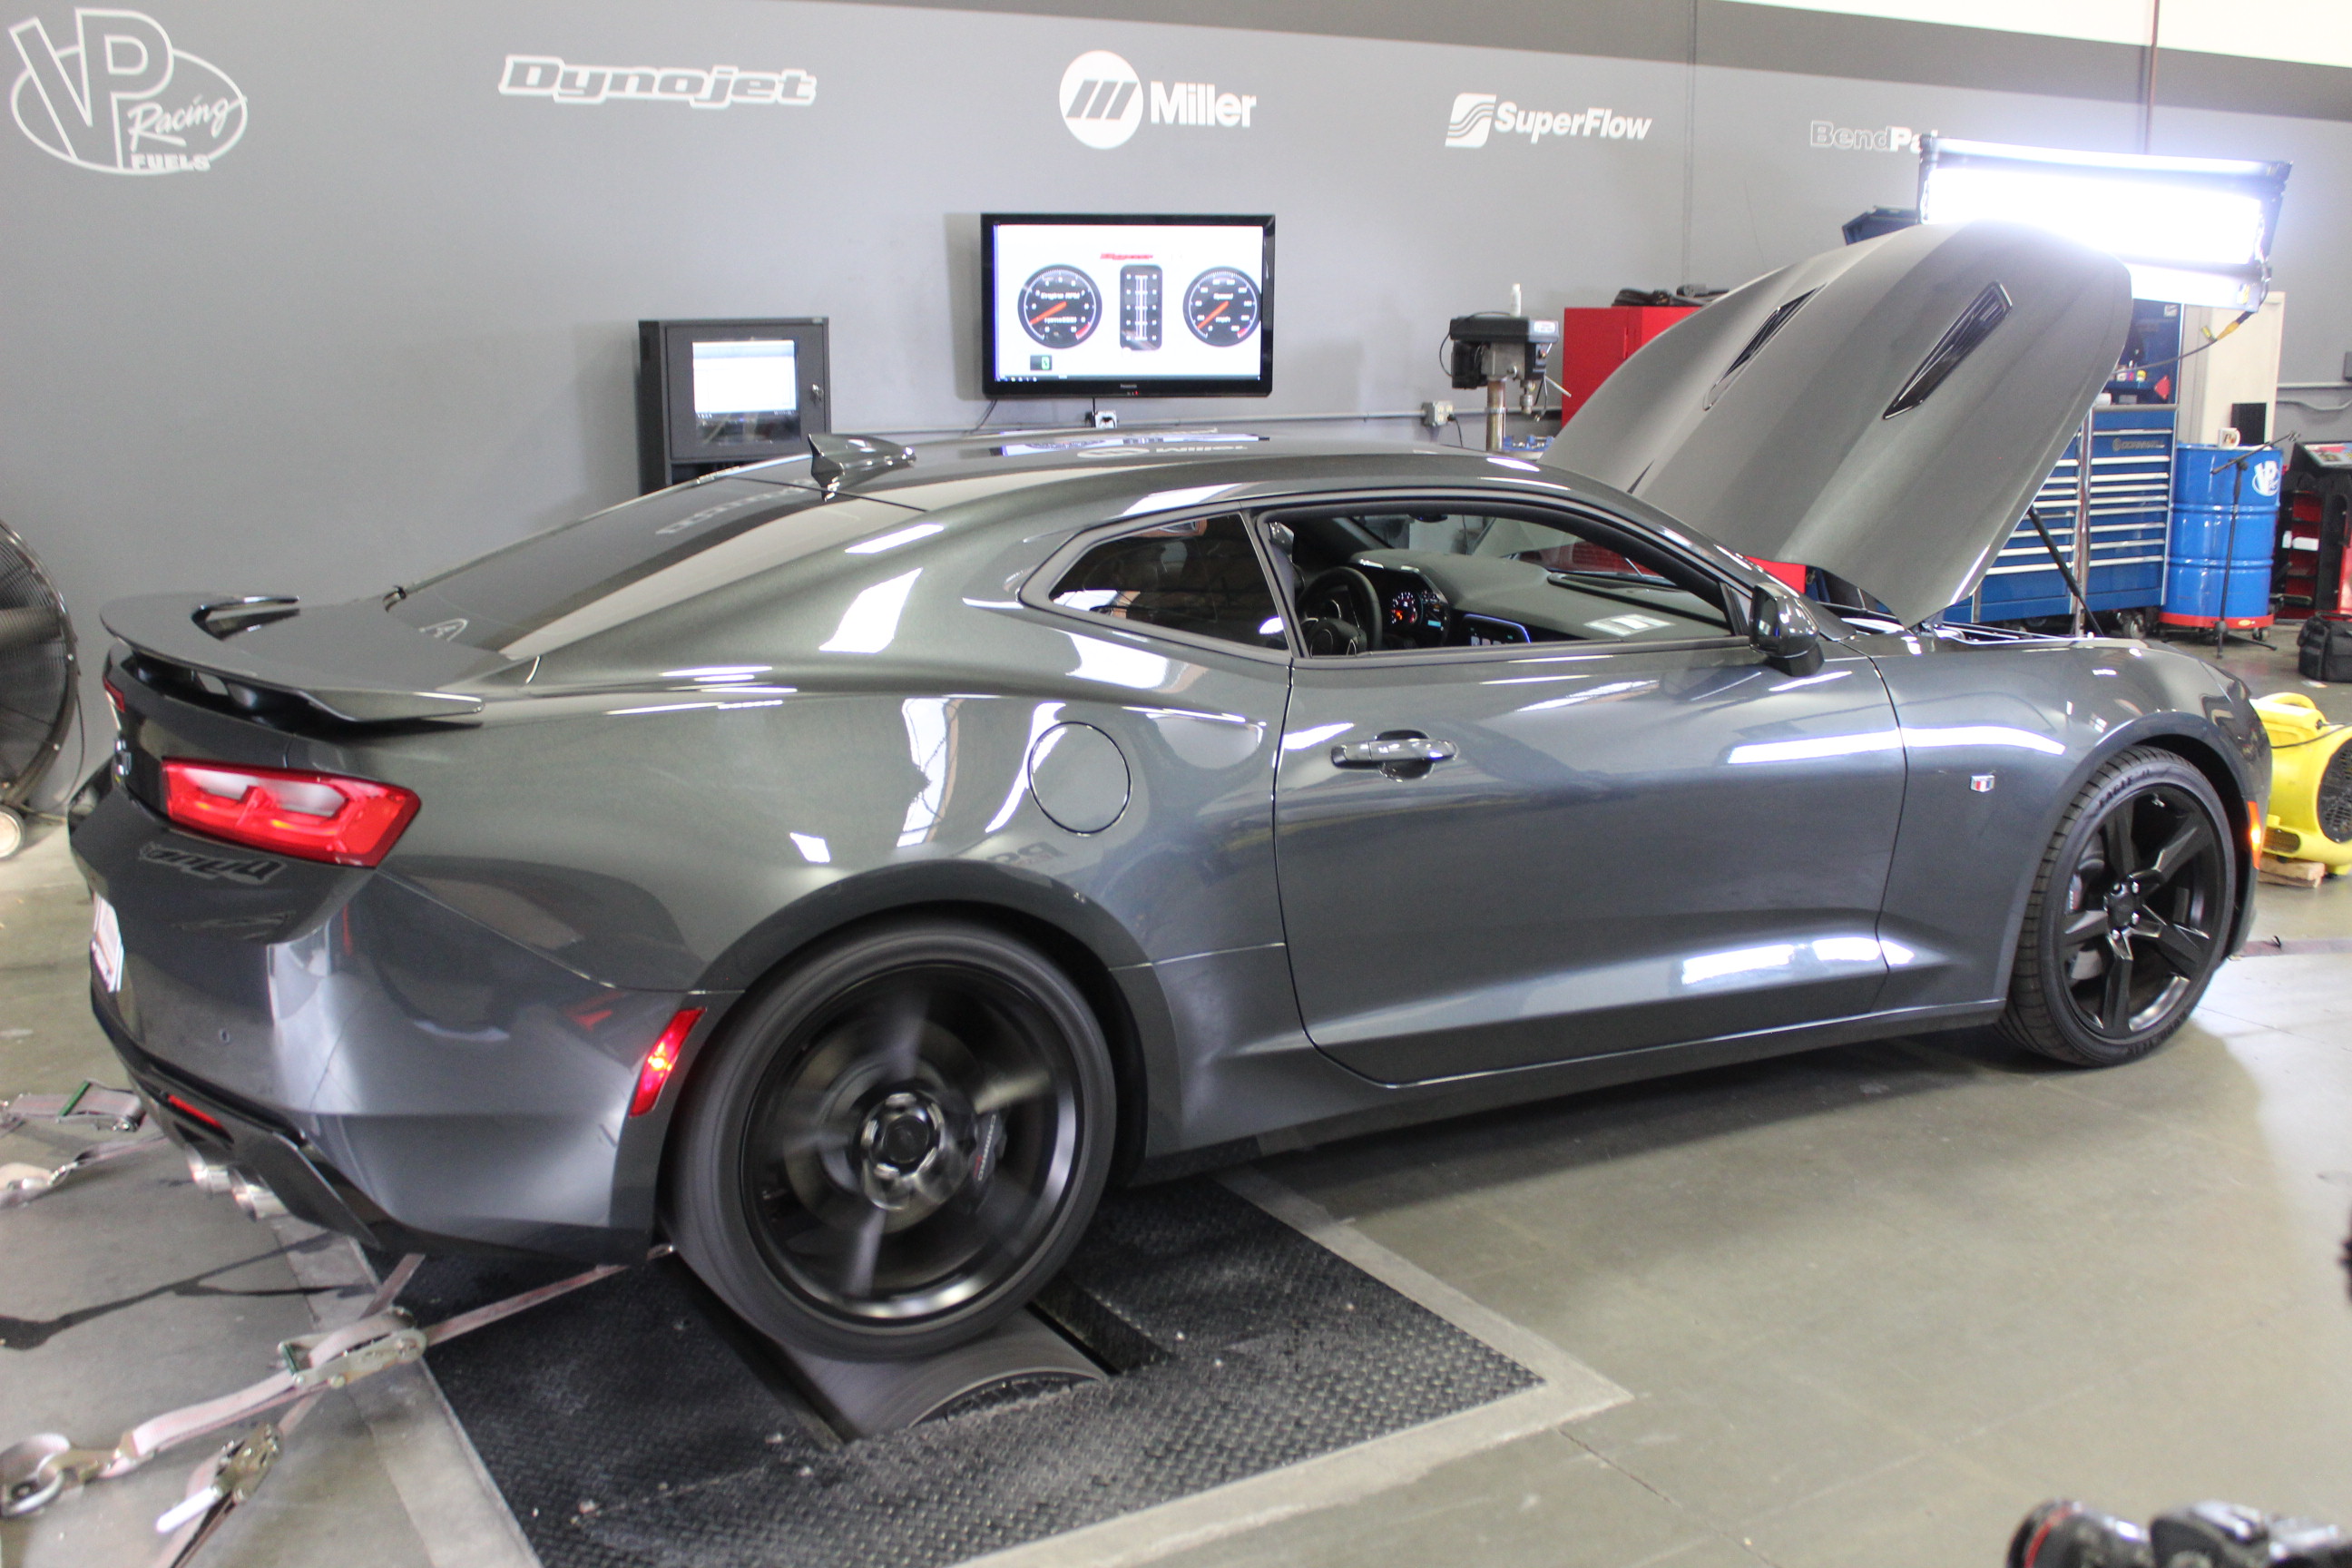
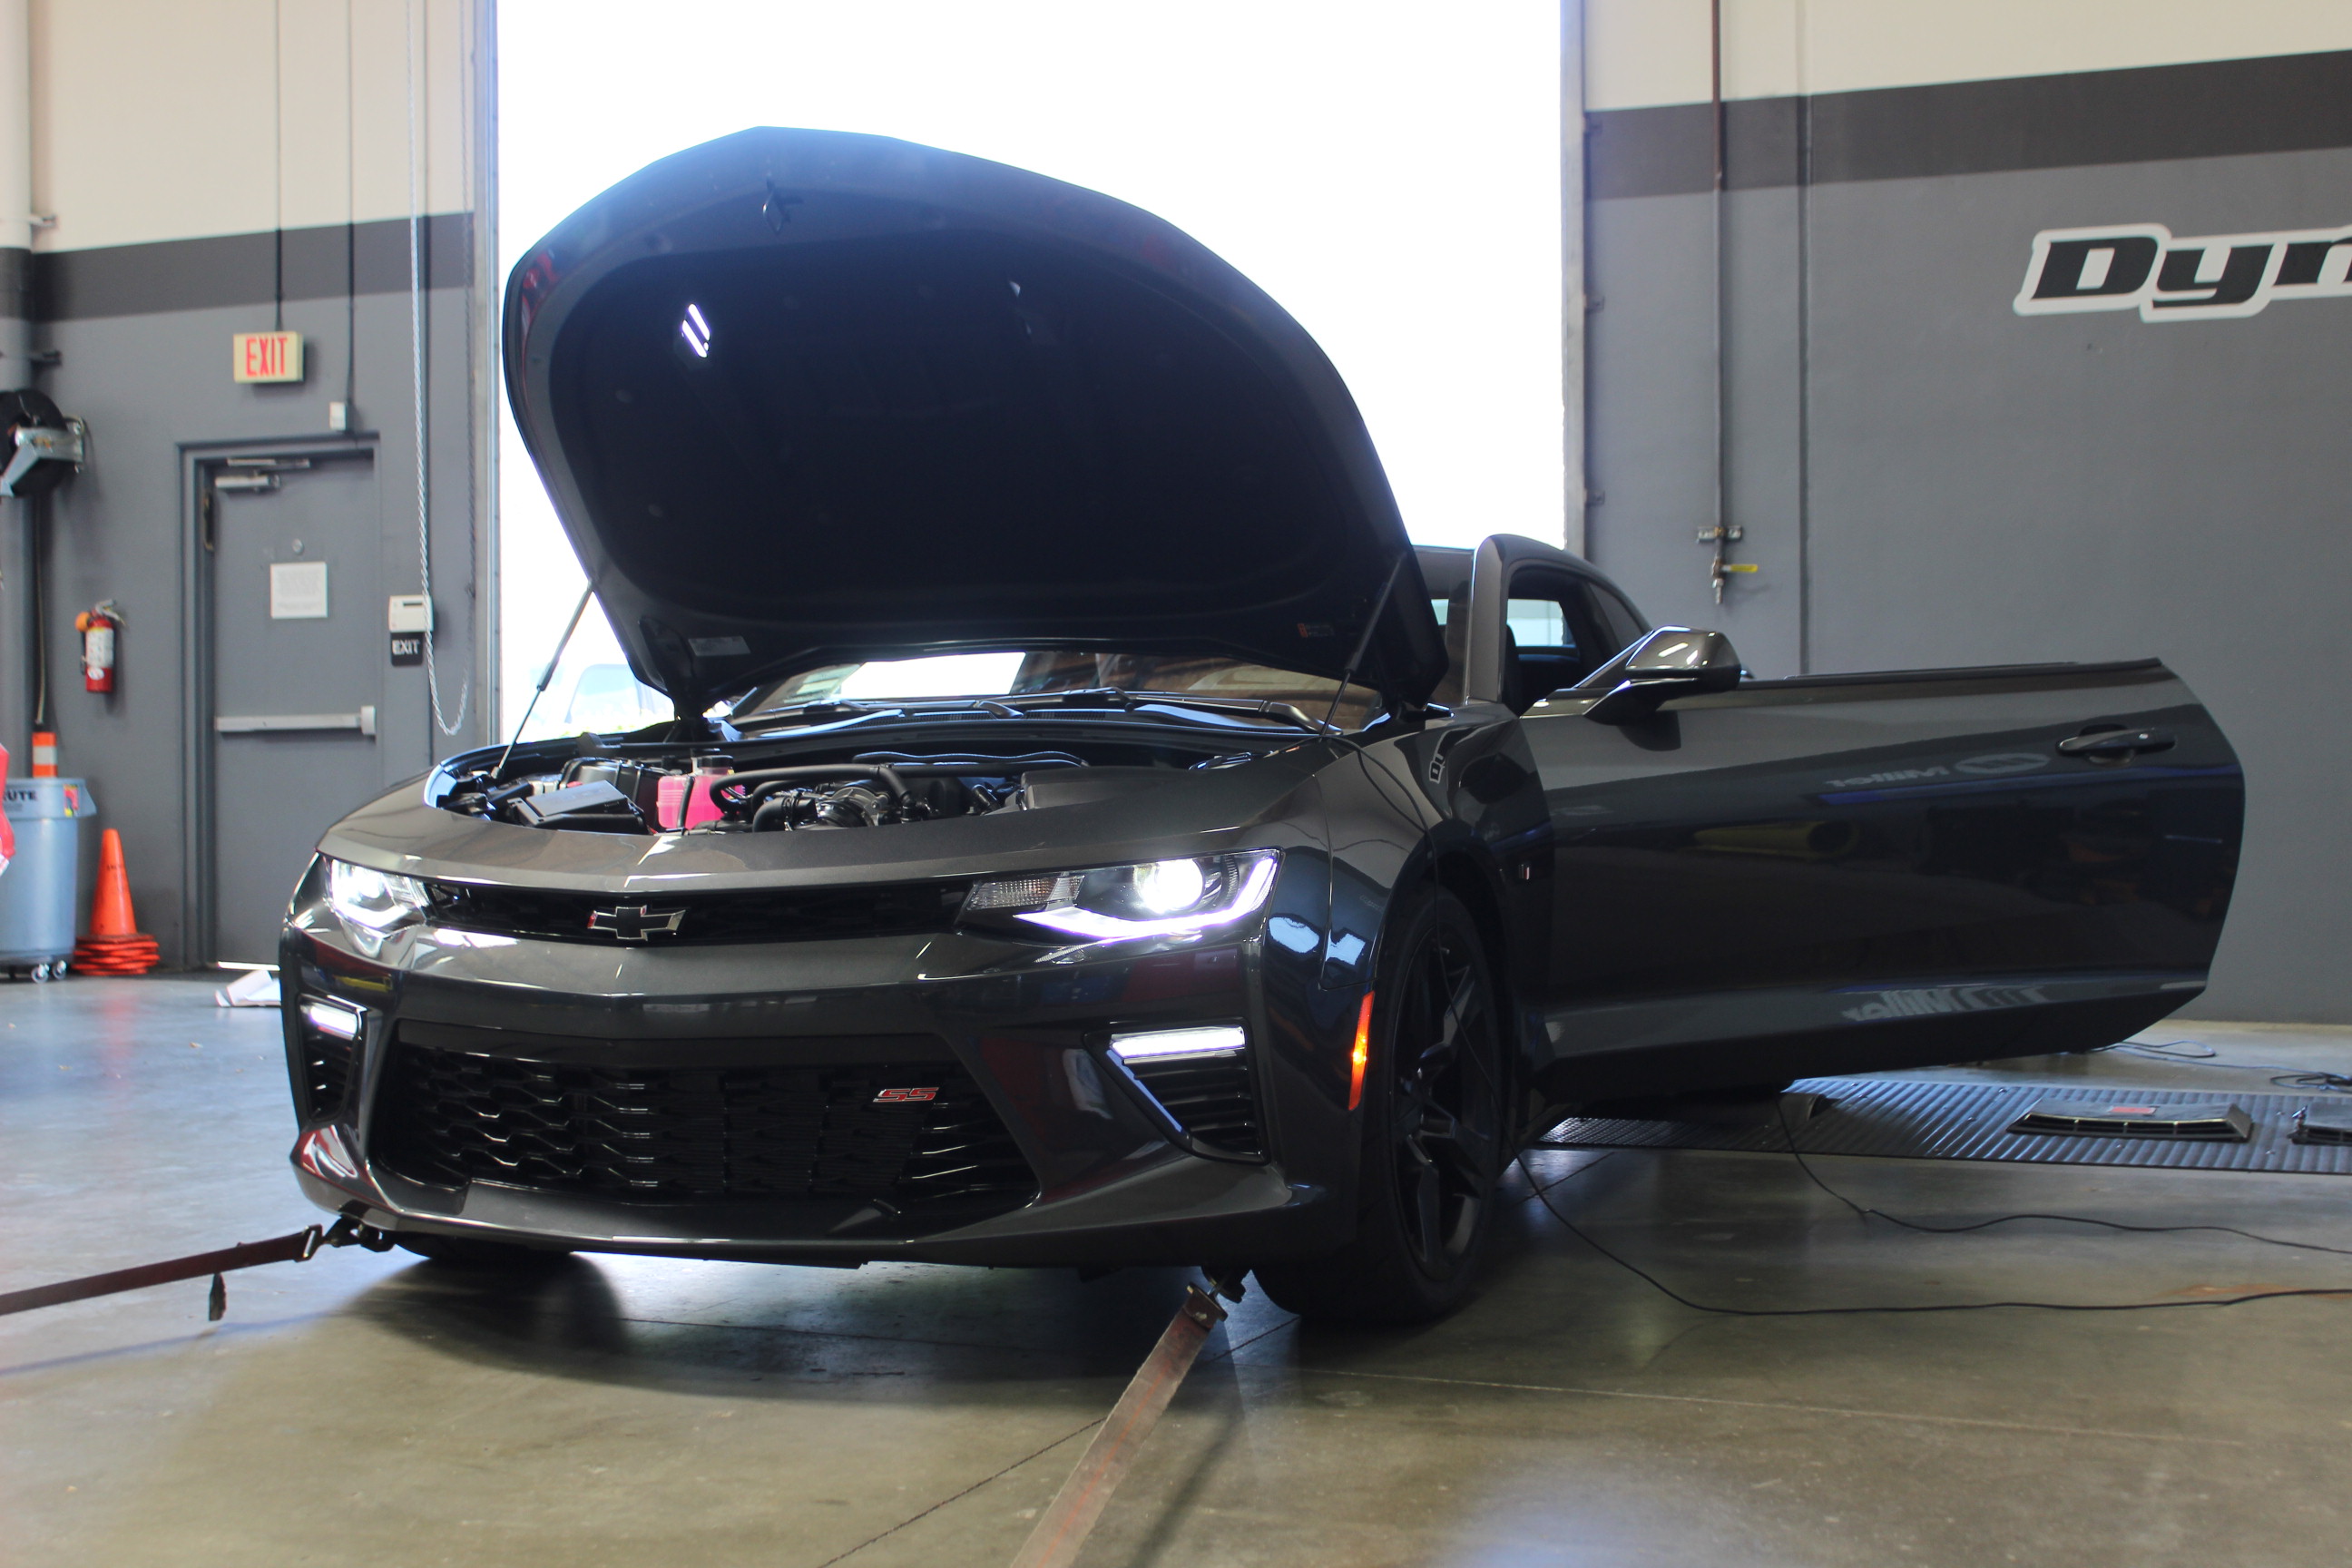
Hitting The Dyno
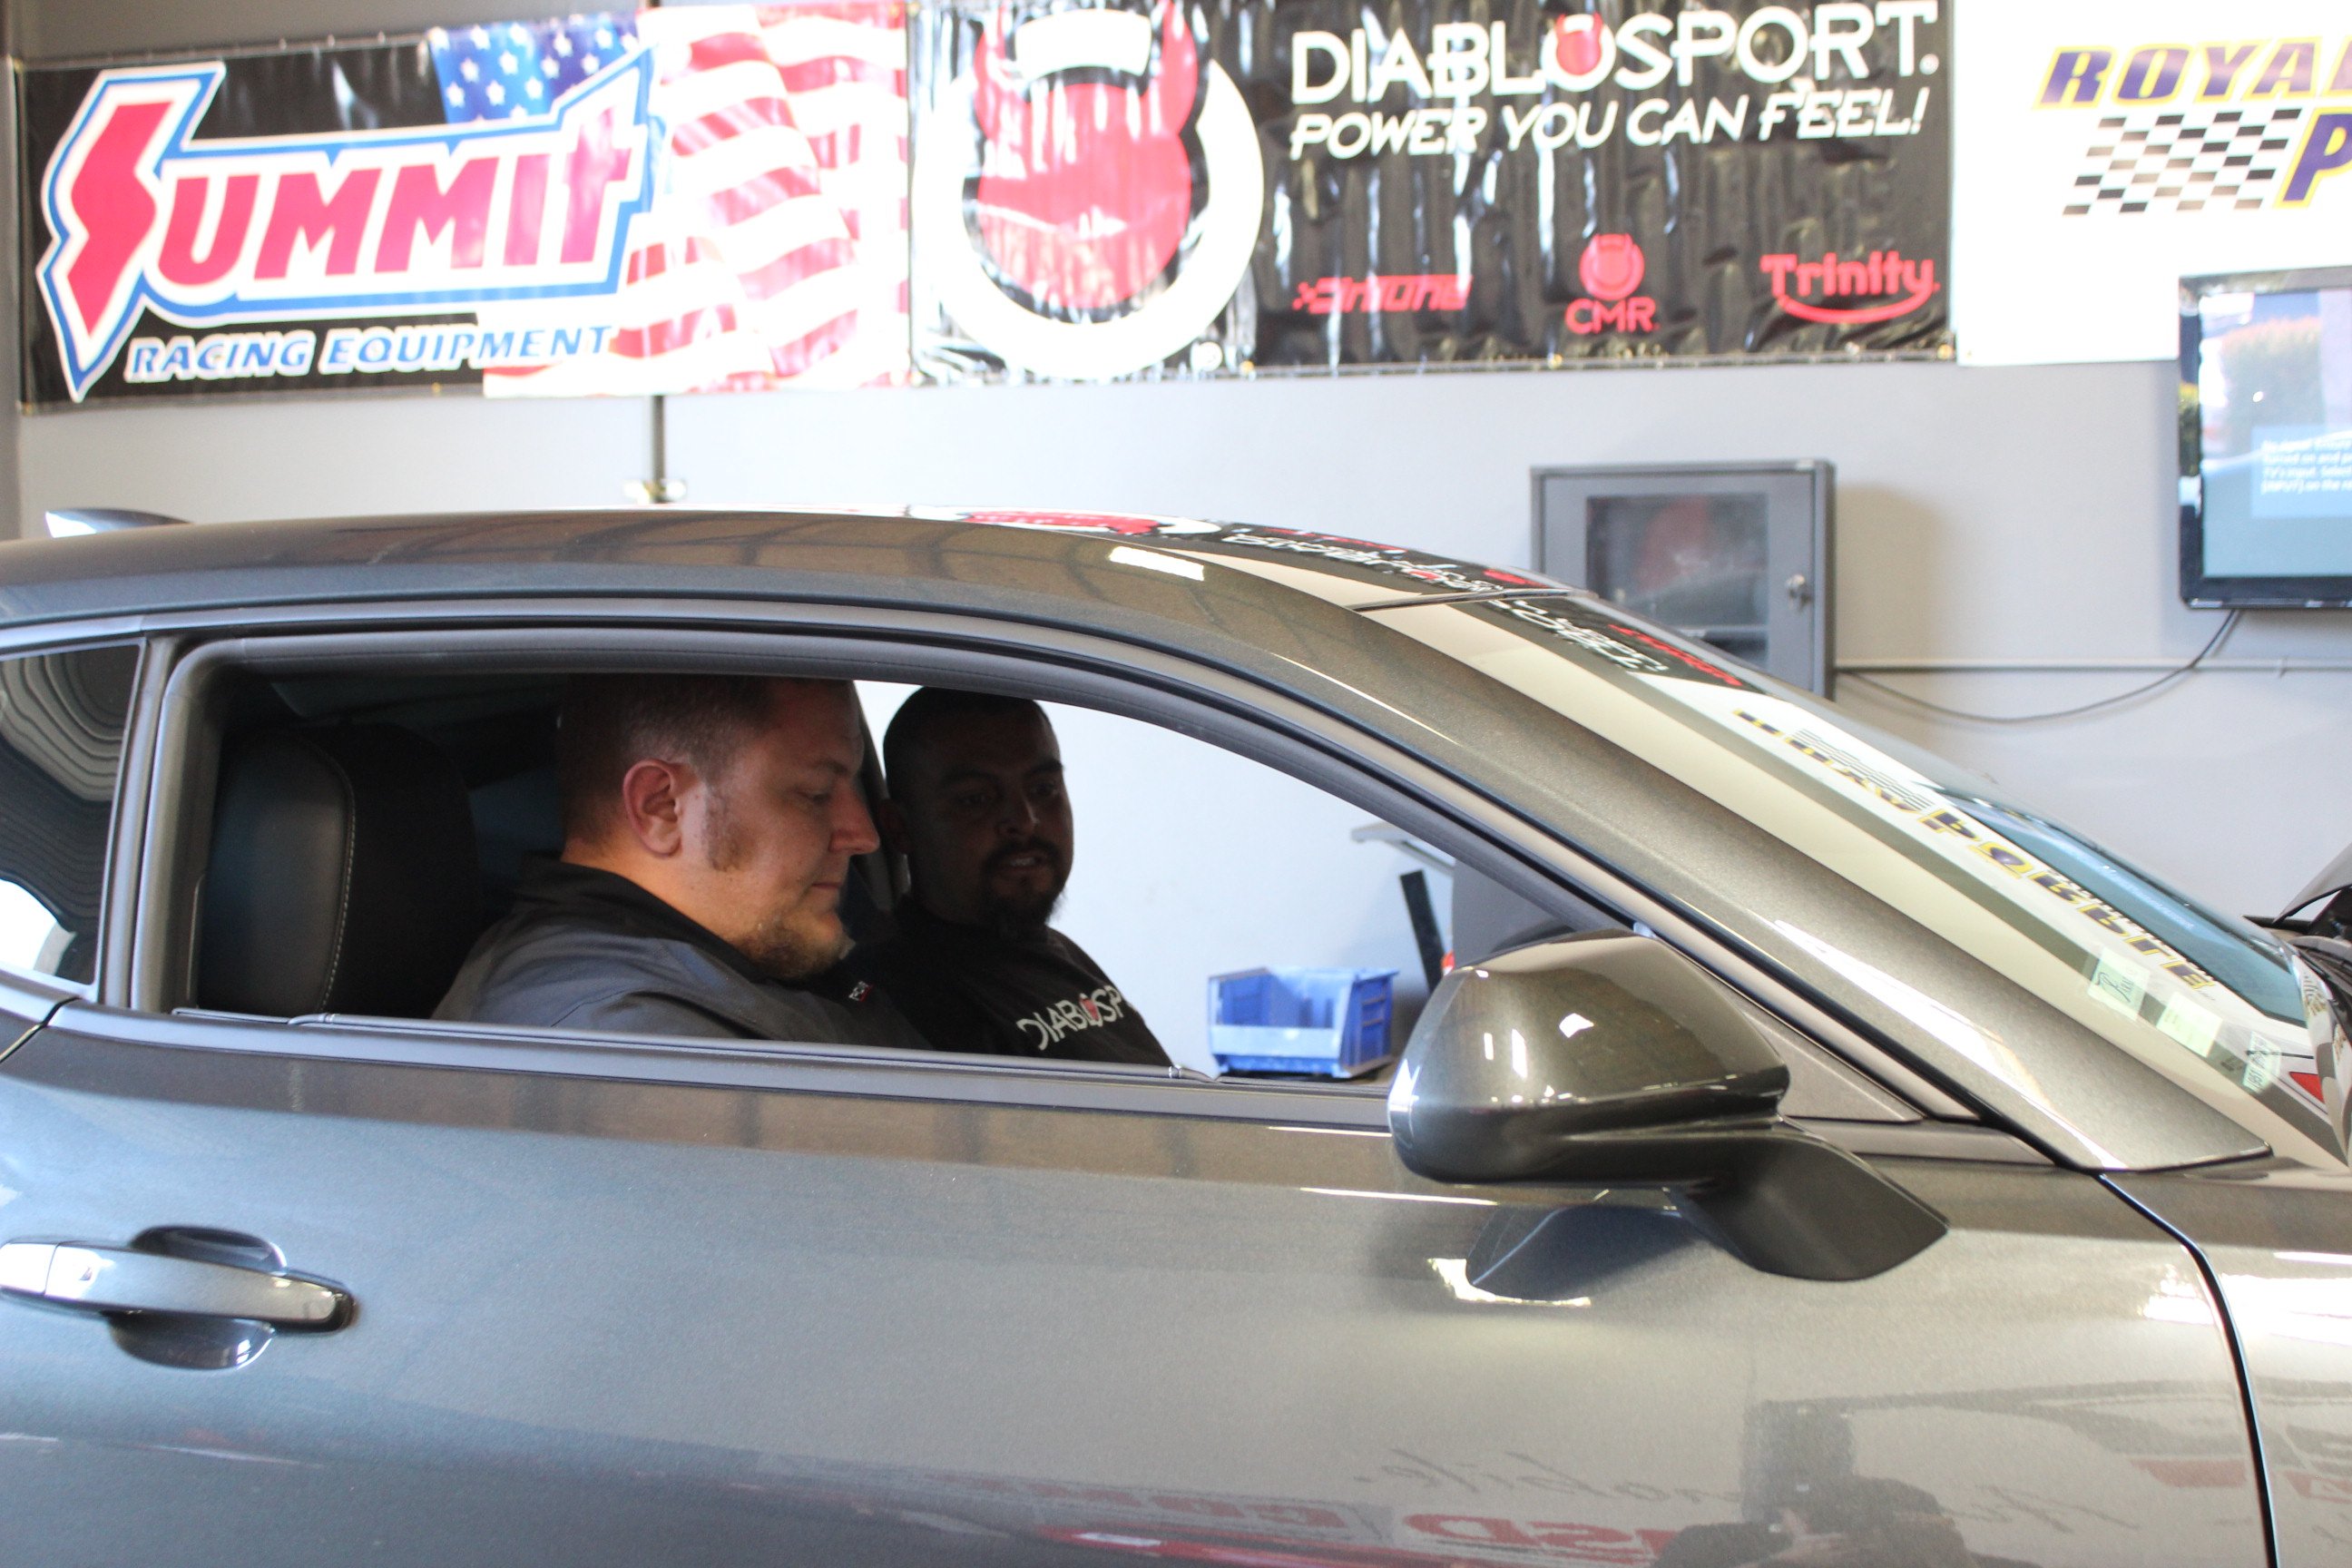
With our Camaro strapped down to our DynoJet, we were joined by Matt Barker of Diablosport to ensure the tuning of the car went well. However, as we mentioned previously, the maestro behind the keyboard was Matt Kesatie who was tuning the car all the way from Florida for us.
Using the i3 as a pass-through to a laptop, and using the Diablosport CMR software, both Matts worked together to get the base tune into the car and start making initial pulls. After some fiddling with the car’s torque-based management system, we were ready to make our first pull. Keep in mind that the car is running on Californian 91 octane.
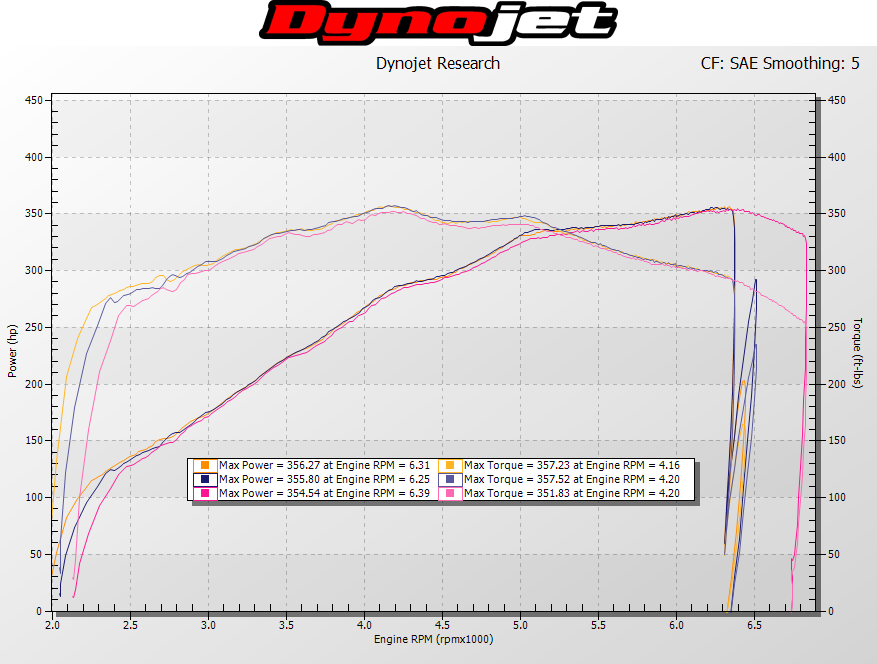
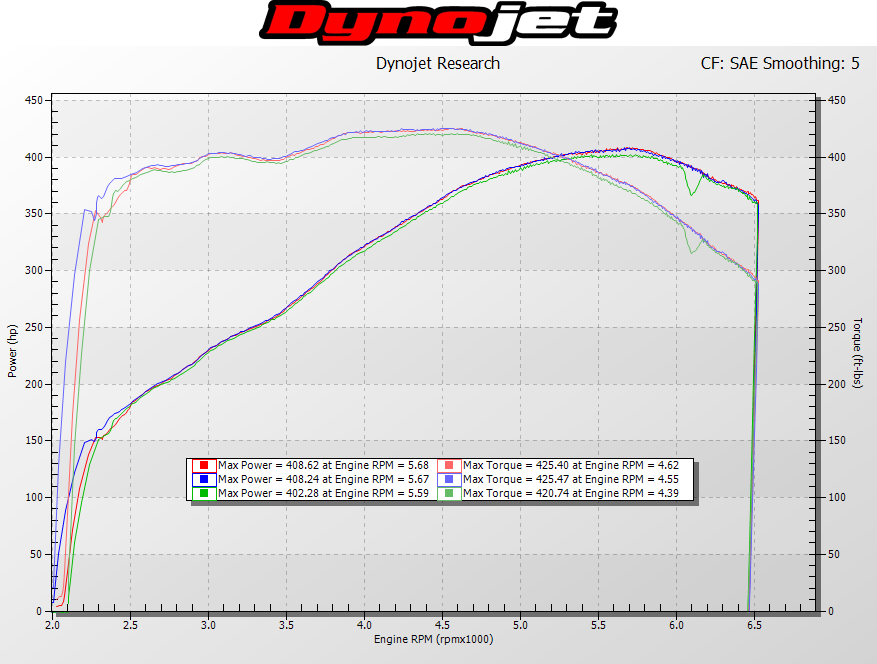
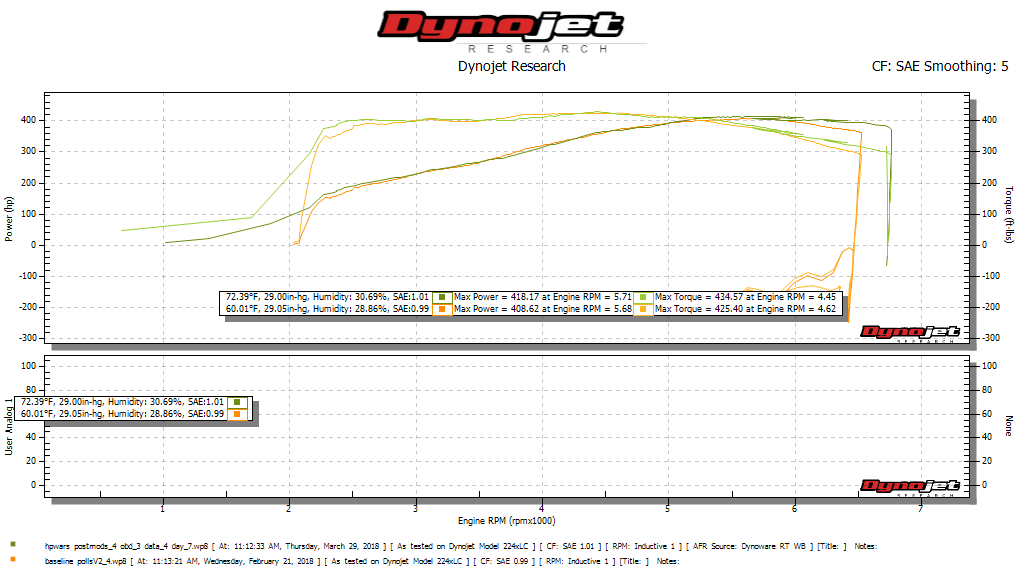
After Kesatie reviewed the data, he made a few final tweaks and informed us that he was ready to make a power pull with the car. With the air/fuel ratio dialed into a conservative 12:1, we were rewarded with a final power output of 418.17 horsepower and 434.57 lb-ft of torque, roughly a 10 horsepower and 10 lb-ft of torque gain.
The real story here came after the peak though. While we may have only gained 10 horsepower and 10 lb-ft of torque at peak, out at 6,800 rpm, where we will be shifting the car, the LT1 was up roughly 35 horsepower at the rear wheels, a considerable gain. Since the car will spend more of its time in this area, it’s hard to discount the improvement. On top of that, with the looser torque converter factored in, it’s hard to draw direct parallels to the power improvement, though we were satisfied with what we saw.


And regardless of what we gained, the Camaro still bested the Mustang by roughly 15 rear-wheel horsepower and a considerable amount of torque. The Mustang managed a best of 402 horsepower but torque actually fell to 348 lb-ft of torque. While the Mustang may have gained almost 50 horsepower, it lost 4 lb-ft of torque. Essential, the Camaro still has 15 rear-wheel horsepower and almost 100 lb-ft of torque on the Mustang, and they essentially weigh the same. You do the math.
At the end of the day, we were happy with our modifications and think they will contribute to considerably faster times for the Camaro at the drag strip. We think the car will go deep into the 11s with its current modifications. The only real question here is can the Mustang keep pace? You’ll have to follow along with the next episode of Horsepower Wars: Pony Wars as we find out.
2017 Camaro SS Phase 1 Mods
• ATI torque converter (PN 708350; $1,199)
• BMR Suspension Rear Cradle lock-out kit (PN BK063; $359.95)
• DiabloSport InTune i3 Platinum handheld tuner (PN 8245; $379.9)
• E3 Ignition spark plugs (PN E3.74; $0.00)
• EPIC brake pads (PN EC3F / EC3R; $0.00)
• Holley Performance Products Intech cold air intake (PN 223-01; $349.95)
• Mickey Thompson ET Street S/S drag radials P275/40R20 (PN 3401; $0.00)
• MSD Performance Atomic Airforce Intake Manifold LT1 (PN 2700; $1,179.95)
• Royal Purple 5W30 engine oil and extended life oil filter (PN 36530 / 10-48; $0.00)
• Texas Speed & Performance 1 7/8-inch stainless steel headers with high-flow cats (PN 25-TSPG6304HCAT-178 ; $849.95)
• Toyo R888R tires (PN 104400 fronts; $0.00 / PN 104150 rears; $0.00)
Total:$4,318.70*
*EPIC brake pads, Royal Purple fluids, Mickey Thompson drag radials, Toyo R888R tires, and E3 ignition components not included.