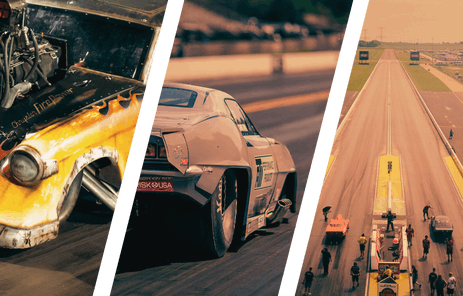
We’re back this week with the third exclusive installment of Brian and Tyler Hard’s 1968 V4 Pro Nitrous Camaro, which is being constructed at none other than hot rod heaven, Tim McAmis Race Cars in Hawk Point, Missouri. The first two installments of the build can be found here and here, and covered the chassis construction, from the 25.1E spec driver’s compartment to the engine fitment and seating position.
 Today we’re moving on to the body and accessory mounting process, which is one of the most tedious and time-consuming portions of the build. Think about it – you’re trying to take a maze of tubing that was constructed on a table and fit a body that was constructed in a different area of the building and bring the two together to end up with a semi-finished product that can be moved to the finishing stages of the build. This segment of the build is picture-heavy due to the detail needed to complete each step, so start the scroll wheel up and enjoy the ride!
The team spent many hours fabricating the chassis and ensuring that the placement of each accessory tab was in the correct place for mounting. Now that the chassis and accessories tabs are complete it’s time to mount the carbon fiber body. This body is extremely light, weighing in at 53 pounds complete, so there are several precautions that need to be taken into consideration.
One of the things the TMRC team is very particular about is the concept of not drilling any holes in the body for securing the mounting plates. Having a “completely finished” racecar that appears as if it were built in a factory, with close panel gaps and an overall completed look is one of the hallmarks of a TMRC build.
To that end, every step of the construction process has been scienced out through years of development, resulting in one of the cleanest race car profiles you’ll see anywhere. In a build like this, every little bit counts, and having a clean profile to cut through the airflow on the track only helps performance.
As you can see from all of the above work, the body mounting process is tedious and time-consuming. A measurement that’s off by as little as 1/16th or 1/32nd of an inch can make all the difference between doors that line up nicely and close with a small push, to doors that need to be stressed out of square and tugged on to close them. The fabricators that populate the TMRC facility have proven their worth in spades – if you’ve ever seen a McAmis car up close, you know what we’re talking about. And if you haven’t, keep an eye out for one next time you’re at the track. And when you do get to see one, inspect it. The craftsmanship will astound you.
You’ve probably noticed throughout the articles we’ve posted on this car so far that nearly every part and piece that’s installed on this machine save for the engine and transmission is made in-house at TMRC or one of their affiliated companies. The builders have the opportunity to not only walk over to a shelf and pick off the correct part for use in a build, but create it from scratch when it doesn’t exist. There is a large quality control advantage to that, not to mention the advantages in fitment and finish – they don’t need to call someone else off-site and have a part made to their specifications, they can do it right there on the property.
Each segment of this build has been done to the Hard family’s specifications, which were to create a lightweight, to-the-letter-of-the-rule car that will be competitive in the ADRL Pro Nitrous category along with NHRA Pro Mod and the Northeast Outlaw Pro Mod Association (NEOPMA). Every ounce placed in the right position throughout a chassis is absolutely 100% critical to the race car’s ultimate performance on the track.

The next step in the process, in the below photos, shows the titanium front end mount tree installed. The same ‘no holes’ procedure that is used on the main body is implemented here. There’s no extra material – each piece is constructed to serve a purpose, and nothing more.
Having a one-piece front end built in this fashion makes it easier to install upon the car in that frantic pit thrash to get ready for the next round – you don’t have crewmembers struggling to get the nose attached. It can be done with one guy on each side of the nose.
Now it’s time for one of the most recognizable parts on the car – the hood scoop. In this build, the TMRC team is using one of their most popular hood scoop designs [PN TMC-1276]. It will feed the dual carburetors enough air to run 3.70’s and potentially quicker in the eighth-mile at the class-legal race weight of 2,300 pounds. Prior to this season, the Pro Nitrous class had no minimum weight, and TMRC machines are known to the class competitors as being the lightest on the property. If you can believe it, several TMRC-built cars have to add a significant amount weight to reach the 2,300 pound minimum – no small feat when you factor in how heavy the engine and transmission packages can be.

Sealing up the carburetor to the hood scoop is a necessity with a car like this; since you’re trying to direct all of the high-pressure air flowing over the nose of the car into the carburetors, you don’t want any of it getting past and trying to lift the nose off the car. You’ve got less than four seconds to make all the horsepower you can and get it to the ground, so every little bit is critical.
Words don’t do justice to the photos above. Simply sick engineering and craftsmanship!

The photos below show off some of the custom work that can be done per customer request. Building in a custom pushbar mount isn’t such a big deal, but you typically see these integrated into a parachute mount and made form chromoly, not titanium. The TMRC team also recesses it into the body – so clean!
Just like every other facet of this car, the wing design is critical. Even more carb0n-fiber is employed here, and the fit and finish is exactly what we’ve seen so far – perfect.
It’s a true honor for us to be selected as the media outlet of choice to show off this new machine that hasn’t even hit the track yet. We hope you’ve enjoyed reading the different segments of the build so far. Next time around we’ll be showing off the interior and powder-coating operations, and following that will be final assembly and paint. The final step of our exclusive series will cover a complete car feature on this awesome machine, much like the one we ran for Mike Knowles and his Blown Money machine earlier this year. Stay tuned for more awesomeness from Tim McAmis Race Cars!
You might also like
PRI 2025: FTI's New Weld Together 10R80 Torque Converter For High-Horsepower Applications
FTI has a new 10R80 torque converter for Coyote applications. This weld together torque converter is made for big horsepower.